
In this article, we will cover two ways of showing your reading interests through your GitHub profile: manually adding your DevCard by copying the code and automatically updating DevCard by leveraging GitHub actions.
A while ago, we launched daily.dev DevCards! A fantastic concept where you can show off how many articles you read, your favorite publications, and show off your rank!
And now we have an updated version of them! Keen to generate your own dev card?
However, this article takes your DevCard to the next level by adding it to your GitHub profile!
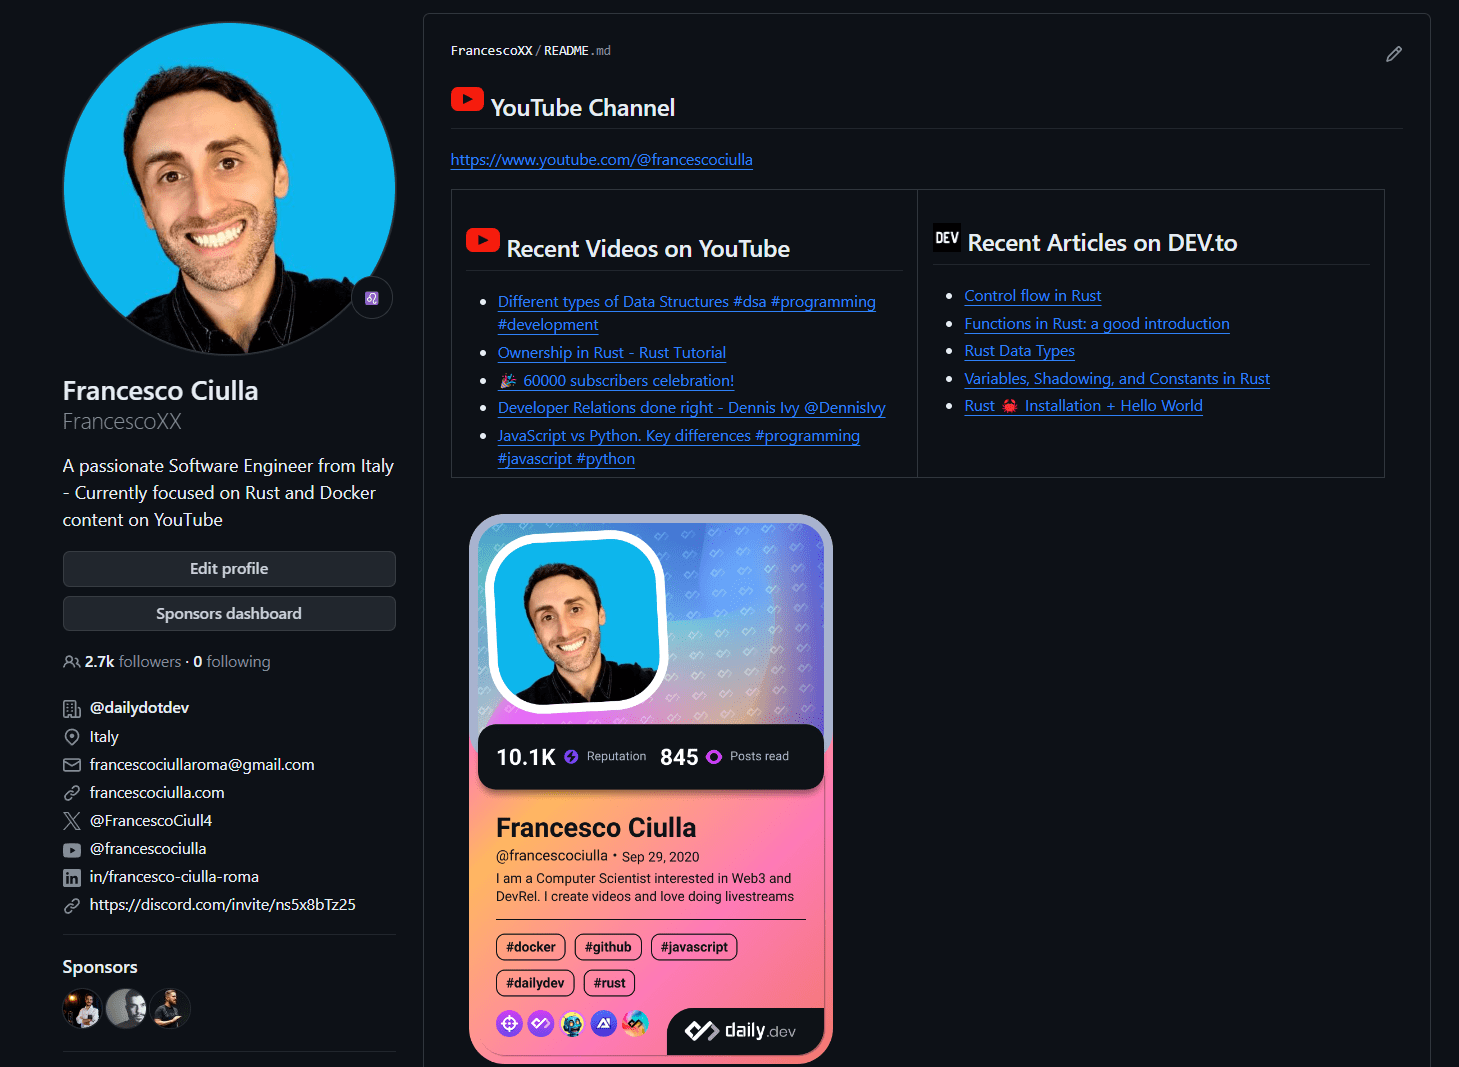
For instance, like Francesco Ciulla:
[
](https://app.daily.dev/devcard)
He added this card to his profile. He created a GitHub action to pull the latest card automatically every day!
Creating a GitHub profile page
Perhaps you are still without a GitHub profile and not sure how you can create one yourself.
The process of creating one is not too hard to follow.
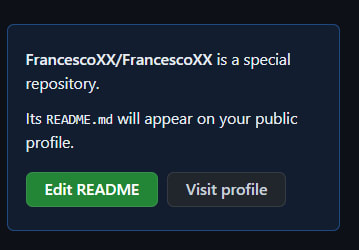
Head over to GitHub and create a new public repository. The name of this repository must be your username.
For example, if your GitHub username is FrancescoXX, the repository name should be FrancescoXX.
[
](https://app.daily.dev/devcard)
You’ll even be prompted that you found the secret hack to creating a GitHub profile.
The profile is limited to a markdown file, but don’t worry, there are many cool things you can do to make it look very stylish!
And one of those things is adding the DevCard.
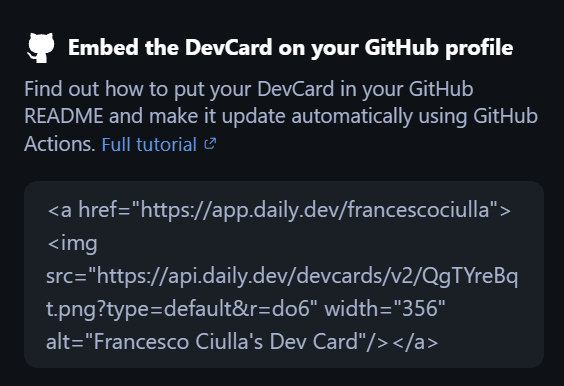
Manually adding the DevCard to your GitHub profile
On the DevCard page, click copy code to copy the code to your clipboard.
[

](https://app.daily.dev/devcard)
Head back over to your GitHub profile README.md file and paste the code anywhere in the README.md file (you can play around and reposition or resize it at your choice).
If you save this file and view your profile, you should now see the DevCard.
It looks something like this:
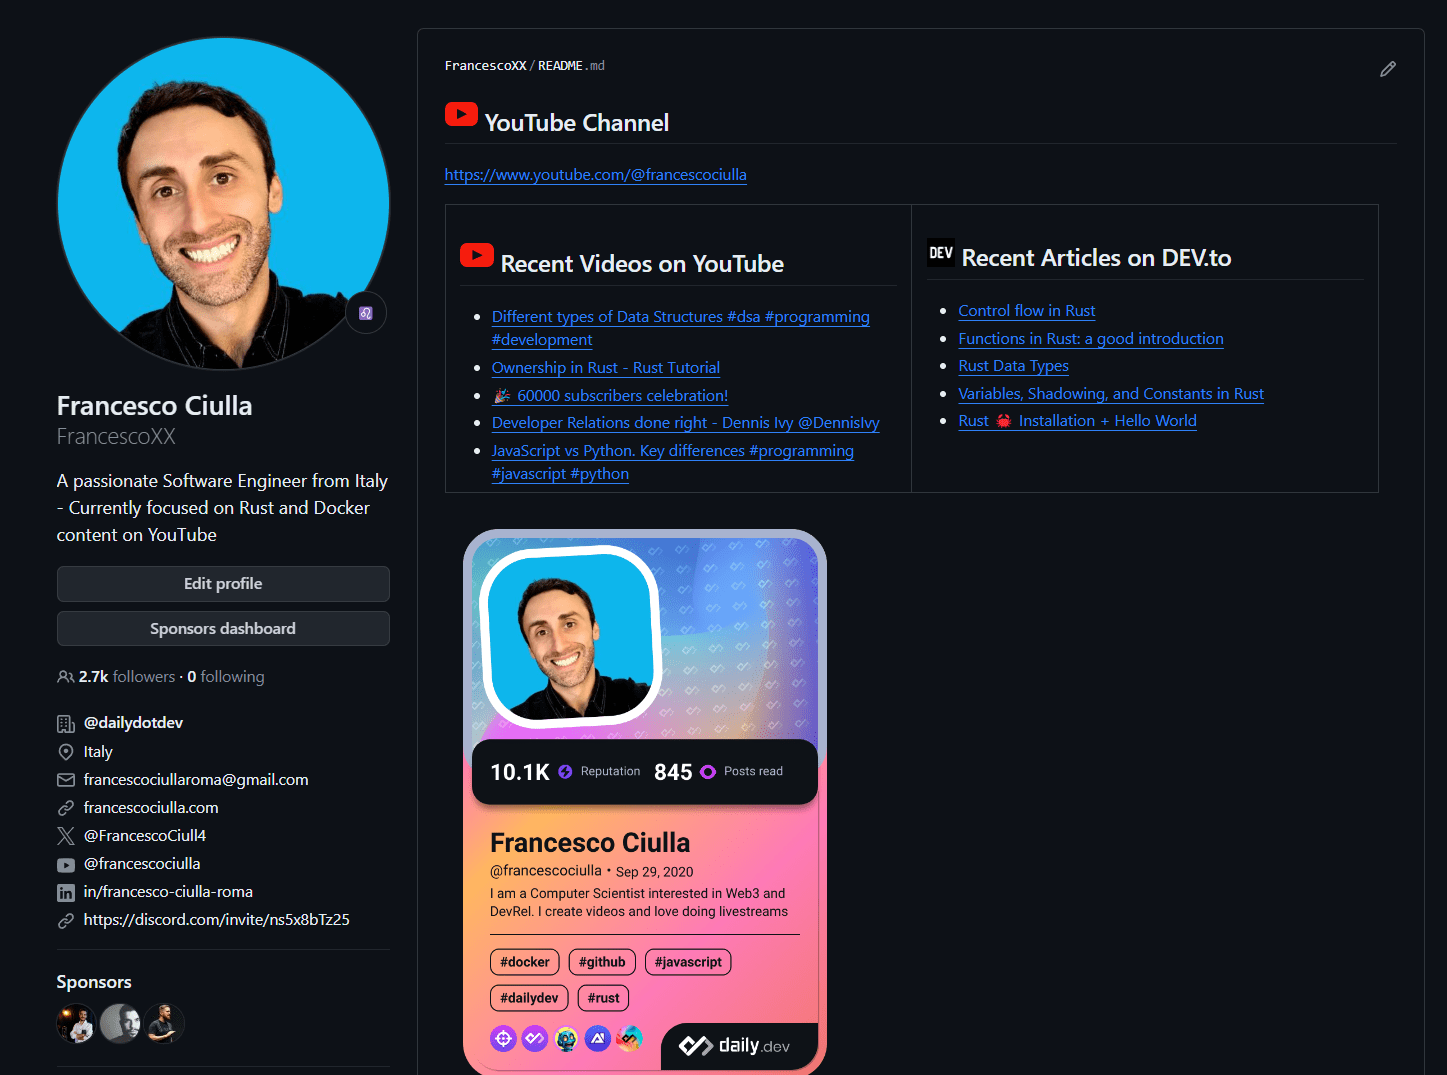
Pretty cool, right. However, there is one downside to this approach.
The DevCard is cached, so it won’t automatically update the content inside it.
However, don’t worry. That’s where the GitHub Action comes in.
Using a GitHub action to update your DevCard automatically
Ole-Martin decided to make this amazing GitHub action for us!
What it does is it will automatically get your own DevCard and download it to your profile repository.
This means we can automatically run this action every x time and get the latest DevCard.
Let’s see how we can use it for our profile.
Click on the Actions button for your profile repository and set up a new workflow yourself.
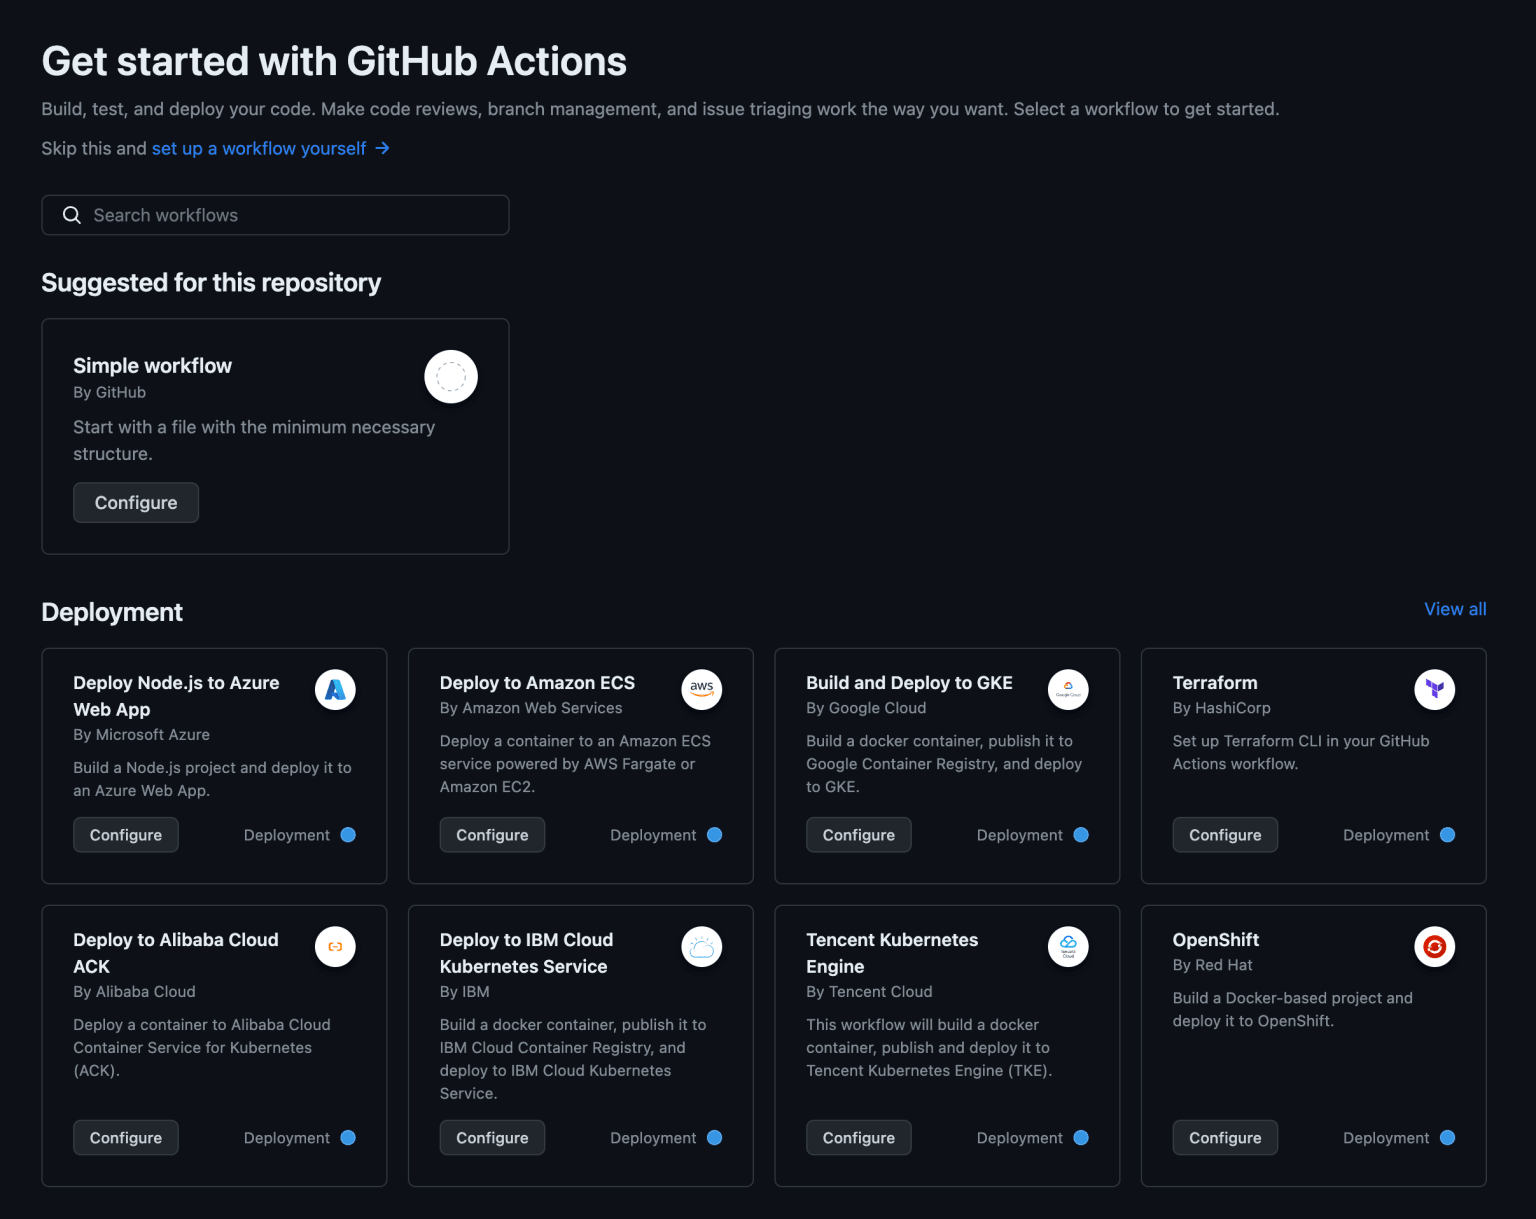
From there, it will create a basic workflow that we’ll start modifying.
Change the name of the workflow to ‘DevCard’.
Then we want to set two ways our action should be triggered, the first being if there is a push on the master branch.
The other one is a schedule, which acts as a cronjob and will return every {x} time. In our case, we will run it every night at 00:00.
The workflow_dispatch tells the action it can manually run from the Actions tab.
Then we want to create a new job that will run the DevCard GitHub action. We need to set one variable for our version, which will be the ID of the DevCard we are fetching.
Making the total file look like this:
name: daily-devcard
on:
  workflow_dispatch:
  push:
    branches:
      - main
  schedule:
    - cron: "0 0 * * *"
jobs:
  devcard:
    runs-on: ubuntu-latest
    permissions:
      contents: write
    steps:
      - name: devcard
        uses: dailydotdev/action-devcard@3.0.0
        with:
          user_id: ${{ secrets.USER_ID }}
          commit_message: "chore: update ${filename}"
The next thing we need to do is set USER_ID as a secret in this GitHub repository.
Head over to the DevCard page and generate your DevCard.
The ID we need is the part before the .png part.
So in the above example, the URL looks like this:
https://api.daily.dev/devcards/v2/QgTYreBqt.png?type=default&r=yfg" width="356" alt="Francesco Ciulla's Dev Card
In this case, the ID is QgTYreBqt. Yours will be of course different, be sure to copy the part before the .png extension.
Now we can head back to GitHub and click the Settings tab.
From there, choose the Secret section and generate a new secret.
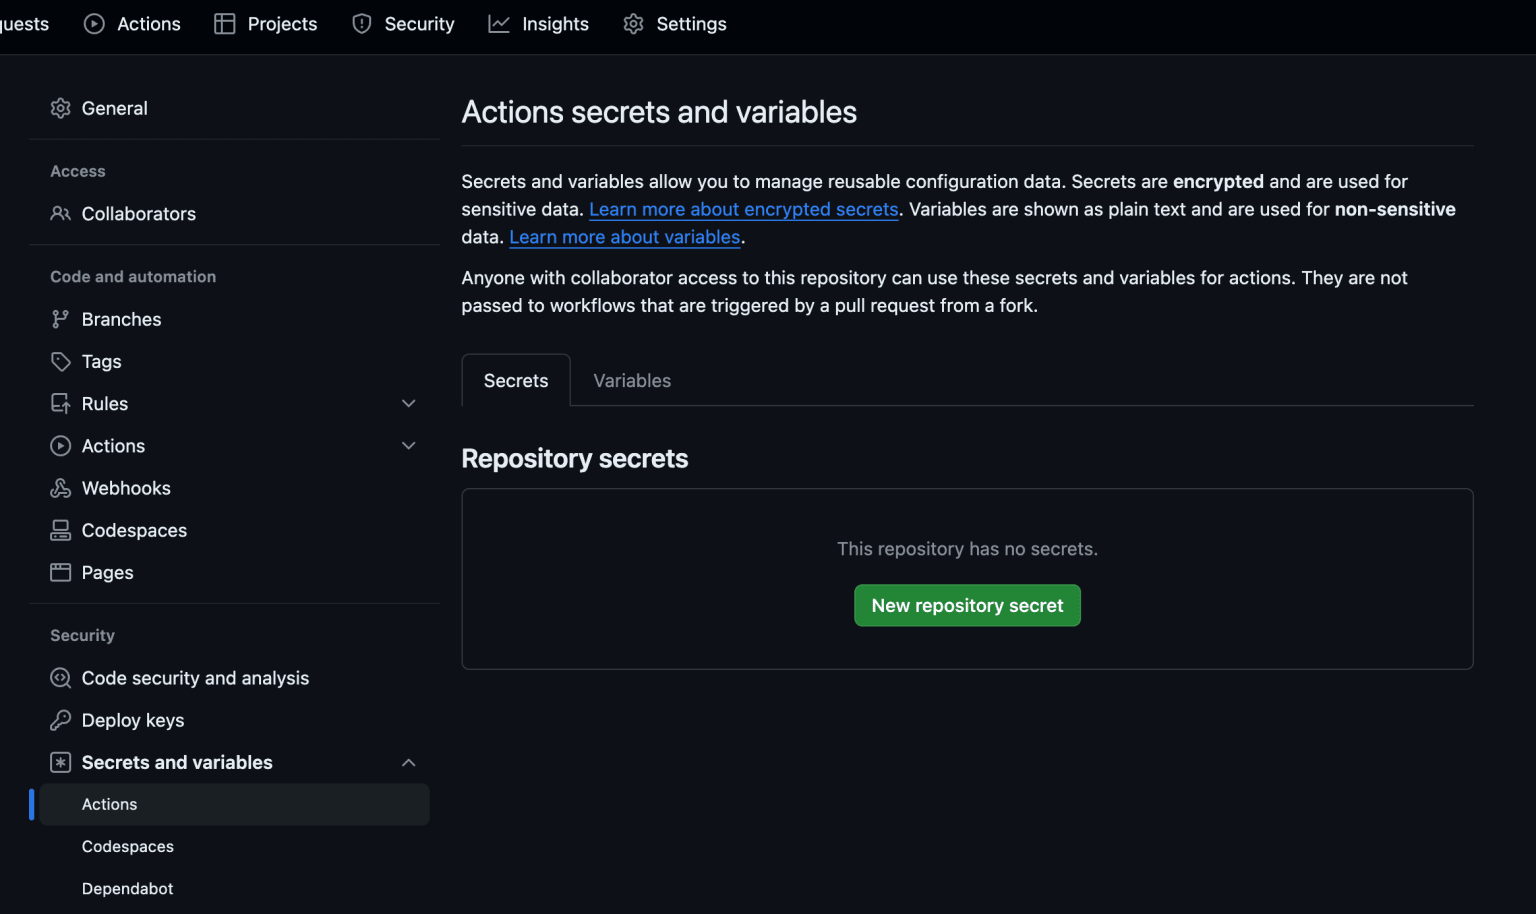
This secret should have the following name: USER_ID and the value we just retrieved from the image.
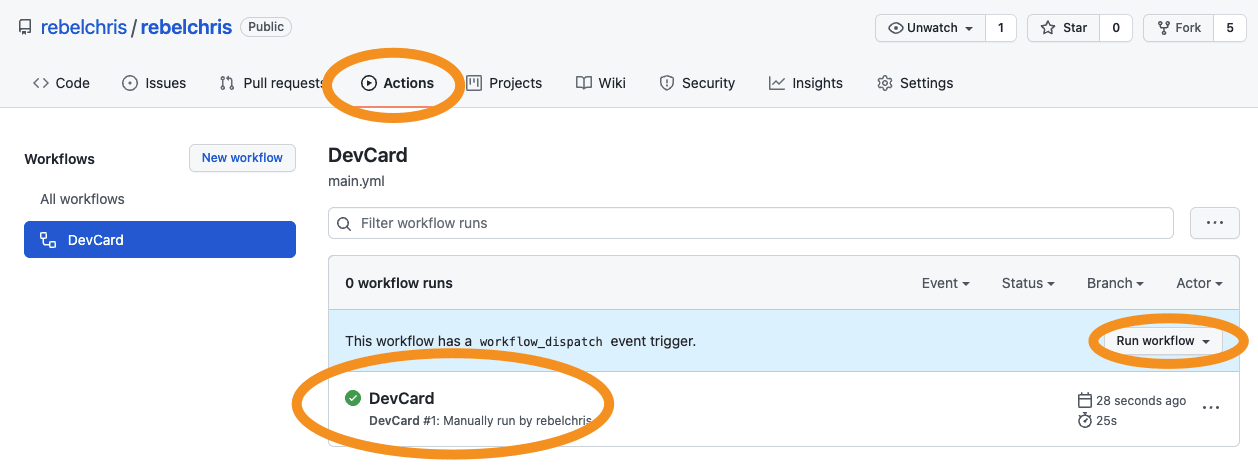
Now we can head over to the Actions tab and run our workflow. Once the workflow is done, you should see a green icon on your workflow.
Head back to your repository, and suddenly you will see there is a new file called devcard.png.
All we have to do now is update our README.md file to use this generated file like so:
<a href="https://app.daily.dev/francescociulla"><img src="./devcard.png" width="356" alt="Francesco's Dev Card"/></a>
Where you have to modify the href, https://app.daily.dev/francescociulla, and alt parts accordingly to your GitHub username.
And there you go! You now have an automatically updating DevCard on your GitHub profile.
Keep your GitHub action up-to-date with GitHub Dependabot
If you opted for the GitHub action method, you might consider using Dependabot for this repo. It will make sure you are always using the latest version of our GitHub action. To enable Dependabot for this repository, all you need to do is add a .github/dependabot.yml file with the following contents.
version: 2
updates:
  # Maintain dependencies for GitHub Actions
  - package-ecosystem: "github-actions"
    directory: "/"
    schedule:
      interval: "daily"
Conclusion
In this article, we covered two different ways of showing your reading interests through your GitHub profile:
Manual adding your DevCard by copying the code Automatic updating DevCard by leveraging GitHub actions
I’m sure you can’t wait to generate your DevCard: https://app.daily.dev/devcard.
Don’t forget to share your DevCard on social media using the #DevCard hashtag (and tag @dailydotdev on Twitter/X ) so we can check out the fantastic profile you created 🤩.