
In this tutorial, we will demonstrate how to use gRPC by building a chat app. We will describe in detail how you can set up a gRPC service and then communicate with it from a React app. The chat messages sending back and forth will be handled by a gRPC service. Let's see how it's done, but first, let's learn what gRPC is.
In this tutorial, we will demonstrate how to use gRPC by building a chat app. We will describe in detail how you can set up a gRPC service and then communicate with it from a React app. The chat messages sending back and forth will be handled by a gRPC service. Let's see how it's done, but first, let's learn what gRPC is.
gRPC at a glance
gRPC is an inter-process communication technology that is used to execute remote sub-routines in a different address space. It uses the concept of message passing to signal a sub-routine residing in another system to execute. gRPC is awesome in that it creates a server service in a language and the service can be consumed from another platform in another language. This server service contains methods that can be called by the gRPC clients from anywhere in the world from any machine or platform.
gRPC has three components: Protocol Buffer, server, and client. Protocol Buffer is an open-source serialization tool built by Google. gRPC uses this to serialize the request and response message format between the server and the client. This is also where the service interface between the server and the client is defined. According to Kasun Indrasiri and Danesh Kuruppu in gRPC: Up and Running, The service interface definition contains information on how your service can be consumed by consumers, what methods you allow the consumers to call remotely, what method parameters and message formats to use when invoking those methods, and so on.
The server as we already know contains methods/sub-routines/procedures, anything you choose to call it. These methods perform an action on the server. The client is where the methods in the gRPC server are called from. We have known what gRPC and how it works, now let's proceed to build our chat app.
The chat app
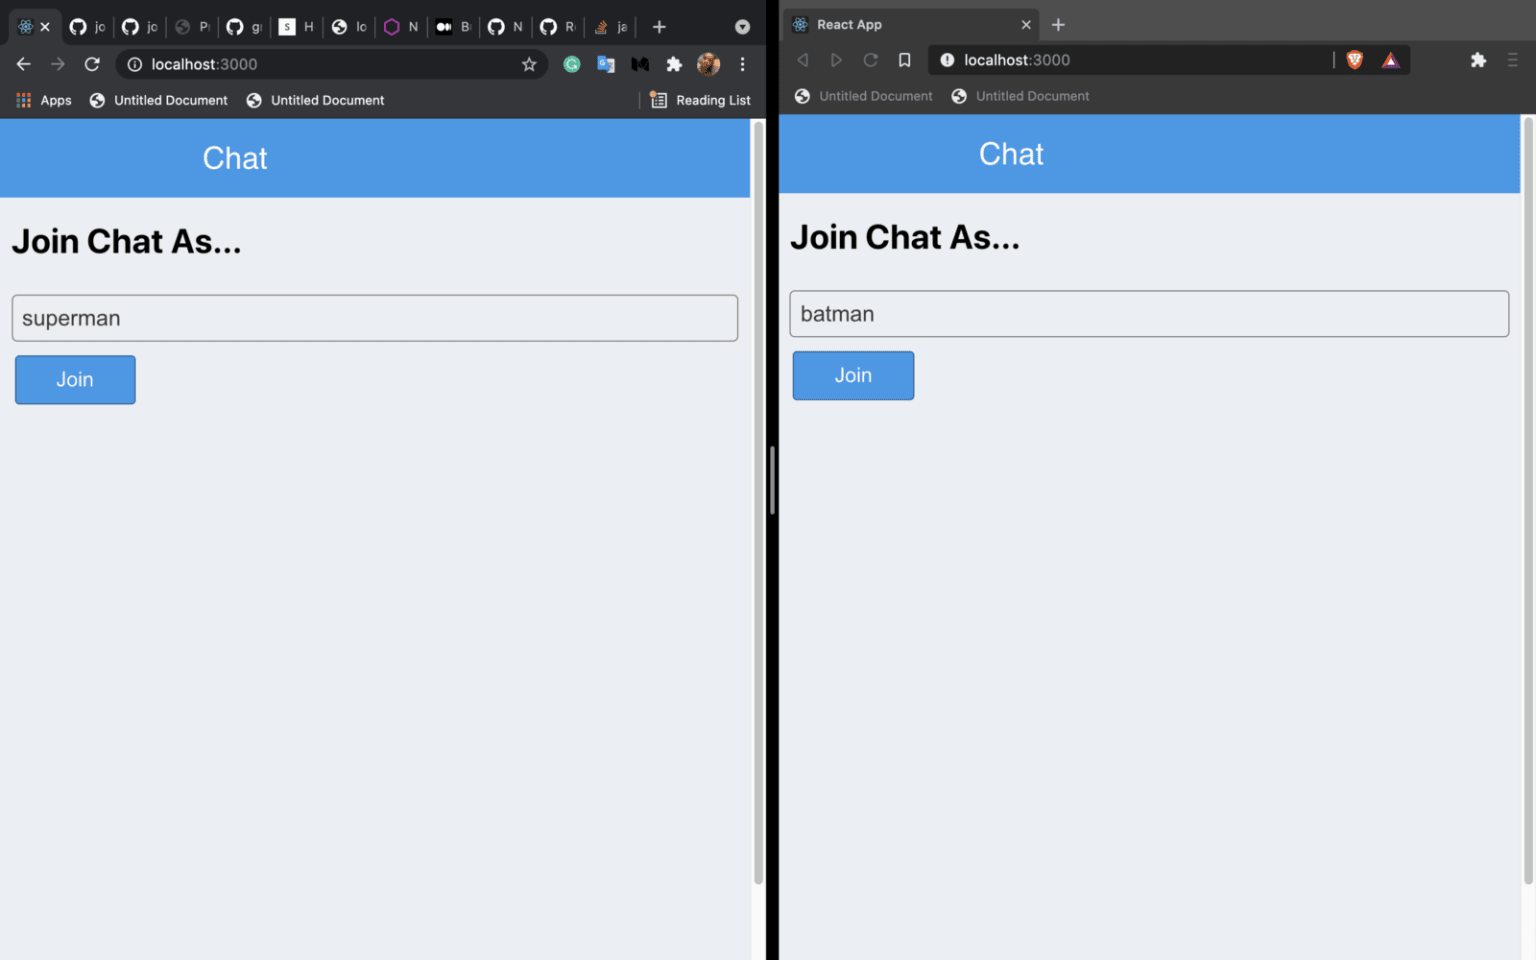
Our chat app will be a group chat like Discord where people can join in and discuss matters with the members. The UI will look like this:
This is the join page where users will have to input their username before joining the chat.
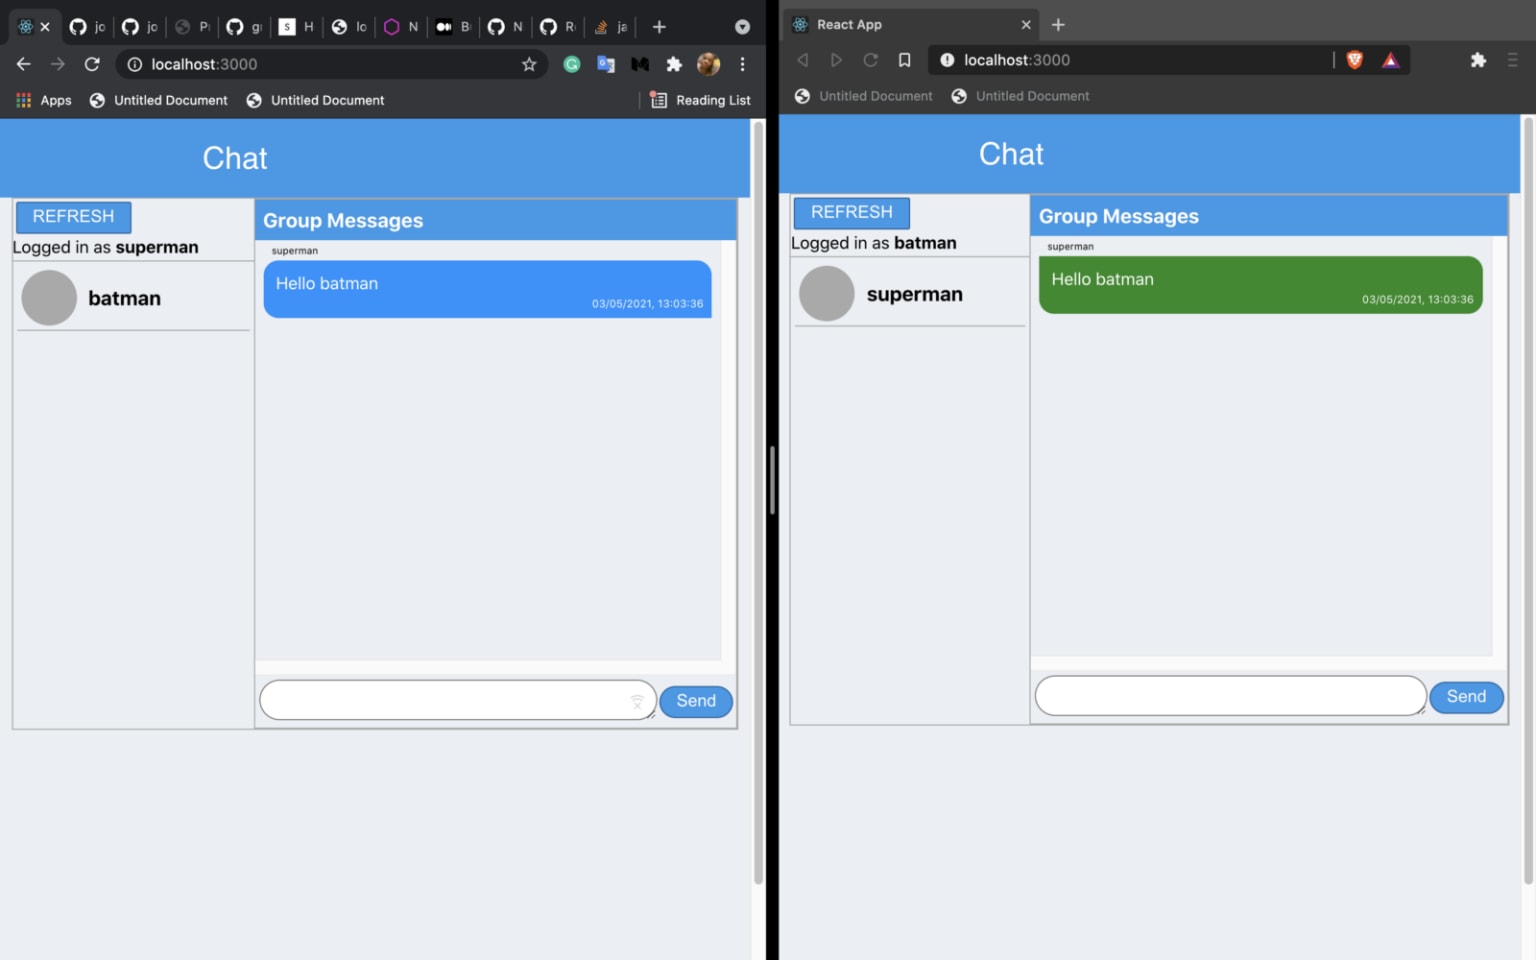
This is the chat UI where the group can read and send messages. The UI is simple and so is the project. This will aim to introduce how we can use the gRPC protocol to create a chat app. Let's first create the server. The server will be built in Nodejs.
gRPC - Setup the chat service
Before we begin scaffolding projects and touching files, let's see the model and structure of our chat app. This will be done in the Protobuf file. We will create the file, chat.proto. We will need methods that:
- users will call to join the group chat
- a method that will be called by a user to send a message to the group.
- a method that will open a stream of data on the server, then the client will listen to the stream of data to get them. This stream of data will be messages sent by the users in the group, so we need to stream them to all client's listening.
- a method that will return all users in the group.
First, in the chat.proto we will have a message format for a chat message:
syntax = "proto3";

message ChatMessage {
    string from = 1;
    string msg = 2;
    string time = 3;
}
The fields, from, msg, and time will hold the name of the user in the group that sent the chat, the text or message sent, and the time when the message was sent respectively. The numbers in the fields are unique numbers. They are used for identification when the fields are encoded to message binary format. The field numbers are what is used to retrieve the values of the fields from their binary format. Field numbers that can be assigned range from 1 to 536,870,911. More on binary format here.
Next, we will have a message format for a user:
message User {
    string id = 1;
    string name = 2;
}
The fields id and name hold the unique identifier of a user and the name of the user respectively. We create an empty message because we will be needing it for methods that require no args or returns.
message Empty {}
Since we will be returning a list of users, so we will have a message format for it.
message UserList {
    repeated User users = 1;
}
The repeated keyword means that the field is a list or an array. So the users field will be an array of users User. We will have a join method that users will call to join a group, this should have a response message format to hold the status of the join attempt:
message JoinResponse {
    int32 error = 1;
    string msg = 2;
}
The error will hold a value to indicate whether the join request was successful. The msg will hold the response message for the join request. Now, our proto will be this:
syntax = "proto3";

message ChatMessage {
    string from = 1;
    string msg = 2;
    string time = 3;
}

message User {
    string id = 1;
    string name = 2;
}

message Empty {}

message UserList {
    repeated User users = 1;
}

message JoinResponse {
    int32 error = 1;
    string msg = 2;
}

message ReceiveMsgRequest {
    string user = 1;
}

service ChatService {
    rpc join(User) returns (JoinResponse) {}
    rpc sendMsg(ChatMessage) returns (Empty) {}
    rpc receiveMsg(Empty) returns (stream ChatMessage) {}
    rpc getAllUsers(Empty) returns (UserList) {}
}
The keyword service denotes the gRPC service the proto will be exporting. gRPC services in a proto file will have methods that will be available to the clients.
These methods are set using the rpc keyword. So above we have four methods. The join method will take a user User as a parameter so to get the user details from there and add the user to the group chat. It will respond with a JoinResponse type. The sendMsg sends messages to the group chat. It takes the ChatMessage message format as arg so it can get the message and the sender from the fields, it returns nothing, an empty object. The receiveMsg sets up a stream of chats on the server. The stream keyword denotes a stream of data being created and streamed to the end-user. Here, the receiveMsg will create and emit streams of chat messages ChatMessage, the client will listen to the stream to receive the chats streamed to the channel. This makes it possible to receive texts sent by users in real-time. The getAllUsers returns the users in the chat.
Now, we scaffold a Node project and write this chat.proto with its contents to it.
mkdir grpc-chat
Move into the directory:
cd grpc-chat
Init a Node environ:
npm init -y
Create chat.proto file:
touch chat.proto
Copy and paste the contents of the proto file we created earlier into it.
Now, we install dependencies:
- grpc: gRPC library for Nodejs runtime.
- @grpc/proto-loader: A utility package for loading .proto files for use with gRPC, using the latest Protobuf.js package.
Run the below command to install the dependencies:
yarn add grpc @grpc/proto-loader

npm i grpc @grpc/proto-load
Now, we create server.js file:
touch server.js
This file will contain the gRPC server code. We will import the gRPC dependencies, then set up our chat.proto path and our server URL address to point at "0.0.0.0:9090":
const grpc = require("grpc");
const protoLoader = require("@grpc/proto-loader");

const PROTO_PATH = "chat.proto";
const SERVER_URI = "0.0.0.0:9090";
We will be using an in-memory database which will be arrays for now. We can actually connect a gRPC server to databases like MongoDB, MySQL, etc, but that’s out of scope. So we create an empty array that will hold users in the group usersInchat and the user's server writable stream observers. Then, we load the chat.proto and load its package definitions.
const grpc = require("grpc");
const protoLoader = require("@grpc/proto-loader");

const PROTO_PATH = "chat.proto";
const SERVER_URI = "0.0.0.0:9090";

const usersInChat = [];
const observers = [];

const packageDefinition = protoLoader.loadSync(PROTO_PATH);
const protoDescriptor = grpc.loadPackageDefinition(packageDefinition);
Next, we set up the function handlers for the methods in the ChatService.
// we'll implement the handlers here
const join = (call, callback) => {
  const user = call.request;

  // check username already exists.
  const userExist = usersInChat.find((_user) => _user.name == user.name);
  if (!userExist) {
    usersInChat.push(user);
    callback(null, {
      error: 0,
      msg: "Success",
    });
  } else {
    callback(null, { error: 1, msg: "User already exist." });
  }
};
The call argument contains request parameters from the client and other parameters set by gRPC. The parameters set by the client resides in the request object. So we pull the user object from the request object and add it to the usersInChat array.
const getAllUsers = (call, callback) => {
  callback(null, { users: usersInChat });
};
This returns the users in the usersInChat array to the client. The callback is a function that when called sends back a response to the client that called the method. The first param of the callback function denotes whether any error occurred, the second param is the response payload. So here, the client will get the users in the users property in the object returned.
const receiveMsg = (call, callback) => {
  observers.push({
    call,
  });
};
This is called to set up a stream in the server so the client can listen to the data emitted in the stream. Here, the call argument will be a ServerWritableStream instance. It has a write that we call to emit data inside the stream. This will be done in the server here because the client that called this method will be listening to data emitted. So when the write method is called, the data is sent down to the client's "data" event handler function. We push the call argument to the observers array.
const sendMsg = (call, callback) => {
  const chatObj = call.request;
  observers.forEach((observer) => {
    observer.call.write(chatObj);
  });
  callback(null, {});
};
This method sends a message to the group chat. This pulls the message object from the call.request object and, loops over the observers array. The observers array contains ServerWritableStream instance from the receiveMsg method call.
Now, the write method on each ServerWritableStream instance in the observers array with the chat message in the chatObj as param. This will make the ServerWritableStream instance emit the chat message so the client's listening in on the emission event will get the chat messages. In the frontend part, the client will get the emitted chat message and we will use it to update the UI to see the message and who sent it.
We are done with our ChatService method handlers. Now, we set up the gRPC server:
const server = new grpc.Server();
The server holds the grpc.Server instance. Next, we add the ChatService service to the server using the addService() method. The first param to the addService is the service descriptor, in this case, we will get the ChatService descriptor from the protoDescriptor. The second param will be a map of method names to method implementation for the provided service.\
server.addService(protoDescriptor.ChatService.service, {
  join,
  sendMsg,
  getAllUsers,
  receiveMsg,
});
Next, we bind and start our server at port 9090
server.bind(SERVER_URI, grpc.ServerCredentials.createInsecure());

server.start();
console.log("Server is running!");
That's it. We can run the server now:
$ node server
Server is running!
The full server code:
const grpc = require("grpc");
const protoLoader = require("@grpc/proto-loader");

const PROTO_PATH = "chat.proto";
const SERVER_URI = "0.0.0.0:9090";

const usersInChat = [];
const observers = [];

const packageDefinition = protoLoader.loadSync(PROTO_PATH);
const protoDescriptor = grpc.loadPackageDefinition(packageDefinition);

// we'll implement the handlers here
const join = (call, callback) => {
  const user = call.request;

  // check username already exists.
  const userExiist = usersInChat.find((_user) => _user.name == user.name);
  if (!userExiist) {
    usersInChat.push(user);
    callback(null, {
      error: 0,
      msg: "Success",
    });
  } else {
    callback(null, { error: 1, msg: "user already exist." });
  }
};

const sendMsg = (call, callback) => {
  const chatObj = call.request;
  observers.forEach((observer) => {
    observer.call.write(chatObj);
  });
  callback(null, {});
};

const getAllUsers = (call, callback) => {
  callback(null, { users: usersInChat });
};

const receiveMsg = (call, callback) => {
  observers.push({
    call,
  });
};

const server = new grpc.Server();

server.addService(protoDescriptor.ChatService.service, {
  join,
  sendMsg,
  getAllUsers,
  receiveMsg,
});

server.bind(SERVER_URI, grpc.ServerCredentials.createInsecure());

server.start();
console.log("Server is running!");
Our client will be a React.js application which means will be in the browser.
Browsers have to connect to gRPC services via a special proxy. This proxy is a process that can send HTTP/2 calls. So we send an HTTP 1.1 call to the proxy from the browser, the proxy gets it and calls the gRPC server via HTTP/2 sending the request URL and parameters with it. Then, it receives a response from the gRPC server via HTTP/2, the response is now sent to the client via HTTP 1.1 by the proxy. The ideal proxy process for this is Envoy.
Set up Envoy proxy
We will set up the Envoy proxy in a Docker image. But before we do that let's set up our React project because that is where Envoy config files will reside.
Scaffold React project
Run the below command to scaffold a React project:
create-react-app grpc-chat-react
Install the dependencies:
- grpc-web: provides a Javascript library that lets browser clients access a gRPC service.
- google-protobuf: contains the JavaScript Protocol Buffers runtime library.
yarn add grpc-web google-protobuf
# or
npm i grpc-web google-protobuf
Now, copy the chat.proto from the server project grpc-chat to this React.js project. Copy it in the src/ folder. We need the file because we will need it to generate gRPC client .js files so we can use them to call the gRPC methods. First, create an envoy.yaml in the root of this React.js folder. This is Envoy's config file that Docker will use to set up an Envoy process running. In the envoy.yaml files paste the config code:
admin:
  access_log_path: /tmp/admin_access.log
  address:
    socket_address: { address: 0.0.0.0, port_value: 9901 }

static_resources:
  listeners:
    - name: listener_0
      address:
        socket_address: { address: 0.0.0.0, port_value: 8080 }
      filter_chains:
        - filters:
            - name: envoy.filters.network.http_connection_manager
              typed_config:
                "@type": type.googleapis.com/envoy.extensions.filters.network.http_connection_manager.v3.HttpConnectionManager
                codec_type: auto
                stat_prefix: ingress_http
                stream_idle_timeout: 0s
                route_config:
                  name: local_route
                  virtual_hosts:
                    - name: local_service
                      domains: ["*"]
                      routes:
                        - match: { prefix: "/" }
                          route:
                            cluster: chat_service
                            max_grpc_timeout: 0s
                            max_stream_duration:
                              grpc_timeout_header_max: 0s
                      cors:
                        allow_origin_string_match:
                          - prefix: "*"
                        allow_methods: GET, PUT, DELETE, POST, OPTIONS
                        allow_headers: keep-alive,user-agent,cache-control,content-type,content-transfer-encoding,custom-header-1,x-accept-content-transfer-encoding,x-accept-response-streaming,x-user-agent,x-grpc-web,grpc-timeout
                        max_age: "1728000"
                        expose_headers: custom-header-1,grpc-status,grpc-message
                http_filters:
                  - name: envoy.filters.http.grpc_web
                  - name: envoy.filters.http.cors
                  - name: envoy.filters.http.router
  clusters:
    - name: chat_service
      connect_timeout: 0.25s
      type: logical_dns
      http2_protocol_options: {}
      lb_policy: round_robin
      # win/mac hosts: Use address: host.docker.internal instead of address: localhost in the line below
      load_assignment:
        cluster_name: cluster_0
        endpoints:
          - lb_endpoints:
              - endpoint:
                  address:
                    socket_address:
                      address: host.docker.internal
                      port_value: 9090
That's a lot there, we will go over the necessary configurations.
admin:
  access_log_path: /tmp/admin_access.log
  address:
    socket_address: { address: 0.0.0.0, port_value: 9901 }
This sets the URL address and port of the Docker image.
static_resources:
  listeners:
    - name: listener_0
      address:
        socket_address: { address: 0.0.0.0, port_value: 8080 }
This sets the URL address where the gRPC browser client will direct its HTTP/1.1 calls. For example, to call the join method the URL will be this:
localhost:8080/ChatService/join
So 0.0.0.0:8080 is the address of the Envoy process running in the Docker image.
clusters:
  - name: chat_service
    connect_timeout: 0.25s
    type: logical_dns
    http2_protocol_options: {}
    lb_policy: round_robin
    # win/mac hosts: Use address: host.docker.internal instead of address: localhost in the line below
    load_assignment:
      cluster_name: cluster_0
      endpoints:
        - lb_endpoints:
            - endpoint:
                address:
                  socket_address:
                    address: host.docker.internal
                    port_value: 9090
This sets the URL address of the gRPC server where the Envoy proxy will direct its HTTP/2 calls. See that the address port is the same as the port our gRPC server is running on 9090. The address is set to host.docker.internal because Docker will set its address to the gRPC server so we use the Docker's address. So the mental image of the HTTP calls will be this:
- browser call ChatService methods on port 8080 via HTTP 1.1.
- Docker running on 9091 receives the call and makes HTTP/2 call to gRPC running on 9090 passing the URL address and request params.
- gRPC server sends a response to the Envoy via HTTP/2 on 9091, Envoy sends the response to the browser client via HTTP 1.1 on port 3000.
Let's create a Dockerfile in the same place as envoy.yaml
FROM envoyproxy/envoy-dev:latest
COPY envoy.yaml /etc/envoy/envoy.yaml
RUN chmod go+r /etc/envoy/envoy.yaml
Next, we build the Docker image:
docker build -t grpc-web-react .
This builds a Docker image with the name grpc-web-react. Now, we run the Docker:
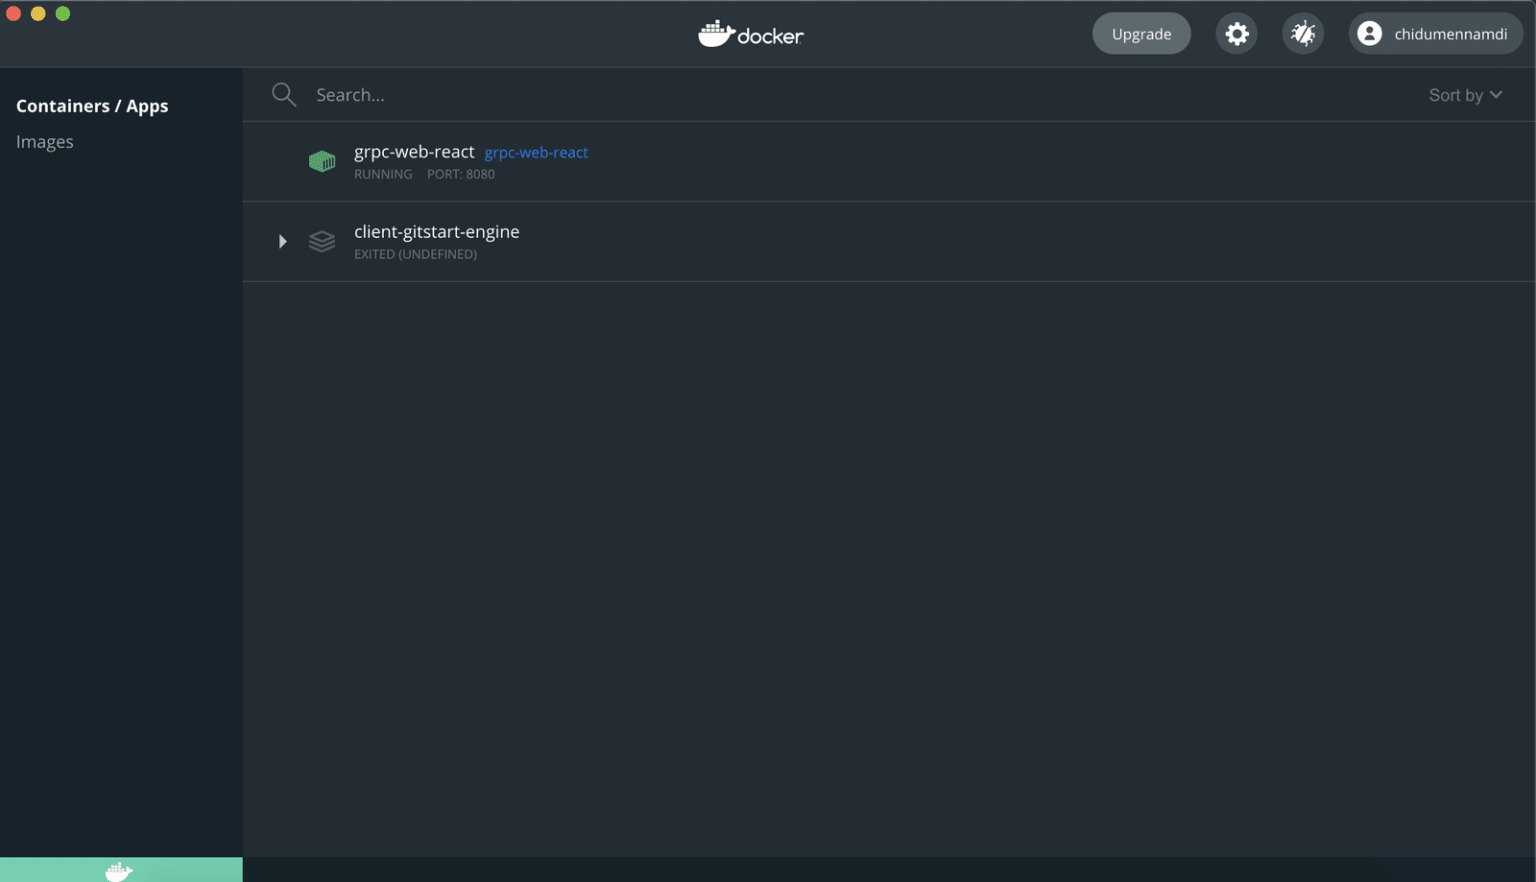
docker run -d --name grpc-web-react -p 8080:8080 -p 9901:9901 grpc-web-react
We will see our Docker image running:
Setting the gRPC web protoc
Now we will have to compile the chat.proto file using proto compiler. This is to generate the JavaScript code equivalent of the Protobuf code we have in the chat.proto, this is done so we can access the message types, services and call the methods using JavaScript. Each language has its own proto compiler, that we can use to generate the language's client gRPC source code. We need to install the Proto plugin and Protoc compiler for JavaScript.
For more info on how to install the Proto tools, visit the grpc-web GitHub page. After all, is done, we will have the protoc compiler globally accessible from our Terminal.
So we compile the chat.proto file, run the below command:
protoc -I=. src/chat.proto --js_out=import_style=commonjs,binary:. --grpc-web_out=import_style=commonjs,mode=grpcwebtext:.
This will compile the chat.proto file and generate the files:
- chat_pb.js: This will export the message formats in the chat.proto file.
- chat_grpc_web_pb.js: This will export the ChatServiceClient. The services in the proto file are exported here. The services are exported with the Client attached to their names.
Now, we build the UI components.
Build the UI
We will have presentational and page components. Presentational components are dumb components that merely displays data passed to it. Page components are components attached to a route, they are displayed when the route they are attached is navigated to in the browser.
Presentational components:
- Header: This will display the header.
- Chat: This component will display the chat messages.
- UsersList: This will display the list of users in the group.
Page components:
- ChatPage: This page will render the components that will display the UI for typing, sending, displaying the messages.
Let's touch the components and mkdir the folders:
mkdir src/pages
mkdir src/pages/ChatPage

touch src/pages/ChatPage/index.js
touch src/pages/ChatPage.css

mkdir src/pages/Join
touch src/pages/Join/index.js

mkdir src/components

mkdir src/components/Header
touch src/pages/Header/index.js
touch src/pages/Header/Header.css

mkdir src/components/Chat
touch src/pages/Chat/index.js
touch src/pages/Chat/Chat.css

mkdir src/components/UsersList
touch src/pages/UsersList/index.js
touch src/pages/UsersList/UsersList.css
Our base component is the App.js so we start from there.
import "./App.css";
import Header from "./components/Header";

import { User, JoinResponse } from "./chat_pb";
import { ChatServiceClient } from "./chat_grpc_web_pb";
import ChatPage from "./pages/ChatPage";
import { useState, useRef } from "react";

const client = new ChatServiceClient("http://localhost:8080", null, null);

export default function App() {
  const inputRef = useRef(null);
  const [submitted, setSubmitted] = useState(null);

  function joinHandler() {
    const _username = inputRef.current.value;

    const user = new User();
    user.setId(Date.now());
    user.setName(_username);

    client.join(user, null, (err, response) => {
      if (err) return console.log(err);
      const error = response.getError();
      const msg = response.getMsg();

      if (error === 1) {
        setSubmitted(true);
        return;
      }
      window.localStorage.setItem("username", _username.toString());
      setSubmitted(true);
    });
  }

  function renderChatPage() {
    return <ChatPage client={client} />;
  }

  function renderJoinPage() {
    return (
      <div>
        <div>
          <h1>Join Chat As...</h1>
        </div>
        <div style={{ padding: "10px 0" }}>
          <input
            style={{ fontSize: "1.3rem" }}
            type="text"
            ref={inputRef}
            placeholder="Your username..."
          />
        </div>
        <div>
          <button
            onClick={joinHandler}
            style={{
              padding: "7px 38px",
              fontSize: "1.2em",
              boxSizing: "content-box",
              borderRadius: "4px",
            }}
          >
            Join
          </button>
        </div>
      </div>
    );
  }

  return (
    <>
      <head>
        <title>ChatApp</title>
        <link rel="icon" href="/favicon.ico" />
      </head>
      <Header />
      <div className="container">
        <main className="main">
          {submitted ? renderChatPage() : renderJoinPage()}
        </main>
      </div>
    </>
  );
}
First, we do the imports. The styling in App.css is imported. Next, we imported the Header component, then, User message type is imported as defined in the proto is exported from chat_pb.js. ChatServiceClient is imported from the chat_grpc_web_pb.js. Further down, we imported the ChatPage component and the useState hook.
We set up a gRPC client by instantiating the ChatServiceClient and passing localhost:8080 in the constructor. The instance is held in the client variable. This is what we will use to call the methods in the ChatService. Inside the App component, we have a submitted state, it holds a boolean state that indicates whether the join request is successful or not. We have two methods renderChatPage and renderJoinPage. The renderChatPage method renders the UI for the chat UI, while the renderJoinPage will render the UI to take input for joining the group.
See that in the renderJoinPage UI, there is an input box that will take the name of the user, the Join button when clicked will call the joinHandler function. The joinHandler function, will call the join() in the client. This will invoke the join method in the gRPC server. See, that the User instance with the id and name set is passed as param to the join() call. In the callback function, the submitted state is set if successful and the ChatPage component is rendered.
Open the App.css, clear the contents and save. Let's see the ChatPage component.
ChatPage
Open the ChatPage/index.js and paste the code:
import Chat from "./../../components/Chat";
import UsersList from "./../../components/UsersList";
import "./ChatPage.css";
import { ChatMessage, ReceiveMsgRequest, Empty } from "./../../chat_pb";
import { useEffect, useState } from "react";

export default function ChatPage({ client }) {
  const [users, setUsers] = useState([]);
  const [msgList, setMsgList] = useState([]);
  const username = window.localStorage.getItem("username");

  useEffect(() => {
    const strRq = new ReceiveMsgRequest();
    strRq.setUser(username);

    var chatStream = client.receiveMsg(strRq, {});
    chatStream.on("data", (response) => {
      const from = response.getFrom();
      const msg = response.getMsg();
      const time = response.getTime();

      if (from === username) {
        setMsgList((oldArray) => [
          ...oldArray,
          { from, msg, time, mine: true },
        ]);
      } else {
        setMsgList((oldArray) => [...oldArray, { from, msg, time }]);
      }
    });

    chatStream.on("status", function (status) {
      console.log(status.code, status.details, status.metadata);
    });

    chatStream.on("end", () => {
      console.log("Stream ended.");
    });
  }, []);

  useEffect(() => {
    getAllUsers();
  }, []);

  function getAllUsers() {
    client.getAllUsers(new Empty(), null, (err, response) => {
      let usersList = response?.getUsersList() || [];
      usersList = usersList
        .map((user) => {
          return {
            id: user.array[0],
            name: user.array[1],
          };
        })
        .filter((u) => u.name !== username);
      setUsers(usersList);
    });
  }

  function sendMessage(message) {
    const msg = new ChatMessage();
    msg.setMsg(message);
    msg.setFrom(username);
    msg.setTime(new Date().toLocaleString());

    client.sendMsg(msg, null, (err, response) => {
      console.log(response);
    });
  }

  return (
    <div className="chatpage">
      <div className="userslist-section">
        <div
          style={{ paddingBottom: "4px", borderBottom: "1px solid darkgray" }}
        >
          <div>
            <button onClick={getAllUsers}>REFRESH</button>
          </div>
          <div>
            <span>
              Logged in as <b>{username}</b>
            </span>
          </div>
        </div>
        <UsersList users={users} />
      </div>
      <div className="chatpage-section">
        <Chat msgList={msgList} sendMessage={sendMessage} />
      </div>
    </div>
  );
}
We have states to hold all users in the group, and the messages sent. The name of the user is retrieved from the localStorage and stored in the username variable.
The callback in the useEffect hook calls the receiveMsg method, as this method returns a stream from the server. We listen to the stream of data to be emitted from the server by calling the then on() method and passing the "data" text in the first param and a callback function in the next. This listens for data on the server-side streaming, the data emitted by the server is retrieved from the response arg in the callback function. This response will be a ChatMessage so we retrieve who sent the message from, the message msg and time it was sent time by calling getFrom(), getMsg(), and getTime() respectively. To differentiate a message by the user from the users in the chat, we check the from to against the current user in the username and add mine prop to the object, then, we set the message object to the msgList array state.
The getAllUsers function gets all the users in the chat, see it calls the getAllUsers() in the gRPC service and sets the response to the msgList state. The sendMessage function sends the chat message to the server. The message arg holds the message to be sent. It constructs its ChatMessage object and calls the sendMsg with it. This invokes the sendMsg method in the gRPC server. The UI renders a button we can click to refresh the users' list, displays the name of the user, and renders the UsersList and Chat components passing the users to the UsersList component via users input, and the msgList and sendMessage function to the Chat component as input props.
Add the styling in ChatPage.css
.chatpage {
  display: flex;
  border: 1px solid darkgrey;
  height: 100%;
}

.userslist-section {
  flex: 1;
}

.chatpage-section {
  flex: 2;
  border: 1px solid darkgrey;
}
UsersList
Open the UsersList/index.js file and paste the code:
import "./UsersList.css";

export default function UsersList({ users = [] }) {
  return (
    <div className="userslist">
      {users?.map((user, i) => {
        return <UserCard user={user} key={i} />;
      })}
    </div>
  );
}

function UserCard({ user }) {
  return (
    <div className="usercard">
      <div className="usercard-img"></div>
      <div>
        <div className="usercard-name">
          <h3>{user?.name || "No Username"}</h3>
        </div>
      </div>
    </div>
  );
}
It destructures the users array from its props. Then, renders it. Add, the styling to UsersList.css:
.usercard {
  display: flex;
  align-items: center;
  margin: 4px;
  padding: 4px;
  border-bottom: 1px solid darkgray;
  cursor: pointer;
}

.usercard-img {
  width: 52px;
  height: 52px;
  background-color: darkgray;
  background-repeat: no-repeat;
  background-size: cover;
  background-position: center;
  margin-right: 9px;
  /*flex: 1 100%;*/
  border-radius: 50%;
}

.usercard-name h3 {
  margin: 2px;
}
Chat
Open Chat/index.js and paste the code:
import "./Chat.css";

export default function Chat({ msgList, sendMessage }) {
  function handler() {
    var msg = window.msgTextArea.value;
    sendMessage(msg);
    window.msgTextArea.value = "";
  }

  return (
    <div className="chat">
      <div className="chat-header">
        <h3>Group Messages</h3>
      </div>
      <div className="chat-list">
        {msgList?.map((chat, i) => (
          <ChatCard chat={chat} key={i} />
        ))}
      </div>
      <div className="chat-input">
        <div style={{ flex: "3 1 90%" }}>
          <textarea id="msgTextArea" />
        </div>
        <div
          style={{
            paddingLeft: "5px",
            display: "flex",
            alignItems: "center",
            justifyContent: "flex-end",
          }}
        >
          <button onClick={handler}>Send</button>
        </div>
      </div>
    </div>
  );
}

function ChatCard({ chat }) {
  return (
    <>
      <div style={{ fontSize: "9px", marginLeft: "4px", paddingLeft: "8px" }}>
        <span>{chat?.from}</span>
      </div>
      <div
        className={
          chat?.mine ? "chatcard chatcard-mine" : "chatcard chatcard-friend"
        }
      >
        <div className="chatcard-msg">
          <span>{chat?.msg}</span>
        </div>
        <div className="chatcard-time">
          <span>{chat?.time}</span>
        </div>
      </div>
    </>
  );
}
It destructures the msgList array, sendMesgage function from its props. The UI has an input box and button for sending messages. The button when clicked calls the handler function, it extracts the chat text from the input box and calls the sendMessage function passing in the chat text as a parameter.
The UI also displays the messages in the msgList array. It loops through them and displays each message in the ChatCard component. See that the ChatCard component uses the mine prop in the chat to know how to display chats belonging to the user and the ones not belonging to the user. The chatcard-mine CSS class is set for chats sent by the user, while chatcard-friend CSS class is set for chats by other users.
Open Chat.css and paste the below styling code:
.chat-input {
  display: flex;
  justify-content: space-between;
}

.chat-header {
  height: 30px;
  padding: 4px;
  background-color: rgb(53 151 234);
  color: white;
}

.chat-header h3 {
  margin: 4px;
}

.chat-list {
  padding: 4px;
  height: 400px;
  overflow: scroll;
}

.chat-input {
  margin: 4px 0;
  margin-left: 4px;
}

.chat-input textarea {
  border-radius: 20px;
  font-family: "Segoe UI", Tahoma, Geneva, Verdana, sans-serif;
  outline: none;
  width: 100%;
  box-sizing: content-box;
}

.chat-input button {
  border-radius: 50px;
}

.chatcard {
  background-color: dodgerblue;
  padding: 8px;
  border-radius: 14px;
  margin: 4px;
  color: white;
}

.chatcard-mine {
  border-bottom-right-radius: 0;
}

.chatcard-friend {
  border-top-left-radius: 0;
  background-color: forestgreen;
}

.chatcard-msg {
  padding: 4px;
}

.chatcard-time {
  text-align: right;
  font-size: 10px;
}
Header
This simply displays a header for the chat app. Add the below code to Header/index.js:
import "./Header.css";

export default function Header() {
  return (
    <section className="header">
      <div className="headerName">Chat</div>
    </section>
  );
}
Set the styling in its Header.css
.header {
  height: 54px;
  background-color: rgb(53 151 234);
  color: white;
  display: flex;
  align-items: center;
  padding: 10px;
  font-family: sans-serif;
  padding-left: 27%;
}

.headerName {
  font-size: 1.8em;
}
Set the global styles
Open index.css and paste the below code:
body {
  margin: 0;
  font-family: -apple-system, BlinkMacSystemFont, "Segoe UI", "Roboto",
    "Oxygen", "Ubuntu", "Cantarell", "Fira Sans", "Droid Sans",
    "Helvetica Neue", sans-serif;
  -webkit-font-smoothing: antialiased;
  -moz-osx-font-smoothing: grayscale;
  background-color: rgba(234, 238, 243, 1);
}

code {
  font-family: source-code-pro, Menlo, Monaco, Consolas, "Courier New",
    monospace;
}

button {
  height: 30px;
  padding: 0px 15px 2px;
  font-weight: 400;
  font-size: 1rem;
  line-height: normal;
  border-radius: 2px;
  cursor: pointer;
  outline: 0px;
  color: rgb(255, 255, 255);
  text-align: center;
  margin: 3px;
  background-color: rgb(53 151 234);
  border: 1px solid rgb(28 90 152);
}

.btn-danger {
  background-color: rgb(195 18 18);
  border: 1px solid rgb(195 18 18);
}

.container {
  min-height: 100vh;
  /*padding: 0 0.5rem; */
  display: flex;
  flex-direction: column;
  justify-content: center;
  align-items: center;

  background-color: rgba(234, 238, 243, 1);
}

.main {
  /*padding: 5rem 0;*/
  flex: 1;
  display: flex;
  flex-direction: column;
  width: 46%;
  /*justify-content: center;
  align-items: center;*/
}

.modal {
  position: fixed;
  top: 0;
  left: 0;
  width: 100%;
  height: 100%;
  display: flex;
  flex-direction: column;
  align-items: center;
  z-index: 1000;
  font-family: "Segoe UI", Tahoma, Geneva, Verdana, sans-serif;
}

.modal-backdrop {
  opacity: 0.5;
  width: inherit;
  height: inherit;
  background-color: grey;
  position: fixed;
}

.modal-body {
  padding: 5px;
  padding-top: 15px;
  padding-bottom: 15px;
}

.modal-footer {
  padding: 15px 5px;
  display: flex;
  justify-content: space-between;
}

.modal-header {
  display: flex;
  justify-content: space-between;
  align-items: center;
}

.modal-header h3 {
  margin: 0;
}

.modal-content {
  background-color: white;
  z-index: 1;
  padding: 10px;
  margin-top: 10px;

  width: 520px;
  box-shadow: 0px 11px 15px -7px rgba(0, 0, 0, 0.2), 0px 24px 38px 3px rgba(0, 0, 0, 0.14),
    0px 9px 46px 8px rgba(0, 0, 0, 0.12);
  border-radius: 4px;
}

input[type="text"] {
  width: 100%;
  padding: 9px;
  font-weight: 400;
  cursor: text;
  outline: 0px;
  border: 1px solid rgb(120 121 121);
  border-radius: 5px;
  color: rgb(51, 55, 64);
  background-color: transparent;
  box-sizing: border-box;
}

.label {
  padding: 4px 0;
  font-size: small;
  color: rgb(51, 55, 64);
}

.content {
  display: flex;
  flex-wrap: wrap;
  flex-direction: column;
}

.inputField {
  margin: 3px 7px;
  flex: 1 40%;
}

button:disabled,
button[disabled] {
  opacity: 0.5;
  cursor: not-allowed;
}

a[href] {
  text-decoration: none;
  color: black;
}

a:visited {
  color: black;
}

@media (min-width: 700px) {
  .main {
    width: 97%;
  }
}
If your create-react-app server is not running, launch it:
yarn start
# or
npm run start
Go to your favorite browser and navigate to localhost:3000. Open another browser side-by-side with the first browser. Then, join in on the chat with different usernames and start chatting. You will see how fast the messages are delivered in real-time. That's the power of gRPC.
Source code
Find the repos of the gRPC server and React.js client source code below:
Conclusion
We learned what gRPC is all about. We started by looking at a bit of its history and then, how it works. We learned about gRPC streaming which enables us to stream and listen to a sequence of data in real-time. We demonstrated all this by building a chat app in React.js, in doing so, we also learned about proxying requests from a browser client using Envoy, we learned a little bit about Envoy configurations and we were able to communicate with a gRPC server from the browser. That's a whole lot we learned in this tutorial.
gRPC opens up a whole new world of possibilities and at the same time harnessing the awesome power of HTTP/2.