close icon
daily.dev platform

Discover more from daily.dev

Personalized news feed, dev communities and search, much better than what’s out there. Maybe ;)

Start reading - Free forever
Continue reading >

Building an image gallery with Fastify and React

Building an image gallery with Fastify and React
Author
Lawrence Eagles
Related tags on daily.dev
toc
Table of contents
arrow-down

🎯

In this article, we would see how Fastify handles file upload as we build an image gallery using Fastify and React. We would work with Cloudinary and Fastify-multer a Fastify alternative to the express middleware multer.

Introduction

Fastify is a web development framework inspired by Hapi and Express but it promises faster performance with low overhead.

Fastify excels when it comes to building a fast HTTP server; performing nearly twice as fast as Express. It claims to be the fastest Nodejs frameworks and benchmark back up their claim.

Fastify is built to be a very modular system and it is fully extensible with hooks, plugins and, decorators.

Fastify uses a plugin-based architecture similar to that of Hapi and provides the register API for working with them.  

Also, the Fastify plugin model is based on the reentrant lock and graph-based. And plugins in Fastify could be a set of routes, server decorators, etc.

In addition, Fastify supports middleware but starting from  v3.0.0, middleware is not supported out of the box. So external plugins such as fastify-express or middie are used to add middleware support.

Fastify provided alternatives to some express middlewares and uses Reusify to squeeze a 10% increase in performance when handling middleware.

In this article, we would see how Fastify handles file upload as we build an image gallery using Fastify and React.  We would work with cloudinary and Fastify-multer a Fastify alternative to the express middleware multer.

Let’s get started with the prerequisite in the next section.

Prerequisite

To follow along in this article, here are a few prerequisites to note:

  1. Node.js  and MongoDB installed
  2. Basic knowledge of MongoDB and Mongoose
  3. Basic knowledge of React

Getting started

To get started, we will first set up our server.

Follow the steps below to create the server:

  1. Create an npm project and install all the needed dependencies:

npm init -y
npm i fastify nodemon fastify-plugin fastify-cors fastify-multer dotenv cloudinary multer-storage-cloudinary mongoose

  1. Add start scripts:

Open the package.json file and edit the scripts section as follows:


...
"scripts": {
  "start": "node ./src/index.js",
  "dev": "nodemon ./src/index.js"
}
...

  1. Set environment variables:

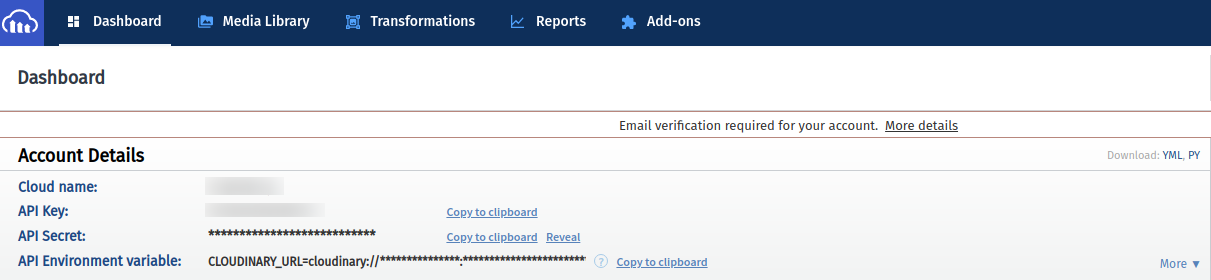
Since we want to set up cloudinary as we build our server it is important we set its environment variables now. Create a .env file in the root directory and add the following codes:


PORT=5000 
MONGODB_URI=mongodb://localhost:27017/gallery
CLOUD_NAME=drqxiuhty // change this to your cloudinary cloud name
CLOUD_KEY=984987678826161 // change this to your cloudinary cloud key
CLOUD_SECRET=qEYQI7ERQpOIUJl765TTHb654KA // change this to your cloudinary secret

I have specified some values you need to change to the values of your Cloudinary account. The values given here would not work if used. You can get these values from your Cloudinary dashboard.

Cloudinary dashboard
  1. In the root directory, create a src directory with an index.js file containing the following code:

require('dotenv').config();
const fastify = require('fastify')({ logger: true });
const cloudinary = require('cloudinary').v2;
const { CloudinaryStorage } = require('multer-storage-cloudinary');
const multer = require('fastify-multer');
const Port = process.env.PORT;
const uri = process.env.MONGODB_URI;

// cloudinary configuration
cloudinary.config({
    cloud_name: process.env.CLOUD_NAME,
    api_key: process.env.CLOUD_KEY,
    api_secret: process.env.CLOUD_SECRET
});

// create cloudinary storage for multer
const storage = new CloudinaryStorage({
    cloudinary: cloudinary,
    params: {
        folder: 'fastify-gallery',
        allowedFormats: [ 'jpg', 'png' ],
        transformation: [ { width: 800, height: 800, crop: 'limit' } ]
    }
});

// create multer image parser
const parser = multer({ storage });

// Rsegister plugins below:

//Decorate fastify with our parser
fastify.decorate('multer', { parser });

// create server
const start = async () => {
    try {
        await fastify.listen(Port);
    } catch (err) {
        fastify.log.error(err);
        process.exit(1);
    }
};
start();

In the code above we have configured Cloudinary and created a Cloudinary image storage for multer.

Multer is an express middleware for handling multipart/form-data; it would not process any form which is not multipart and it is primarily used for uploading files.

Also, by default, Fastify does not parse multipart form data; it requires an external plugin like fasitfy-multipart or multer to add multipart support.

In this article, we are using fastify-multer which is a port of express multer and multer storage cloudinary — used to configure our Multer storage to Cloudinary.

Finally, we decorate Fastify with our image parser; this exposes the parser across our application. We will talk more about using the parser when we build our routes.

  1. Create the status route and test the server:

In the src directory, create a routes directory and a status.js file inside.

Add the following code to the status.js:


const fp = require('fastify-plugin');
const status = async (server, opts) => {
    server.route({
        url: '/status',
        logLevel: 'warn',
        method: [ 'GET', 'HEAD' ],
        handler: async (request, reply) => {
            reply.send({ date: new Date(), status: 'server is working' });
        }
    });
};
module.exports = fp(status);

Our route above uses a custom log level warn. And the handler method in our route options object above specifies the function to handle this request.

Next, register out status route by adding the following codes below the // // Register plugins below in the index.js file:


// Register plugins below
fastify.register(require('./routes/status'));

Now we can test the server by running the codes below:


# Start server
npm start

#Test server
curl http://127.0.0.1:5000/status

# Server returns
{"date":"2021-04-24T21:25:28.860Z","status":"server is working"}

Our server is working so we will proceed to building our APIs in the next section.

Building our image gallery APIs

Create Models

In the src directory create a config directory with an index.js file and a models, directory. Inside the models directory, create a gallery.js file with the following codes:


const mongoose = require('mongoose');
const gallery = mongoose.Schema({
    filename: {
        type: String,
        required: true
    },
    originalname: {
        type: String,
        required: true
    },
    url: {
        type: String,
        required: true
    }
});
module.exports = mongoose.model('gallery', gallery);

Connecting to MongoDB using Mongoose

In the index.js file in the config directory add the following code:


const fp = require('fastify-plugin');
const mongoose = require('mongoose');
const Gallery = require('./models/gallery');
const models = { Gallery };

const ConnectDB = async (fastify, options) => {
    try {
        mongoose.connection.on('connected', () => {
            fastify.log.info({ actor: 'MongoDB' }, 'connected');
        });
        mongoose.connection.on('disconnected', () => {
            fastify.log.error({ actor: 'MongoDB' }, 'disconnected');
        });
        const db = await mongoose.connect(options.uri, {
            useNewUrlParser: true,
            useUnifiedTopology: true,
            useCreateIndex: true
        });
        
        // decorates fastify with our model
        fastify.decorate('db', { models });
    } catch (error) {
        console.error(error);
    }
};
module.exports = fp(ConnectDB);

The code above connects our app to MongodDB using mongoose and logs the connection status to the console and decorates Fastify with our model.

Create Upload Route Using Multer and Cloudinary

To create our endpoints, create a gallery.js file in the routes directory with the following codes:


const fp = require('fastify-plugin');
const gallery = async (server, opts) => {
    server.route({
        method: 'GET',
        url: '/gallery',
        handler: async (request, reply) => {
            // request.file is the `avatar` file
            // request.body will hold the text fields, if there were any
            const { Gallery } = server.db.models;
            const data = await Gallery.find({});
            reply.code(200).send({ message: 'SUCCESS', data });
        }
    });
    server.route({
        method: 'POST',
        url: '/gallery',
        preHandler: server.multer.parser.single('upload'),
        handler: async (request, reply) => {
            // request.file is the `avatar` file
            // request.body will hold the text fields, if there were any
            const { Gallery } = server.db.models;
            const image = new Gallery({
                filename: request.file.filename,
                originalname: request.file.originalname,
                url: request.file.path
            });
            const data = await image.save();
            reply.code(200).send({ message: 'SUCCESS', data });
        }
    });
};
module.exports = fp(gallery);

Our routes above are built using full declaration, and in the route option object, the handler function handles the request. In the post endpoint, we use the prehandler hook to handle the file upload using multer.

Register plugins and test server

To register our plugins add the following code below the // Register plugins below: in the index.js file as seen below:


...
// Register plugins below
fastify.register(db, { uri });
fastify.register(multer.contentParser);
fastify.register(require('./routes/status'));
fastify.register(require('./routes/gallery'));
...

Note we need to import our mongoose configuration. Add the following codes to the list of imported modules in the index.js file:


...
const multer = require('fastify-multer');
const db = require('./config/index');
const Port = process.env.PORT;
...

Not we can test the sever by running:


# start mongodb
mongod 
# start application server
npm start

We get:


{"level":30,"time":1619300720736,"pid":15200,"hostname":"eagles-pcname","actor":"MongoDB","msg":"connected"}
{"level":30,"time":1619300720755,"pid":15200,"hostname":"eagles-pcname","msg":"Server listening at http://127.0.0.1:5000"}

Test Routes

  • POST /gallery:

curl -F "upload=@/home/eagles/Pictures/birds/dove.jpg" http://127.0.0.1:5000/gallery | jq

// returns
{
  "message": "SUCCESS",
  "data": {
    "_id": "60868e60e056cb7cc322bf59",
    "filename": "fastify-gallery/o5dij0jjhvbmy9mudzim",
    "originalname": "dove.jpg",
    "url": "https://res.cloudinary.com/drquzbncy/image/upload/v1619431007/fastify-gallery/o5dij0jjhvbmy9mudzim.jpg",
    "__v": 0
  }
}

Note you should add more images for the React gallery.

  • GET /gallery:

curl http://127.0.0.1:5000/gallery | jq

// returns 
{
  "message": "SUCCESS",
  "data": [
    {
      "_id": "60868e60e056cb7cc322bf59",
      "filename": "fastify-gallery/o5dij0jjhvbmy9mudzim",
      "originalname": "dove.jpg",
      "url": "https://res.cloudinary.com/drquzbncy/image/upload/v1619431007/fastify-gallery/o5dij0jjhvbmy9mudzim.jpg",
      "__v": 0
    }
  ]
}

Consume API with React

App setup

To setup our React application follow the steps below:


# Boostrap app
npx create-react-app <!-- project name -->

# Change into project directory
cd <!-- project name -->

# Start
yarn start

Install dependencies

To install our app dependencies run the following code:


yarn add react-image-gallery axios

Add the Gallery and Error components

In the src directory, create a Gallery.js with the code below:


import 'react-image-gallery/styles/css/image-gallery.css';
import React, { useState, useEffect } from 'react';
import ImageGallery from 'react-image-gallery';
import axios from 'axios';
import ErrorMessage from './ErrorMessage';
const Gallery = () => {
    const [ images, setImages ] = useState(null);
    useEffect(() => {
        const fetchImages = async () => {
            const { data: { data } } = await axios.get('http://127.0.0.1:5000/gallery');
            if (data.length > 0) {
                setImages(
                    data.map((image) => ({
                        original: `${image.url}`,
                        thumbnail: `${image.url}`
                    }))
                );
            }
        };
        fetchImages();
    }, []);

    return images ? <ImageGallery lazyLoad={true} items={images} /> : <ErrorMessage message={'No Image found!'} />;
};
export default Gallery;

The Gallery.js component above fetches data from our backend — http://127.0.0.1:5000/gallery once our component mounts. Then it modifies this data to an array of objects containing two keys namely: original and thumbnail. This data structure is required by the react-image-gallery library we are using in this project.

Lastly, it displays the image gallery if there are images and an error message — using the ErrorMessage component if there are no images.

Next, create the ErrorMessage  component by creating an Error.js file with the code  below:


import React from 'react';
const ErrorMessage = ({ message }) => {
    return (
        <div>
            <h4>{message}</h4>
        </div>
    );
};
export default ErrorMessage;

This component simply takes a message prop and displays it

Finally update our App.js with the codes below:


import './App.css';
import Gallery from './components/Gallery';
function App() {
    return (
        <div className="App">
            <h2>Fastify Gallery</h2>
            <Gallery />
        </div>
    );
}
export default App;

Start app and enable cors

To start our app we run:


# Starts our app at localhost:3000
yarn start

Before we can successfully query our server we need to enable cors. To do  this we will use fastify-cors. Register the fastify-cors package as a plugin in our server — index.js:


...
// Rsegister plugins below
fastify.register(db, { uri });
fastify.register(cors, { origin: 'http://localhost:3000' });
...

also import the fastify-cors module:


...
const cors = require('fastify-cors');
const cloudinary = require('cloudinary').v2;
...

This configures the Access-Control-Allow-Origin CORS header to allow requests from localhost:3000.

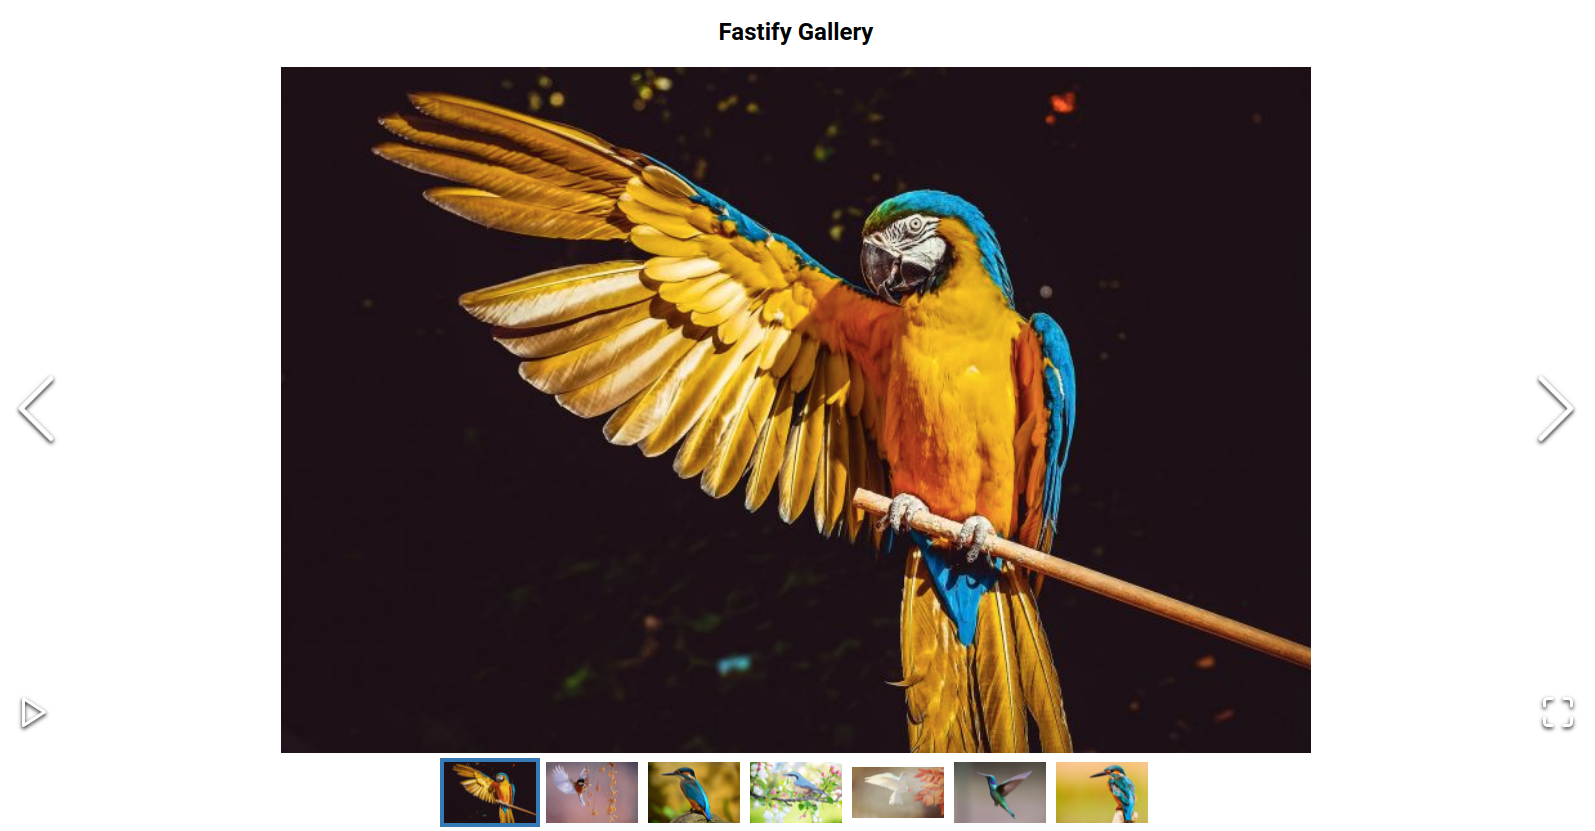
We can start our React server now and our final app looks like this — note your uploaded images would be displayed instead:

fastify gallery
fastify gallery

Conclusion

It is a real joy to work with Fastify. The developer experience is great and the plugin model is really cool. One great thing about Fastify is that it allows us to use express middlewares modules — which is a huge collection of matured modules.

In this article, we handled our image upload with fastify-multer which is a port of express multer middleware. Another alternative to multer is fastify multipart; a plugin to parse the multipart content-type.

Also, Fastify provides alternatives to the most commonly used middleware, such as fastify-helmet in case of helmet, fastify-cors for cors and fastify-static for serve-static.

Finally, I do hope that after this article, you are willing and ready to give Fastify a try in your next project.

Why not level up your reading with

Stay up-to-date with the latest developer news every time you open a new tab.

Read more