
.png)


If you had played around with your Sentry dashboard, you would have realized that Sentry is not only a cloud-based error logger but rather a fully-fledged solution for logging, maintaining, and managing issues.
Every developer has felt the frustration behind not being able to fix bugs. Even though there are several debugging tools out there to help you with the "fixing", you will only be fixing bugs you have encountered. The rest of the bugs will silently exist until that one customer follows that specific action flow that triggers the bug and makes your system go haywire.
The Testing phase is implemented as a standard procedure in any software development life cycle. This phase includes unit testing, system testing, integrated testing, end-to-end testing, etc. But there is always a chance of you missing a bug and proceeding into production. Remember the worldwide CDN outage at Fastly? Even after deployment, you will be unaware of any residing bugs without anyone informing you about them (unless your whole system crashes). An end-user will rarely report a bug via the support email provided — crash reporting. This is where Sentry comes into play.
Sentry provides self-hosted and cloud-based error monitoring that helps all software teams discover, triage, and prioritize errors in real-time.
Cloud-based error logging systems like Sentry.io, help you record instances of errors, even after deployment. And since it’s cloud-based, you get all the benefits associated with the cloud. This will help you debug errors faster and you will find which errors are causing the most number of problems and debug what's essential.
Fastify is one of the fastest Node js web frameworks out there. It was inspired by Express and Hapi but outperforms them when it comes to speed. Fastify is also open-sourced and focused on providing a better experience to developers with lower overhead.
In this article, we will be looking at how to integrate Sentry with our Fastify server. We will build a minimal server that uses the Official Joke API created by David Katz to send some random jokes to the user.
Prerequisite
- Node.js installed and setup
- Basic working knowledge of JavaScript
- Basic knowledge of errors and types
Initial Setup
Account Creation & Project Creation
Before building the application, we need to create a Node js project on Sentry.
- Login to Sentry (If you do not have an account, you can easily create one)
- Create a Node JS project
- Once you have created your project successfully, you will see a Configure page which will contain two code snippets. You do not need to worry about the code at the moment as I will be explaining it down below. What you should focus on is the DSN value within the Sentry.init function.
Make sure to take note of your DSN as we will be needing this value to configure our SDK.
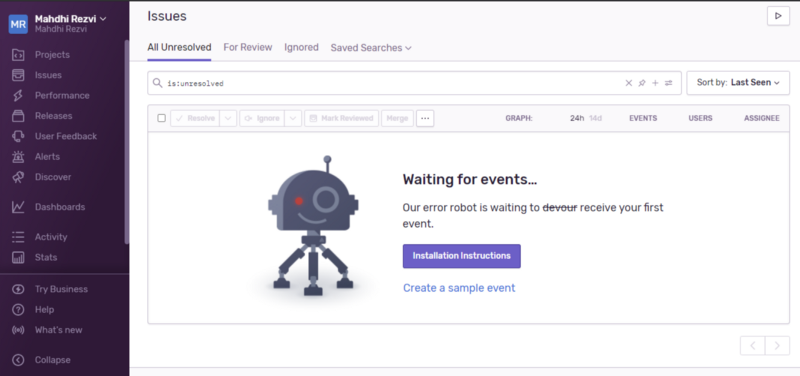
Now you can click on the “Take me to Issues” button to go to your Issues Dashboard.
We created a node js project as Sentry does not straightaway support Fastify.
Getting Started
Installing the necessary dependencies
Before we get started, we need to get all the necessary dependencies installed. I will use NPM. Alternatively, you can use yarn as well. We will also need to create our project application.
Getting to know our packages
Before diving in, we should understand what task each of the packages that we installed the above step is responsible for.
- Axios — a promise-based HTTP client for node
- Dotenv — a library that helps you load environment variables from a .env file into process.env . We will be using this library to load our DSN value as it is a piece of sensitive information.
- Fastify — a web framework for node
- Sentry/node — the official Sentry SDK for Node
Setting up the server skeleton for Fastify
As we are thorough with the prerequisites and packages used in this tutorial, it’s time to get our hands dirty with some code. We will first build a basic Fastify server and make sure it runs without any errors. Once that's successfully completed, we can move onto the actual integration and error handling part.
- Create a server.js file with the basic server skeleton
- Modify the package.json file
- Run npm start in your terminal and make sure there are no errors
Building our application
Accessing your Sentry DSN with env
- Create a .env file in your root directory. This is where we will be storing our sensitive credentials.
- Add the below contents to the .env file. Make sure to replace the DSN with your Sentry DSN value.
Load the variables onto env. Make sure to type the code below the comment // Rest of the code here
Integrating Sentry SDK
To integrate the Sentry SDK, simply add the following code snippet below your dotenv.config(). It is essential that the DSN value has been loaded into env before we initialize the SDK.
Adding the error handler
Once we have initialized the Sentry SDK, we can start handling and logging errors to Sentry. We will try a simple solution to see whether our Sentry dashboard is functioning.
Let's add a try-catch statement to catch a Reference error and handle it by sending the error to Sentry.
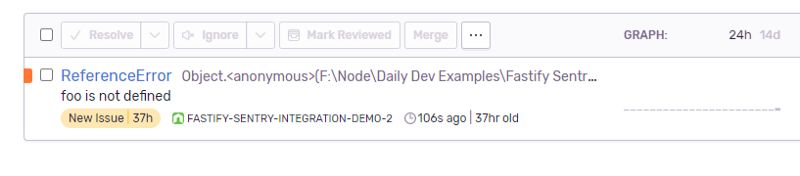
If you have everything set up successfully, you will receive the following notification in your dashboard.
But this method of error handling is not a good practice as you will have to include try-catch blocks for various parts of your code. To make things easier, Fastify provides us with a setErrorHandler method. This error handler will be triggered whenever an error happens. The handler is fully encapsulated, so different plugins can set different error handlers.
Let's remove the try-catch statement and insert our custom error handler.
Our custom error handler logs the error locally and sends the error to Sentry to be logged in the cloud as well. We also send a 500 error code to the user notifying them that something went wrong on our end.
Creating our utility function
In this step, we create a module to retrieve jokes from the Joke API. This module will be later integrated into our routes.
- Create a file under utils/get-joke.js
We simply export the getRandomJoke function from our module.
Setting up our routes
In this step, we will be creating our API endpoints which will be accessible to our users. We will set up a default endpoint to provide overall information about our API. We will also include endpoints to receive jokes.
- Create a file under routes/default-route.js
If you note the above code snippet, the /joke-with-error endpoint calls an unreferenced foo function which would throw an error. If our application functions as expected, this Reference error should be caught and handled by our error handler.
- Register the routes in our server.js file
Finalizing our application
Your server.js file would look somewhat like this.
Testing our application
As we have completed all the necessary coding for our application, let's test our application by visiting the different endpoints and seeing the behavior.
- Start the server
- Hitting our root endpoint

That is great. Our root endpoint is working.
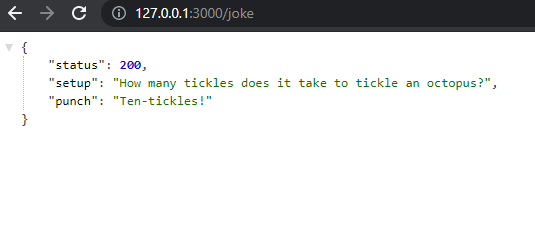
- Hitting our /joke endpoint
- Hitting our /joke-with-error endpoint to trigger an error.
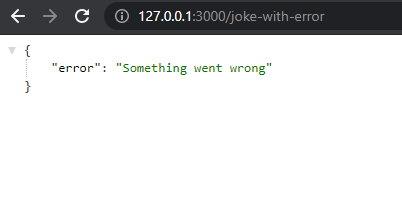
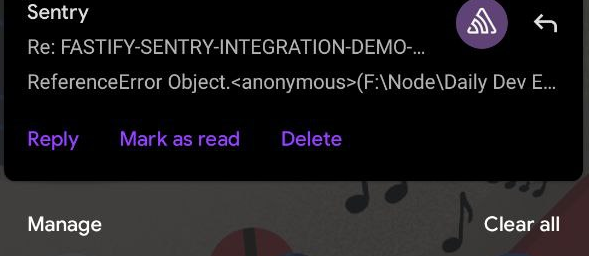
And guess what, as soon as the error was sent to Sentry, I got an email notifying me about the error. These push notifications can of course be customized.
And if we have a look at our Sentry dashboard, we should see our error.

That's perfect as well. The labeling might be different for you as I have run into these errors several times during the development of this tutorial.
Conclusion
If you had played around with your Sentry dashboard, you would have realized that Sentry is not only a cloud-based error logger but rather a fully-fledged solution for logging, maintaining, and managing issues.
You can access the GitHub source code repository over here.


