
RedwoodJS is a full-stack React app, this means that the front-end and the back-end are all handled in one place. The frontend is a React app that can be deployed to the cloud or CDNs. The back-end is a GraphQL API that can be hosted anywhere and can be called from external or internal services.
RedwoodJS
RedwoodJS is a shiny new full-stack React framework started by Tom Preston (co-founder of GitHub). The framework boasts of many unique features:
- Cells.
- advanced Routing system.
- Services.
- CLI Generators.
- Automatic page-based code-split components
RedwoodJS is a full-stack React app, this means that the front-end and the back-end are all handled in one place. The frontend is a React app that can be deployed to the cloud or CDNs. The back-end is a GraphQL API that can be hosted anywhere and can be called from external or internal service.
RedwoodJS uses Prisma for data modeling, database connection, queries, and migrations. We write our model in a schema file, and the model is replicated in the database. Also, we are provided with a Prisma instance so we can make queries to the database.
I know you must be thinking that we write SQL commands and queries here. But no, Prisma will do all the heavy lifting, we won't have to write any SQL commands. Prisma exposes methods/functions that we use to create, insert, edit and delete records from the database tables. The SQL commands are generated and run by Prisma, that's awesome :) isn't it?
So don't worry if you aren't too good with SQL, Prisma has got your back.
Before we can use RedwoodJS generators we need to have the following binaries installed in our system.
Requirements
- Node.js: Since RedwoodJS is Node.js based, we need the Node.js binary installed in our machine. Go to Node.js downloads page to download the binary suitable for your machine and OS.
- NPM: This is a Node.js package manager, you don't need to install it, it comes bundled with the Node.js binary.
Scaffolding a RedwoodJS project
A RedwoodJS project can be created by running the below command:
yarn create redwood-app redwoodprj

npx create-redwood-app redwoodprj
The above command will create a RedwoodJS project in a redwoodprj folder
The default database of a RedwoodJS application is SQLite. This means that the content of our GraphQL API endpoints is stored in an SQLite database. SQLite is a relational database management system contained in a C library.
To verify this go to the api/db folder in the redwoodprj folder. Open the schema.prisma file:
datasource db {
  provider = "sqlite"
  url      = env("DATABASE_URL")
}

generator client {
  provider      = "prisma-client-js"
  binaryTargets = "native"
}

// Define your own datamodels here and run `yarn redwood prisma migrate dev`
// to create migrations for them and apply to your dev DB.
// TODO: Please remove the following example:
model UserExample {
  id    Int     @id @default(autoincrement())
  email String  @unique
  name  String?
}
See the datasource db object, this is where the database configurations are set and the configuration determines how RedwoodJS uses Prisma to connect to our database. The provider specifies the data source connector to use, here it is set to sqlite, this is because we are using an SQLite database.
The url points to the database connection URL of the database. Let's see the value of the env variable DATABASE_URL.
DATABASE_URL=file:./dev.db
It is a file path pointing to an SQLite database file. When you run your first migrations this dev.db file will be created in the db folder.
This datasource db object is where we can set our RedwoodJS to use different databases. Prisma majorly supports SQL databases like MySQL, PostgreSQL, MS SQL, SQL Server, SQLite, but recently Prisma is beginning to support NoSQL databases, MongoDB.
So this datasource object is where we can set the PostgreSQL database in a RedwoodJS app. Before we do that we have to download, install and start a PostgreSQL server in our machine.
We will learn how to do all that in the below sections.
Postgres DB setup
PostgreSQL is a relational database management system that extends the SQL standards with great upgrades, it was first released on 8 July 1996. PostgreSQL or commonly known as Postgres is an advanced version of SQL that provides more features to SQL. It provides functions to SQL like triggers, subqueries, and user-defined types and functions. Postgres is definitely more refined than other RDBMS.
To download the Postgres binary head over to its downloads page, there you can select and download the packages and installers for your OS.
You can peep into the source code here if you are feeling like a Rockstar. Also, you can find Postgres documentation here.
I listed each OS installers page below:
Now, install the downloaded package and start the server. During the installation of the PostgreSQL binary, make sure to write out the below details:
- The port number, is usually 5432 but make sure to write out if it changes.
- The database username.
- The database host name (it is usually localhost).
- The database name.
Configuring PostgreSQL in RedwoodJS
We have successfully installed and started our PostgreSQL database server. Now we will learn how to configure a RedwoodJS app to use a PostgreSQL database.
To configure the Postgres database in our app, we will go to the DATABASE_URL env variable in .env.defaults in the root of our project.
DATABASE_URL=file:./dev.db
There we will change its present value to the connection URL of our newly installed Postgres DB. Here is an example of a Postgres connection URL:
postgresql://USER:PASSWORD@HOST:PORT/DATABASE
- USER is the name of the database user.
- PASSWORD is the password of the database user.
- HOST is the domain name or IP address of the Postgres database server.
- PORT is the port number of the database server.
- DATABASE is the name of the database to use.
My db connection URL is postgresql://postgres:0000@localhost:5432/mydb, so I will add it to DATABASE_URL as its value in the .env.defaults:
DATABASE_URL=postgresql://postgres:0000@localhost:5432/mydb
Now, we move back to the schema.prisma file and add postgres to the provider in the datasource db object.
datasource db {
  provider = "postgresql"
  url      = env("DATABASE_URL")
}
Prisma will use its internal Postgres connector for connecting and accessing our Postgres database. With this, we have fully and successfully configured our RedwoodJS app to use our Postgres database. The app will store and retrieve from a Postgres database, Prisma will do the work for us.
We will build a quick RedwoodJS app to see how our data will be stored in our Postgres database. Amazingly, RedwoodJS generate a full website with its look and feel, it will generate everything; the pages, all GraphQL actions (Create/Read/Update/Delete), and schemas.
This generator provides us with a bunch of quick pages we can use to verify that we've got the right fields in the Postgres database. We already have a RedwoodJS project redwoodprj, we will continue from that. We will build an inventory app, like we said the styling and the pages will be done by RedwoodJS. We need to create a database inventoryStore in our Postgres.
Note: Whenever a database in a RedwoodJS is changed to a new database, we need to delete the migrations folder under the api/db folder. This enables RedwoodJS to create new migrations and apply them to the new database.
Create a database in Postgres
Make sure the Postgres database server is running. Open the pgAdmin 4 tool installed along with your Postgres database.
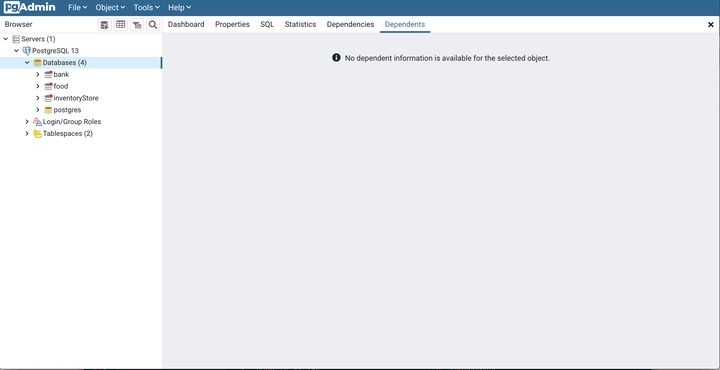
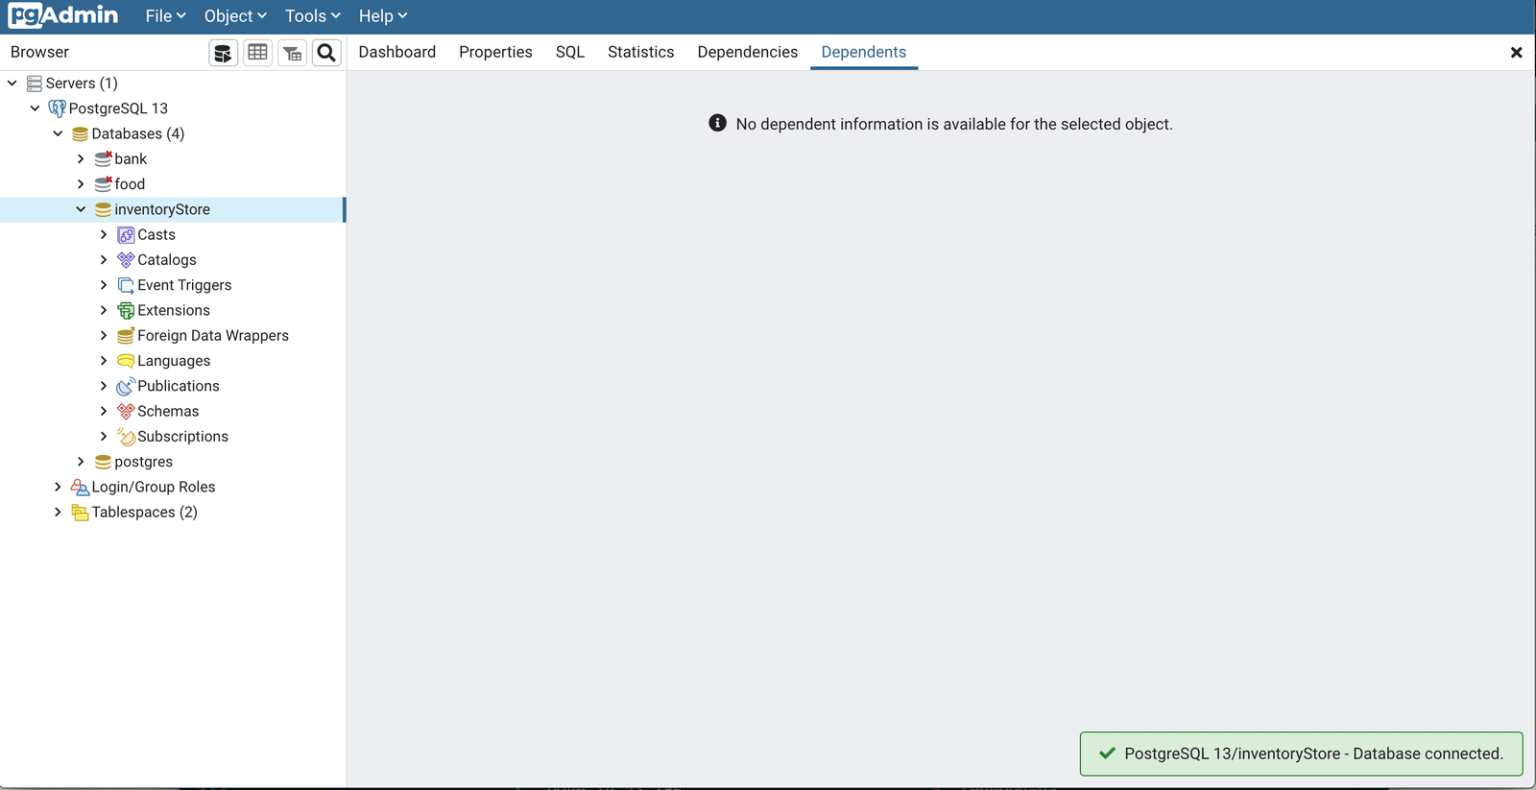
Create the inventoryStore database like below:
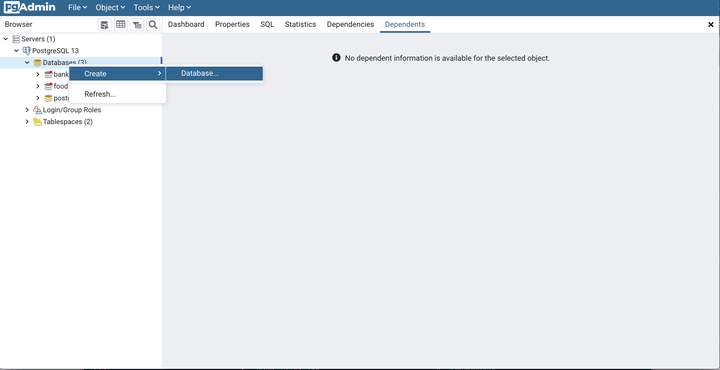
- Creating the inventoryStore database

- Creating the inventoryStore database
- Creating the inventoryStore database
- Creating the inventoryStore database
Now, the database is running. We will edit the .env.defaults like this:
DATABASE_URL=postgresql://postgres:0000@localhost:5432/inventoryStore?schema=public
We don't need to touch our schema.prisma because it is already set:
datasource db {
  provider = "postgresql"
  url      = env("DATABASE_URL")
}
Delete the migrations folder under the api/db folder. Then, run yarn rw prisma migrate dev to create and apply the model into our new database.
We are done with the inventoryStore database configuration. Now, let's create the model.
Building model
Add the below code to the schema.prisma file:
model Inventory {
  id    Int     @id @default(autoincrement())
  name  String
  quantity Int
}
The id field is the unique identifier of an inventory item, it is auto-incremented so we won't be concerned with it. The name is the name of an item in the inventory. E.g pack of Beer cups. The quantity is the quantity of the item in the inventory.
Let’s run the migrations to apply our recent changes:
yarn rw prisma migrate dev
A prompt will appear in the terminal to input the name of the migration, type in added_inventory, and hit Enter.
Building the frontend and backend
Let's generate everything we will need for the Inventory schema model. Run the below command:
yarn rw g scaffold inventory
This command will generate Pages, SDL, and Services files based on the Inventory DB schema Model. All the files are necessary to perform all CRUD actions on our inventory table.
The command created the following files:
- ./api/src/graphql/inventories.sdl.js: This contains the GraphQL schema definitions for the Inventory model.
- ./api/src/services/inventories/inventories.js: This is a services file that contains the GraphQL query and mutation resolver functions. The resolver functions are implementations of the GraphQL schema definitions for the Inventory model, they use the Prisma client to add/modify data in the database.
- ./web/src/layouts/InventoriesLayout/InventoriesLayout.js: This is a presentational component where common elements that will appear in all the pages are kept. This holds the Header of our application and a "New Inventory" button, these elements will appear on all pages.
- ./web/src/pages/Inventory/EditInventoryPage/EditInventoryPage.js: This file contains a page component where an inventory item is edited.
- ./web/src/pages/Inventory/InventoryPage/InventoryPage.js: This file is a page component where the details of an inventory item are displayed.
- ./web/src/pages/Inventory/InventoriesPage/InventoriesPage.js: This file contains a page component where all the inventories are displayed.
- ./web/src/pages/Inventory/NewInventoryPage/NewInventoryPage.js: This file contains a page component where new inventories are created.
- ./web/src/components/Inventory/EditInventoryCell/EditInventoryCell.js: This file contains a Cell component. This Cell component gets the inventory item to edit from the database.
- ./web/src/components/Inventory/Inventory/Inventory.js: This file contains a component that displays an inventory item. This component is rendered by InventoryCell to display the inventory item it has retrieved from the database.
- ./web/src/components/Inventory/InventoryCell/InventoryCell.js: This file contains a Cell component, this component is used to retrieve an inventory item to display.
- ./web/src/components/Inventory/InventoryForm/InventoryForm.js: This file contains a component that displays a form used to both create or edit an inventory item.
- ./web/src/components/Inventory/Inventories/Inventories.js: This file contains a component that renders all the inventories in the database.
- ./web/src/components/Inventory/InventoriesCell/InventoriesCell.js: This file contains a Cell component that retrieves all the inventories in the database.
- ./web/src/components/Inventory/NewInventory/NewInventory.js: This is file contains a component with a form. This form is used to create new inventory.
Our app is set. Now start the RedwoodJS server:
yarn rw dev
Navigate to http://localhost:8910/inventories in your browser.
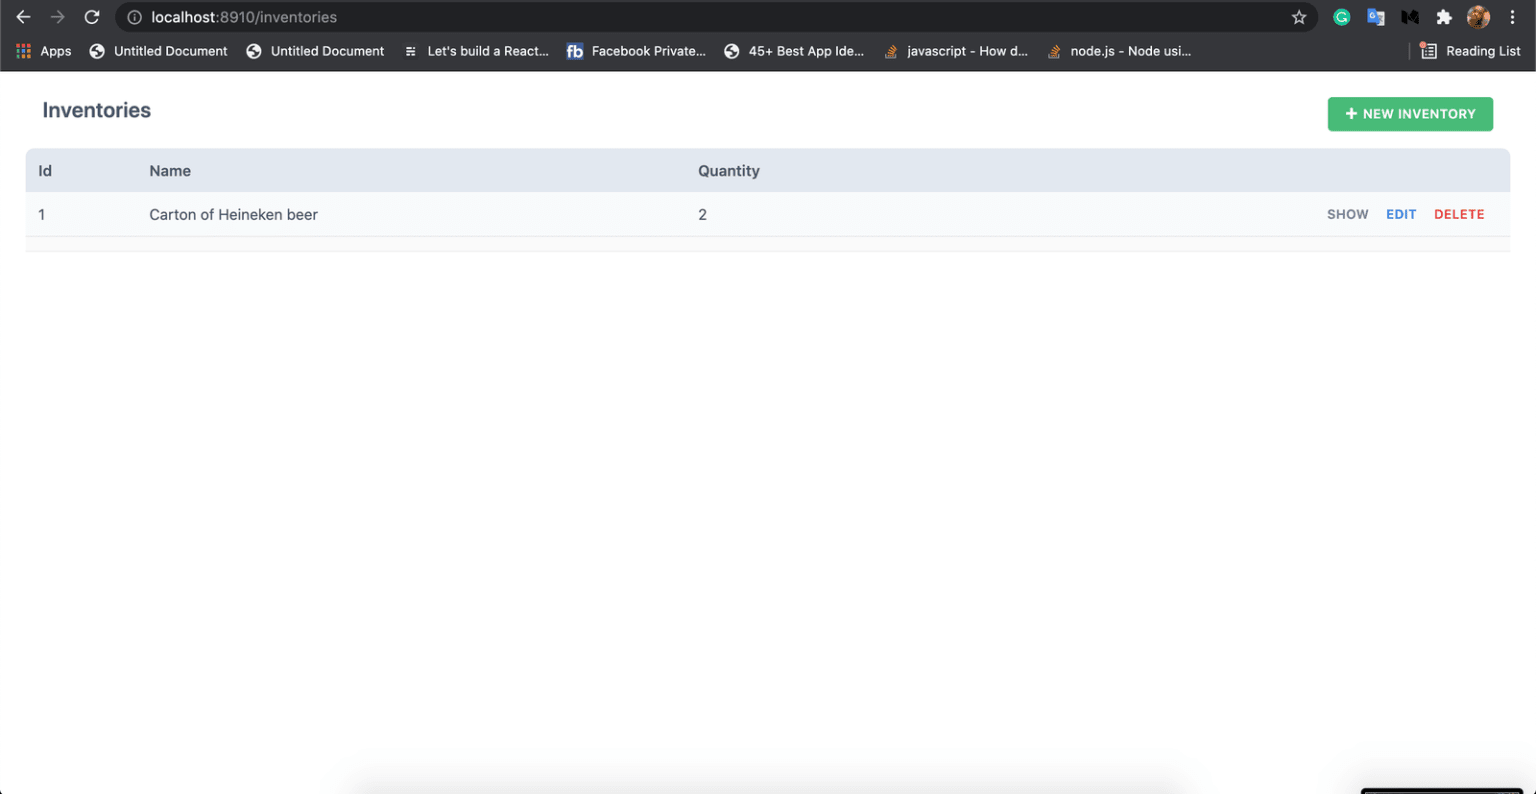
The below page will appear:
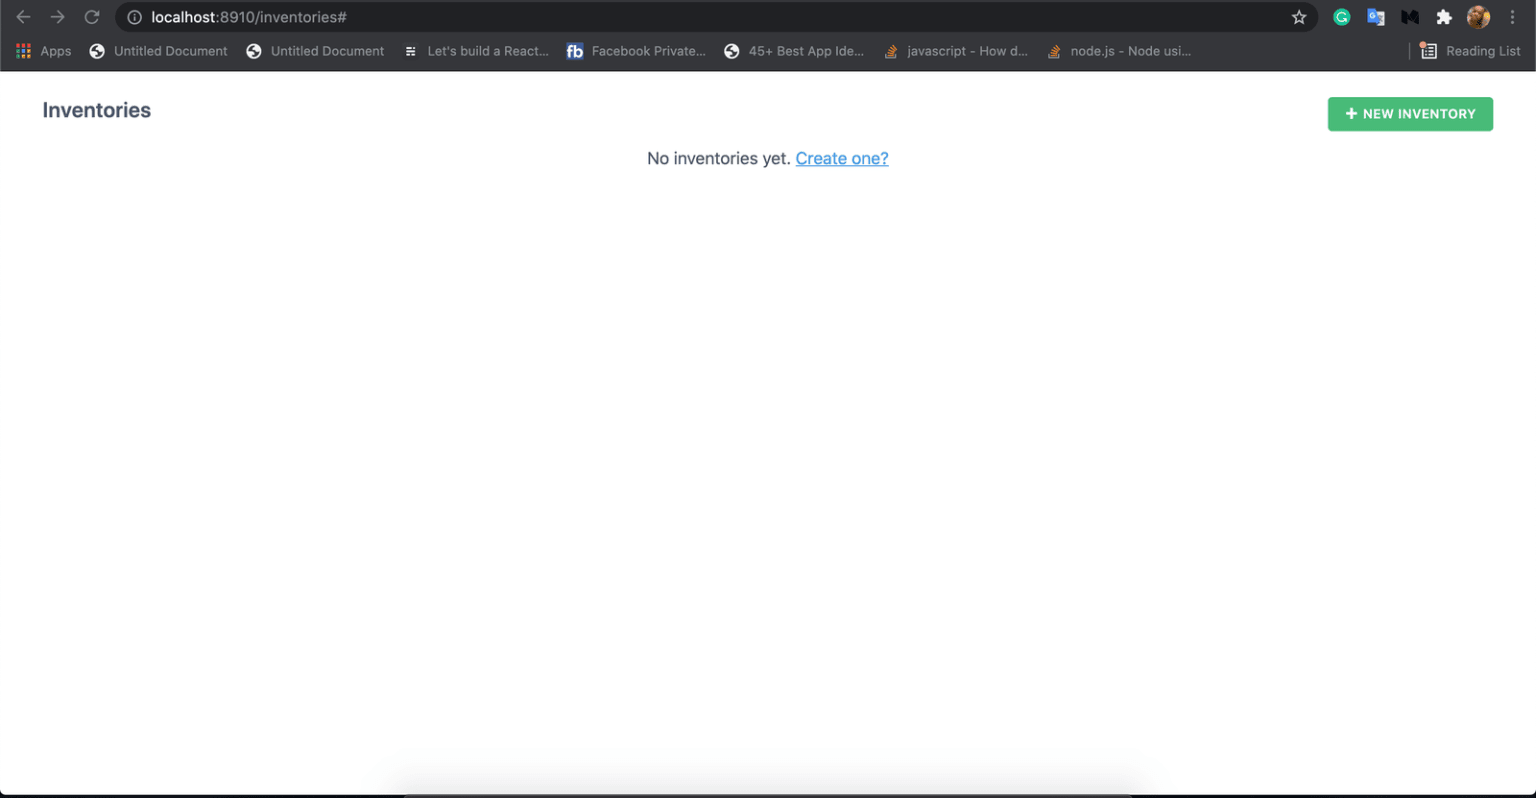
Inventory initial page without data
Now whatever inventory we add will be stored in our Postgres database.
Test app
Create an inventory
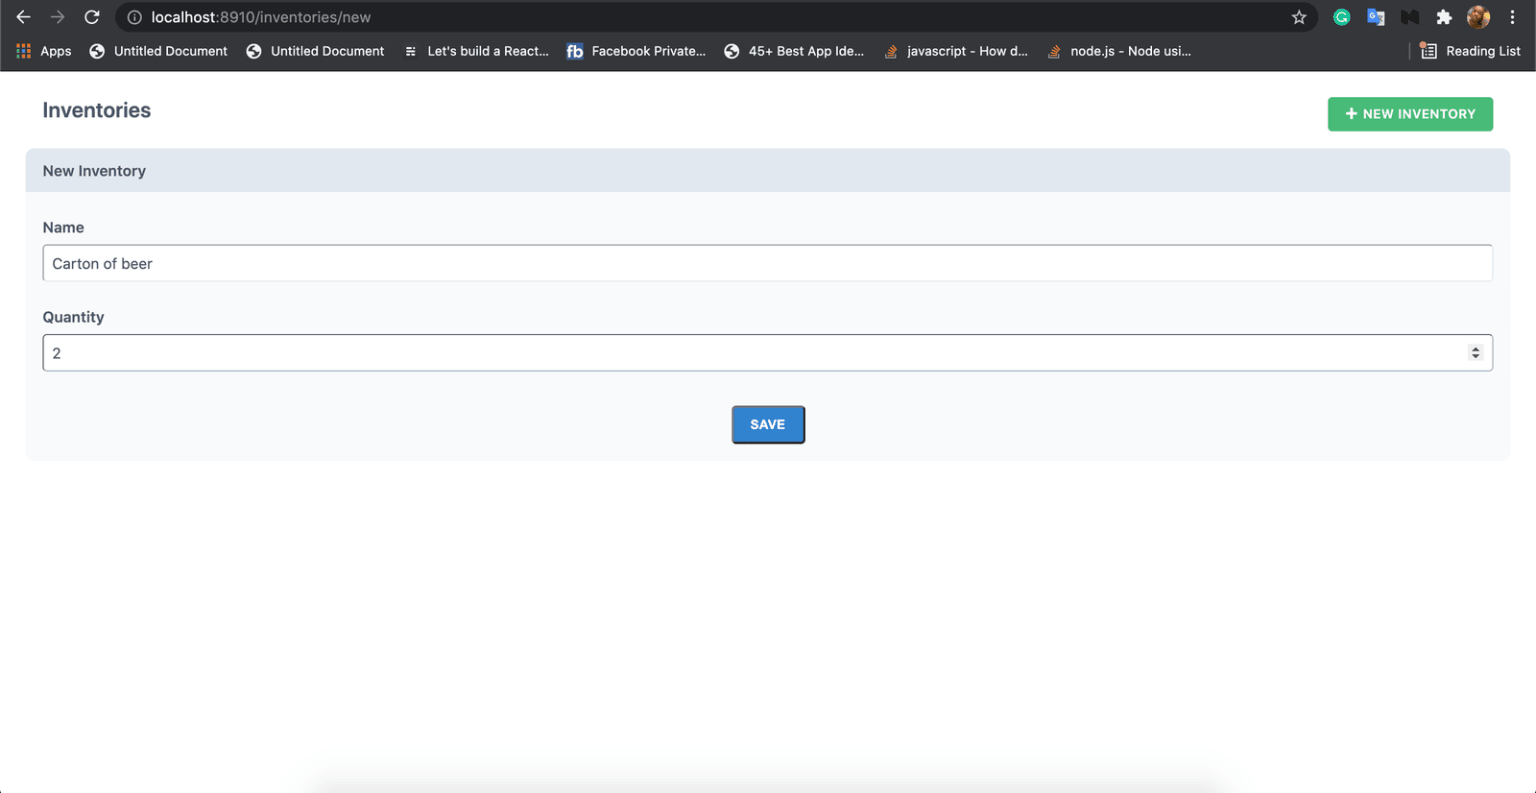
Create an inventory item
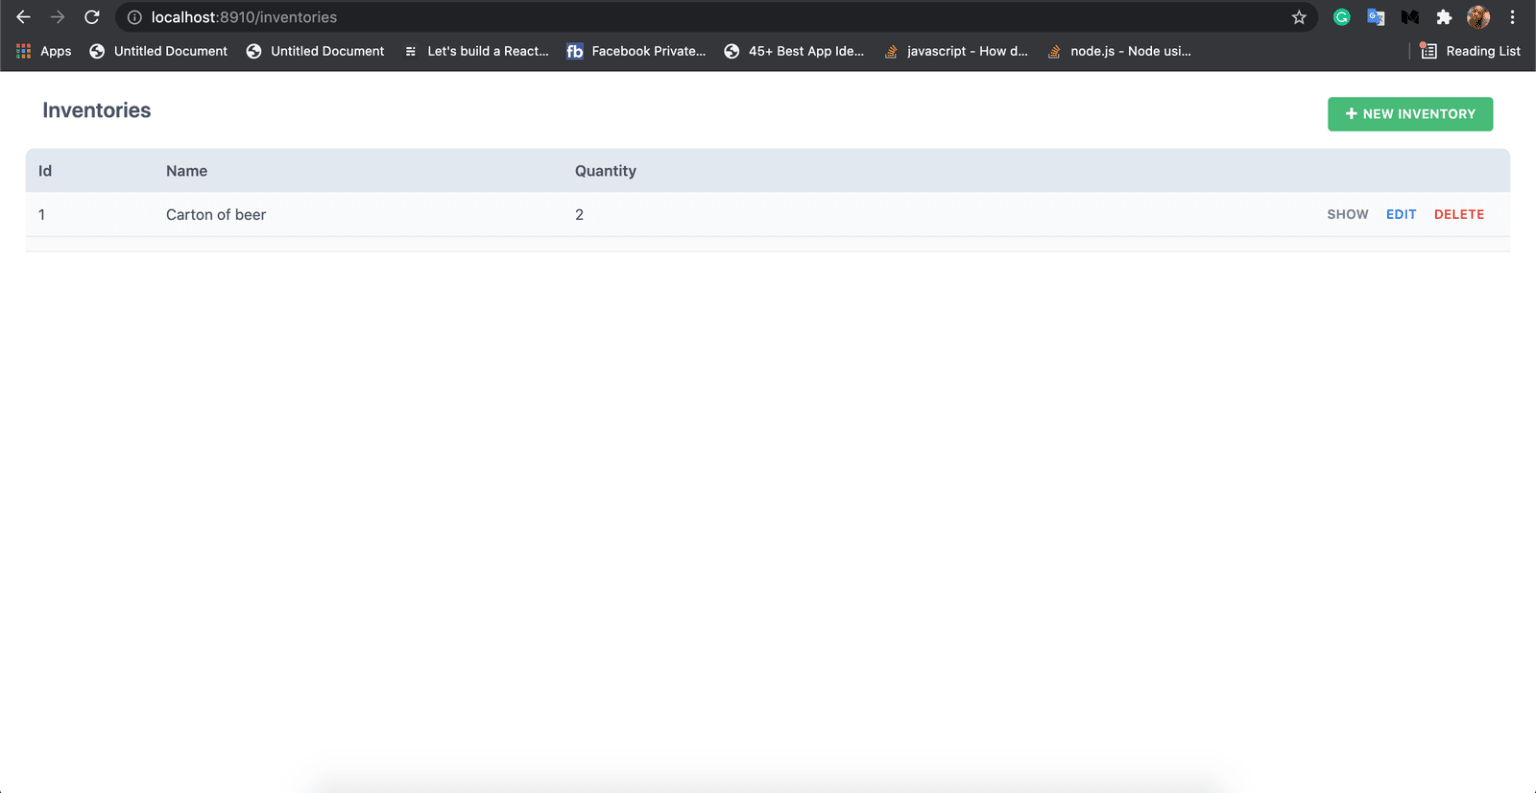
Viewing inventories with the newly created inventory item
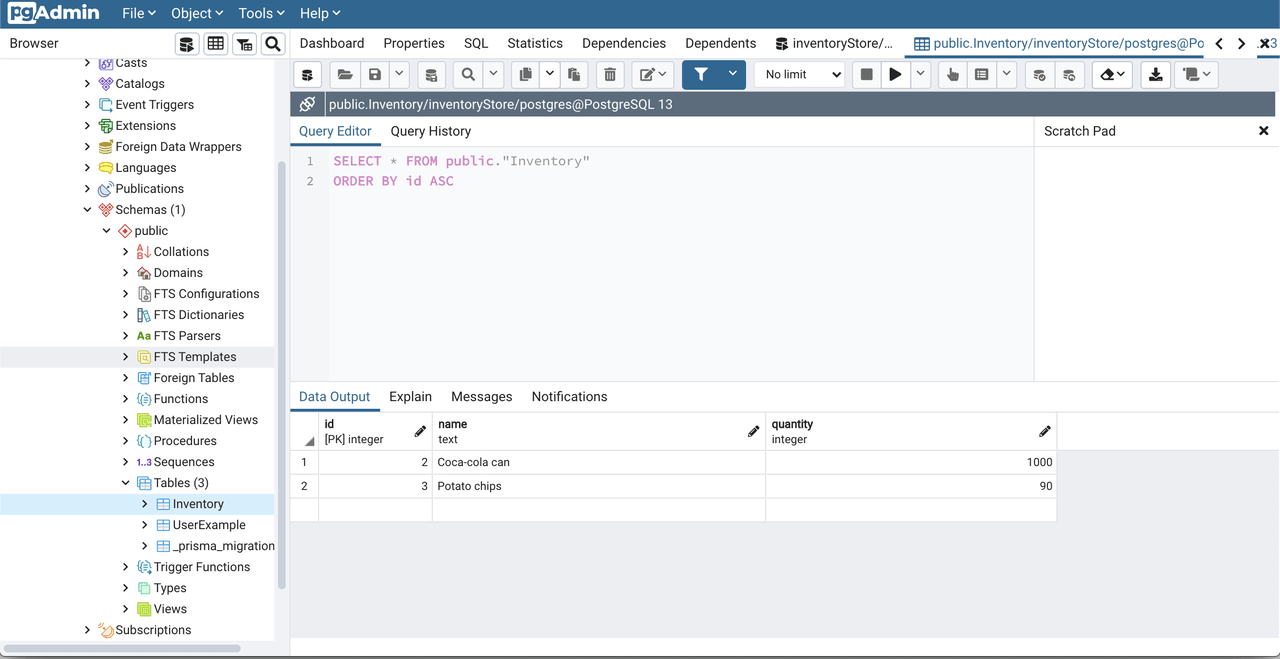
Also, in our Postgres database, we see the entry.
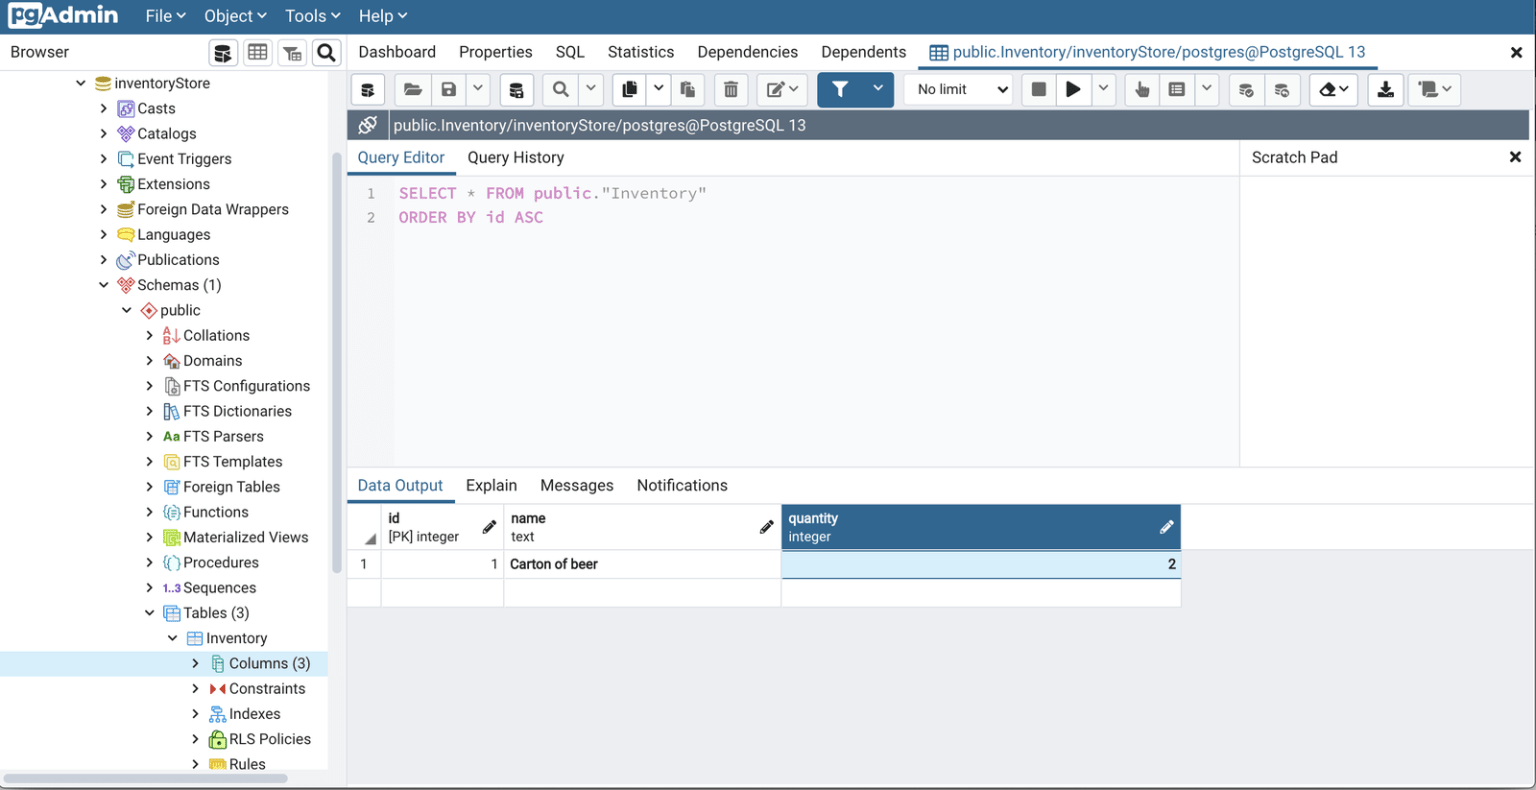
inventoryStore on Postgres
View an inventory
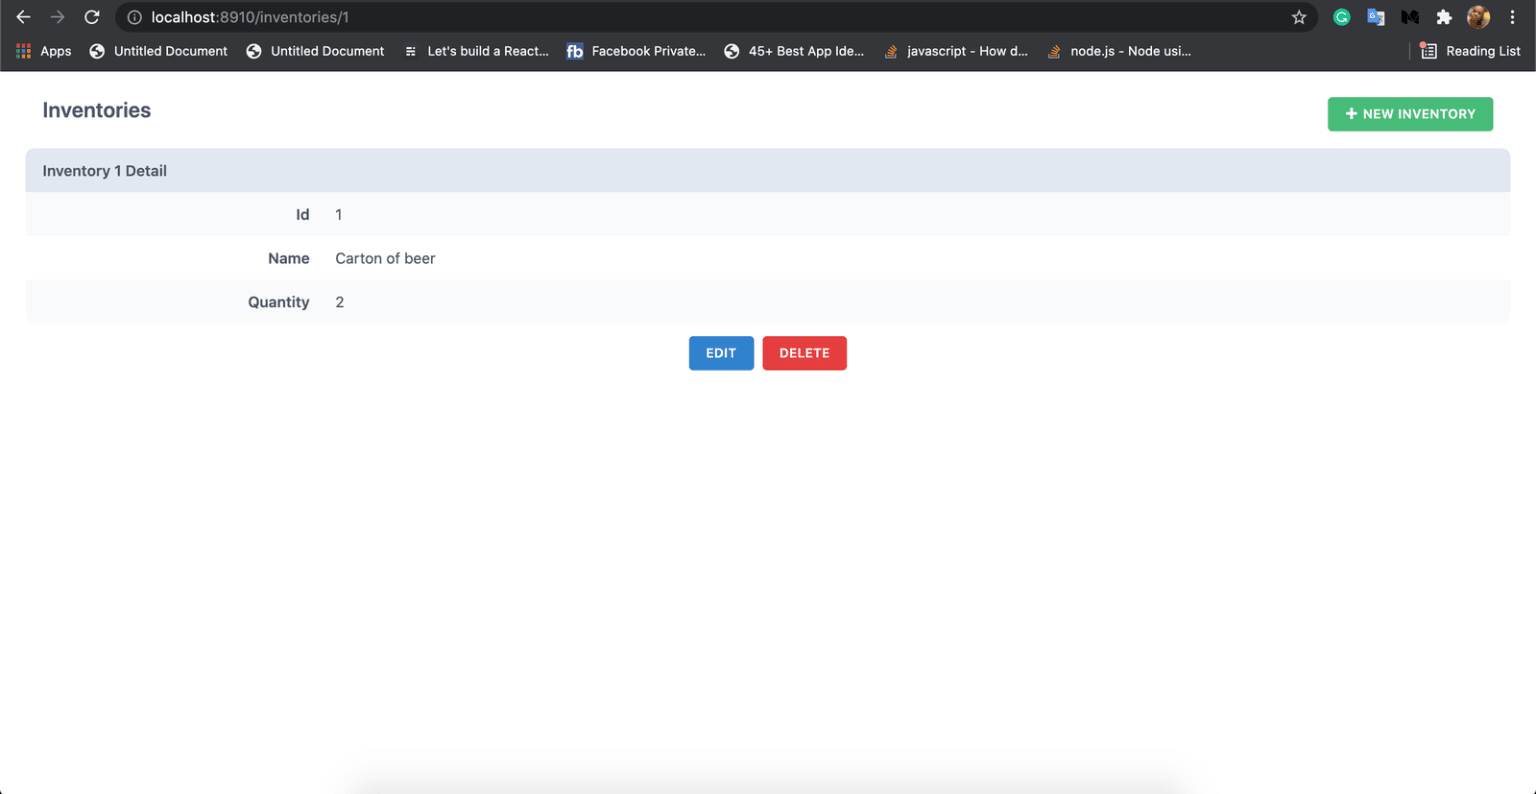
View an inventory item
Edit inventory

- Edit an inventory

- Edit an inventory
Viewing inventories with the edited inventory item
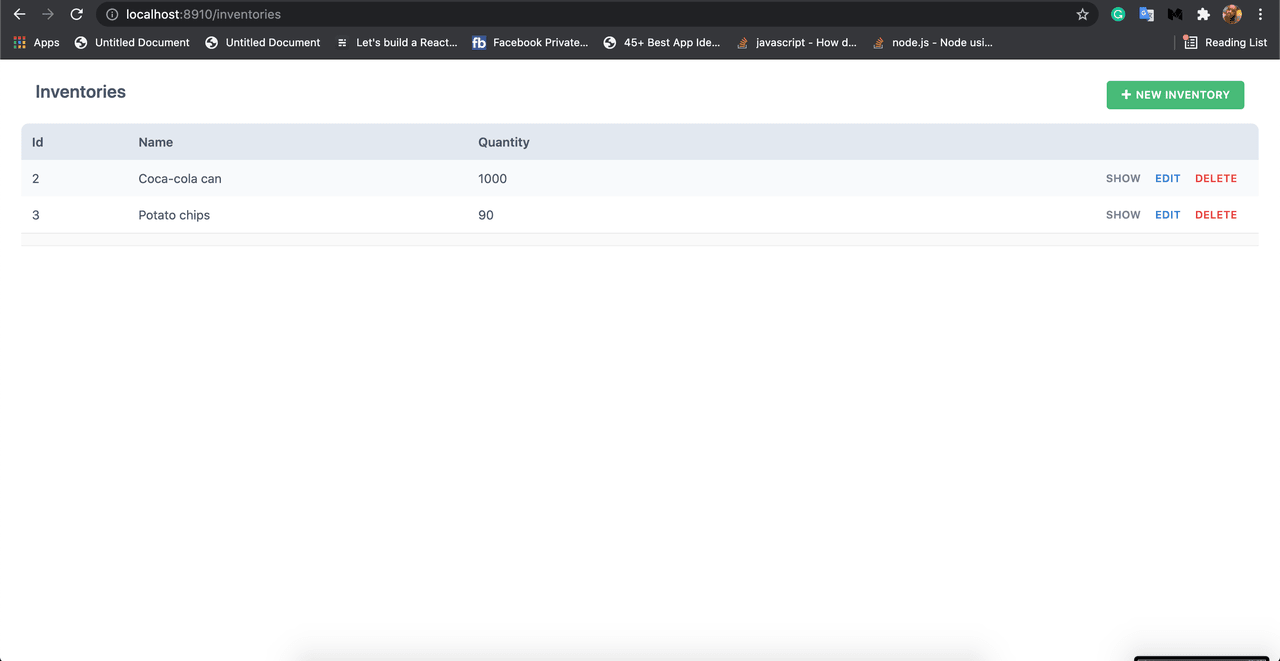
View inventories
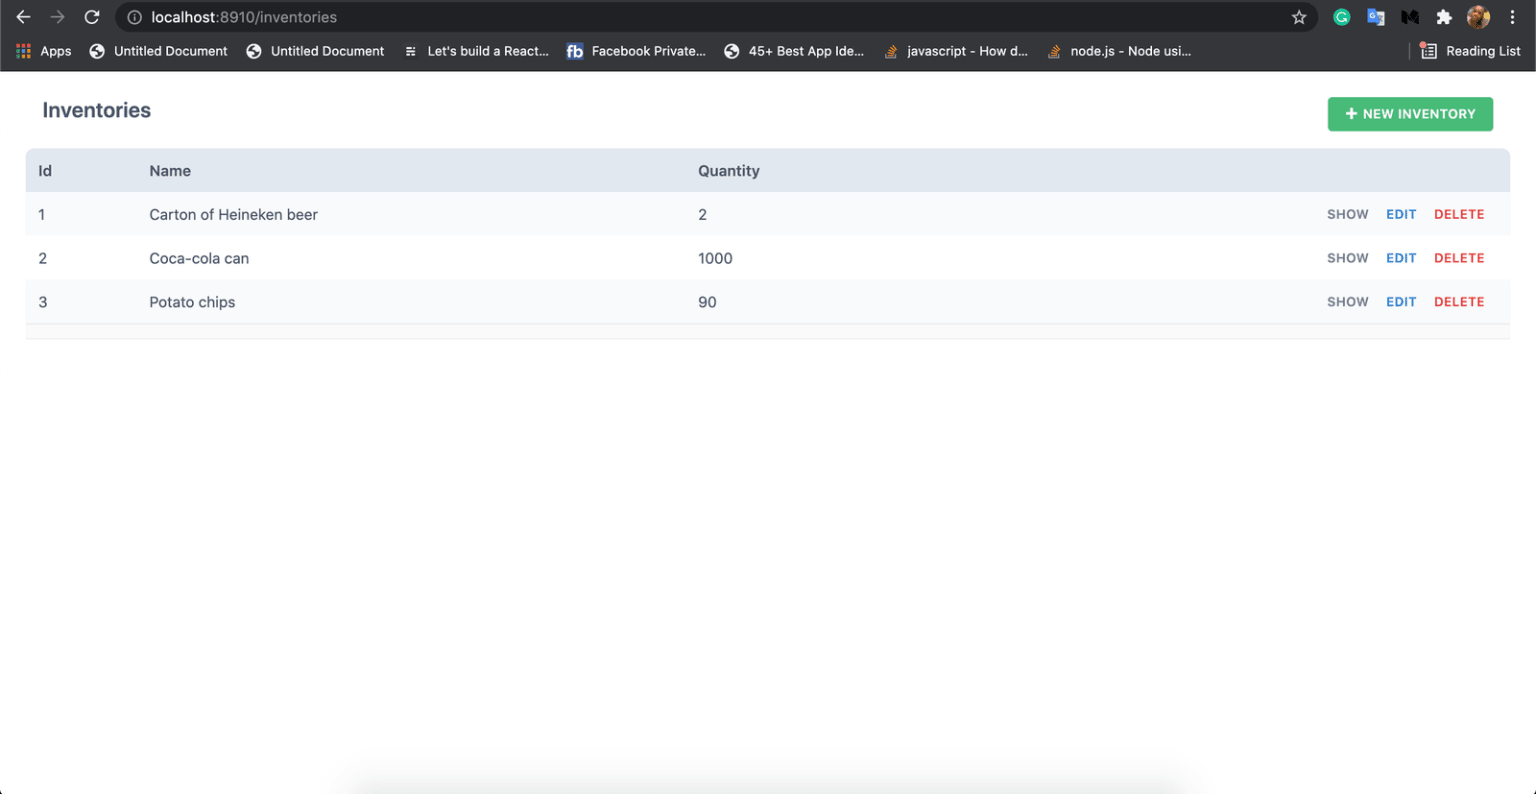
View all inventories
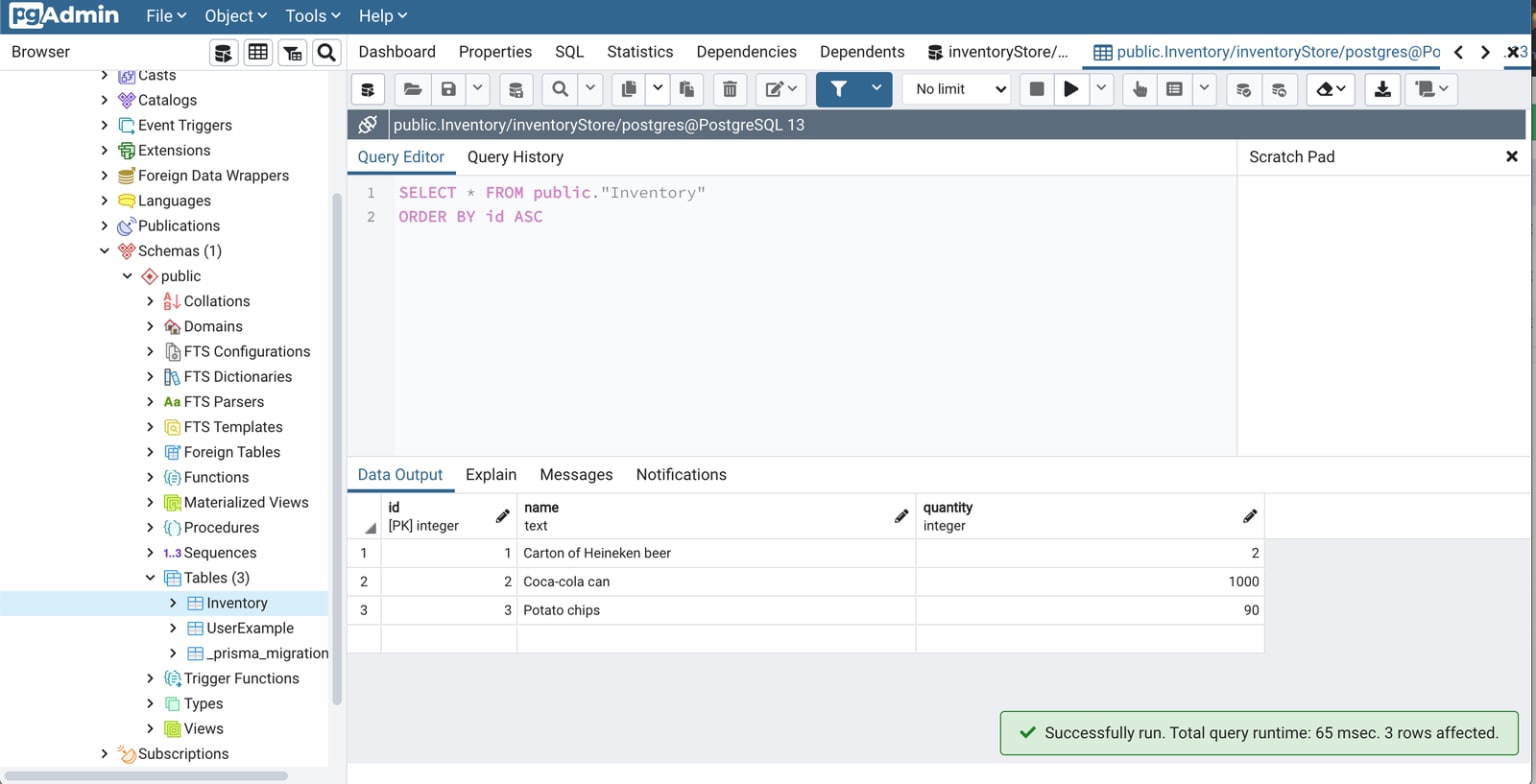
Inventories in the Postgres DB
Delete an inventory
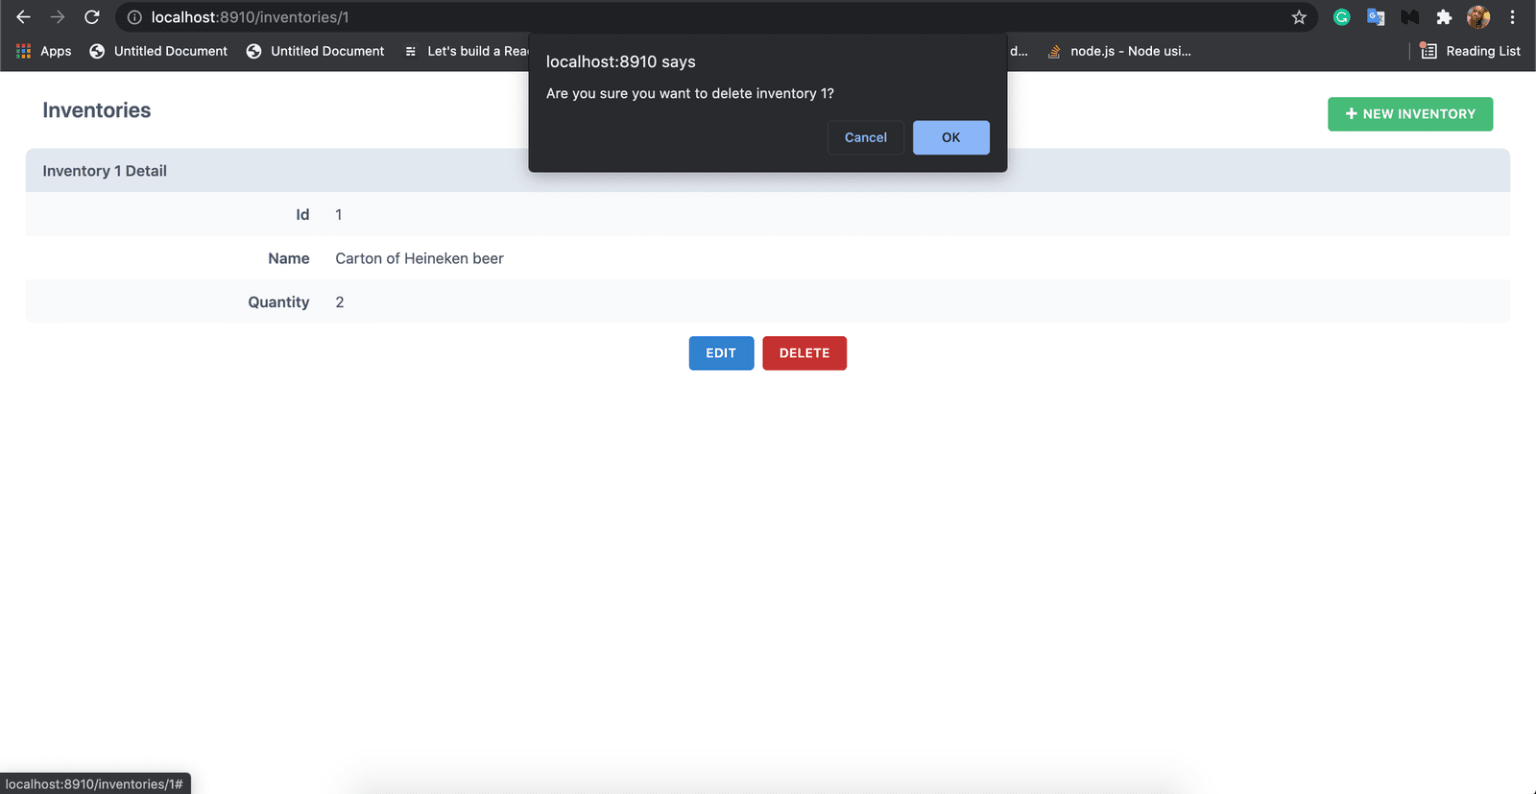
Deleting an inventory
Viewing inventories without the deleted inventory item
Postgres inventoryStore without the deleted inventory item
Conclusion
We learned a lot in this tutorial, we started by introducing RedwoodJS, listing out the goodies it brings to web development. Next, we learned how to scaffold a RedwoodJS project, and we looked at the database configuration. We learned the configurations in the schema.prisma file and also learned how to configure the database to use the PostgreSQL database.
Lastly, we tested the PostgreSQL configuration by scaffolding an Inventory app using RedwoodJS generators, we saw that the inventories being created and modified were actually stored in our PostgreSQL database.