.png)


Vue DevTools make developers' lives much easier by allowing them to monitor and edit component data, handle routing, time-traveling through states, performance monitoring, etc. during the dev life cycle.
Vue.js DevTools is one of the biggest highlights in the Vue ecosystem. Its unique features like time traveling through states allow developers to debug Vue applications in no time. As a Vue.js developer, knowing how to use DevTools features would make your work a lot easier.
So, this article will show you the different ways to install Vue.js DevTools and how you can use their features to make your development process more efficient.
Getting Started With Vue.js DevTools
Vue.js DevTools is available in 3 forms: Chrome extension, Firefox extension, and standalone application (Electron application). You can download the most suitable DevTool based on your development environment.
For example, if you use Google Chrome for your development purposes, you can go with the Chrome extension. If you don’t use Chrome or Firefox, you can install the standalone version.
So, let’s see how to install Vue.js DevTools.
Chrome Extension
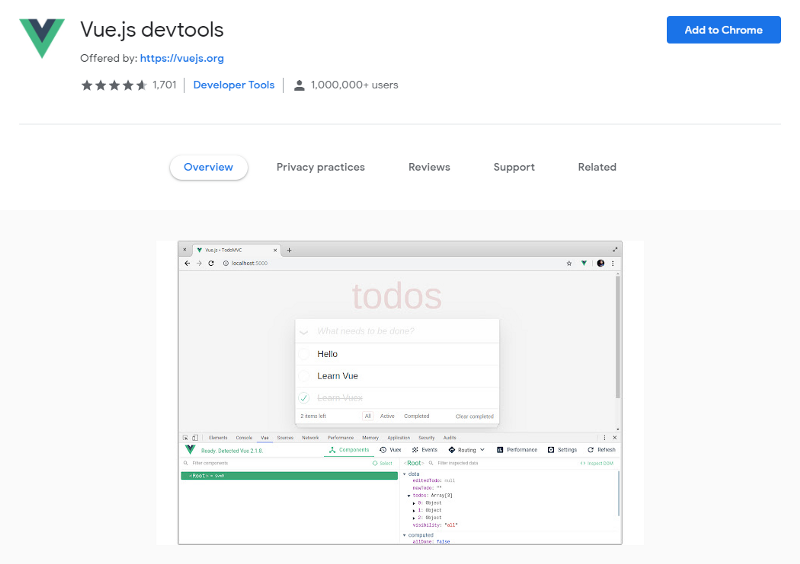
To install the Chrome extension, you can visit the Chrome web store and add the extension to your browser.

Firefox Extension

Similar to Chrome, you can visit the Firefox extension store and install the Vue.js DevTools extension to your browser.
Standalone Version
If you prefer the standalone version, you can install Vue.js DevTools globally or locally using NPM or Yarn.
Once the installation completes, you can start DevTools using vue-devtools command, and you will see a window like below.
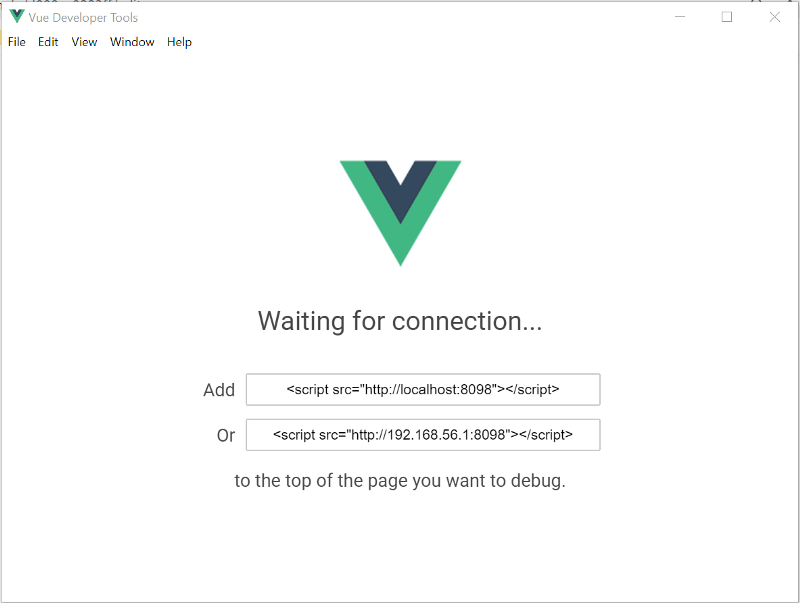
Then you can link DevTools into your Vue.js application. Here you need to copy the script and paste it on top of the page you debug. Then, wait a few seconds until the DevTools application reloads.
These versions of Vue.js DevTools are still not fully upgraded for Vue 3. So if you are using Vue 3 in your project, there is a beta version of the Chrome extension.
Since now you know how to install DevTools for Vue.js, let’s look at its features in detail and use them in practice.
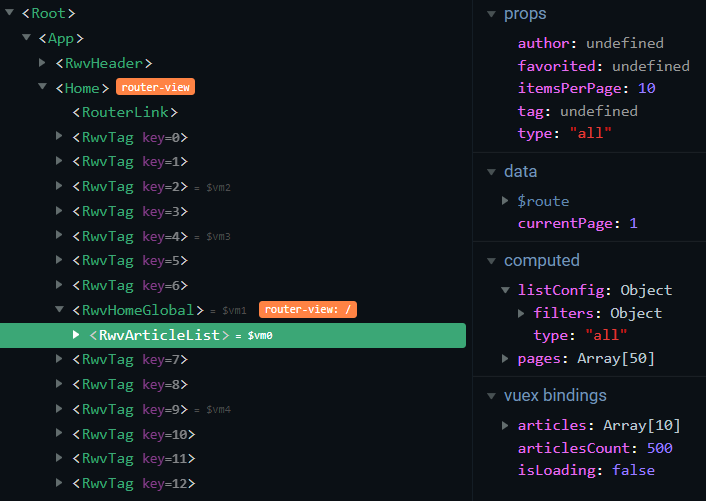
1. The Components Tab Allows to Edit Component Data in Real-time
When you navigate to the Components tab, you can see all your page components on the left side and all the details of the selected component on the right side, including props, data, bindings, etc.
This view gives you a clear picture of components and their details.
But, the most exciting thing in the Components tab is its ability to edit component data in real-time.
By default, Vue.js DevTools doesn't allow you to edit component data. So, first, you have to enable it from the Settings tab.
Then you can select the component and make changes to its data and monitor these changes at the same time.
This editing capability is not just limited to strings. You can edit arrays, numbers, booleans, and even data received from API calls using the Components tab.
2. Track Your Routes and Data Using the Routing Tab
When your application grows, it becomes difficult to keep track of all the routes and their details.
With Vue.js DevTools, you can see all the routes and their information in a single place. And also, you can monitor a complete history of your applications routing actions with the user data.
All you need is to navigate to the Routing tab and select the option required from the drop-down: History or Routes.
3. Time Travel with the Vuex Store
Vuex is a state management library used in Vue.js, and it allows you to mutate and manage your application states easily. Although Vuex is known for its smoothness, there can be scenarios where it behaves in unexpected ways.

With Vue.js DevTools, you can easily debug the Vuex store in such situations, and it even lets you travel through time to previous states.
It will log all the details of application states when Vuex dispatches a mutation, and you can monitor your application’s state history.
When you hover through these states, you will see an option called Time Travel, which can take you through time to that particular state.
4. The Events Tab Records All the Custom Events
Tracking the custom events of your application is another feature provided by Vue.js DevTools, and it collects all the emitted events into a single place.
You can see the name, size, source component, and payload of each event using the Events tab.
Please note that Vue.js DevTools only tracks the events which are emitted using this.$emit(‘myEvent’). It does not track events like v-on:click or v-on:keyup.
5. The Performance Tab Provides Timing Statistics for Component Lifecycle Methods
The performance tab in Vue.js devTools allows you to measure two things: Frames per second and Component render details.
If you run the application and monitor the frames per second section, you will see several frames loaded by each second and three other indicators with letters R, M, and R.
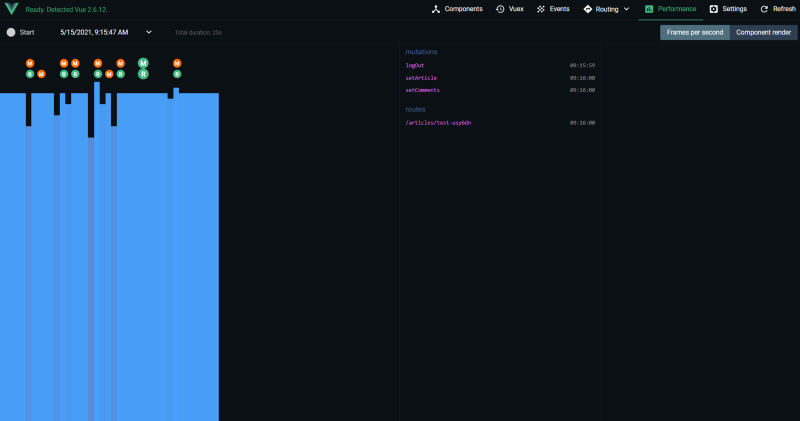
Label R appears when a mutation happens, E shows up when an event is fired, and R shows up when there is a change in route.
You can easily find any mutation, event, or route change that affects your application performance using the Performance tab.
The second part of the Performance tab is the component rendering section, and it gives you a detailed timing description of each component’s lifecycle.
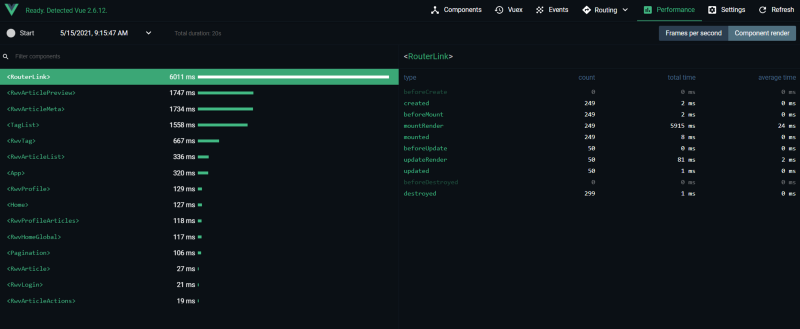
With this section, you can find out how long it takes to create, mount, update, or destroy a component. The component list is ordered based on the time taken to load, and you can easily find the components that need your attention.
Conclusion
In this article, I've covered the methods of installing Vue.js DevTools and their main features.
If you are a Vue.js developer or if you are willing to start your journey with Vue.js, I highly recommend you have a good understanding of the things I discussed.
Also, these are not the only features available Vue.js DevTools. So I would encourage you to find the ones that work best for you. Thank you for Reading!