

At Daily, we regularly push updates to make your experience better and safer. By default your extensions get automatically updated. Sometimes, auto-update is disabled and we roll some critical security updates. In such cases, it is necessary to update the extension as soon as possible.
This guide will help you manually update the extensions to counter such cases. Let's get started.
🌐 Google Chrome
Updating extensions manually in Chrome is pretty simple. Follow the quick steps below to update an extension.
Step #1
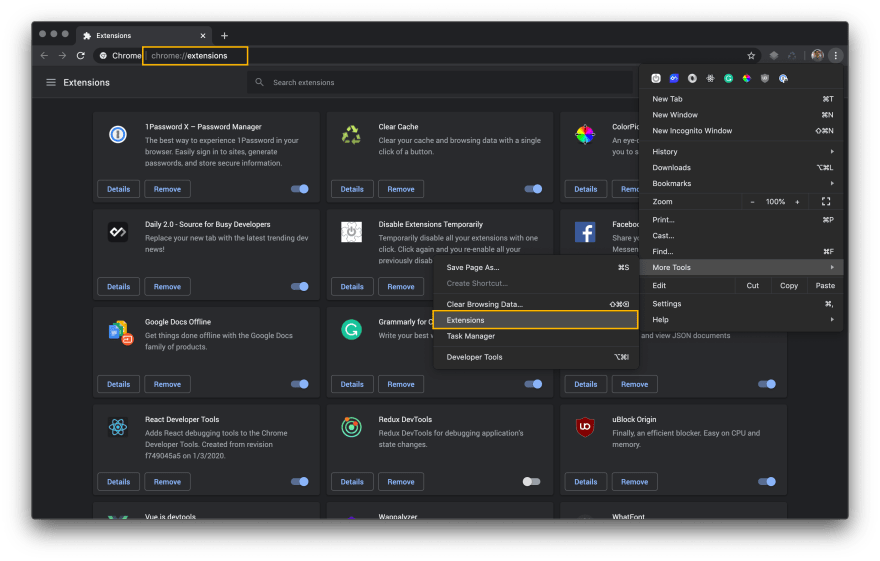
The very first step is to open the extensions manager in Chrome. You can do it in two ways.
- Type
chrome://extensions/in your address bar. - Click on the hamburger menu icon on the top right corner, then navigate to More Tools > Extensions.
Take a look at the screenshot below, I have shown both ways.
Step #2
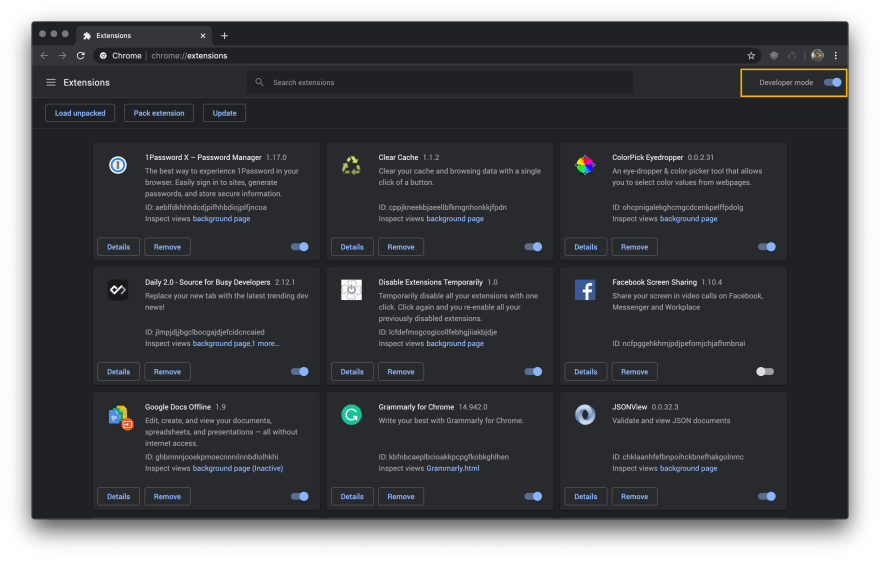
The second step is to enable the Developer Mode. It can be enabled by toggling the Developer mode toggle button on the top right section of Chrome extensions manager.
Step #3
Once you have enabled the developer mode. You will see three buttons in a small section right below the top bar. In order to update your plugins, all you need to do is click on the Update button. It will automatically update all the extensions in Chrome.
That's all! Three simple and quick steps and you are done. 💯
🦊 Mozilla Firefox
Like Chrome, updating addons in Firefox is also quite simple. Below are the quick steps to check for updates and install them.
Step #1
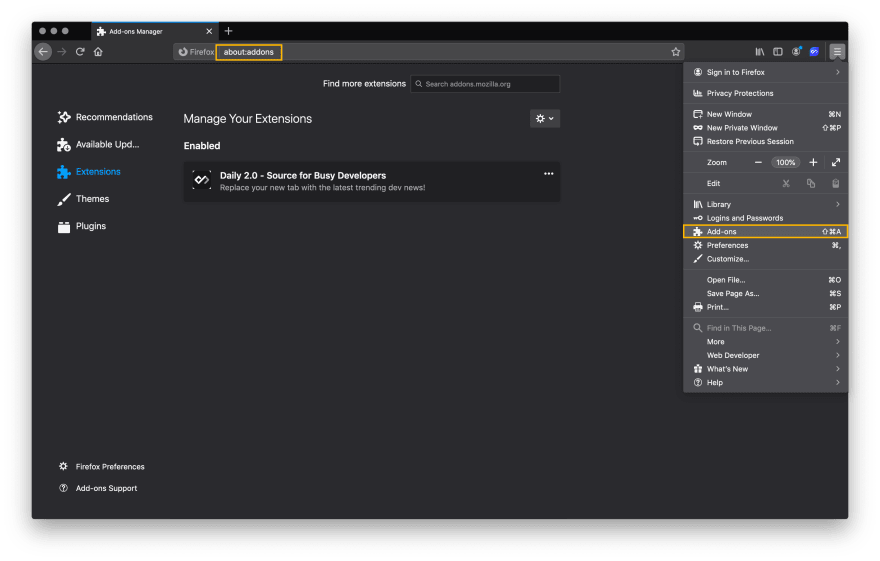
The first step is to open the addons manager in Firefox. You can do it in three ways.
- Type
about:addonsin your address bar. - Click on the hamburger menu icon on the top right corner and click on Add-ons button.
- Use the shortcut key. Command+Shift+A (
⌘⇧A) for mac and probably Ctrl+Shift+A for windows.
Below is a screenshot of how it looks like.
Step #2
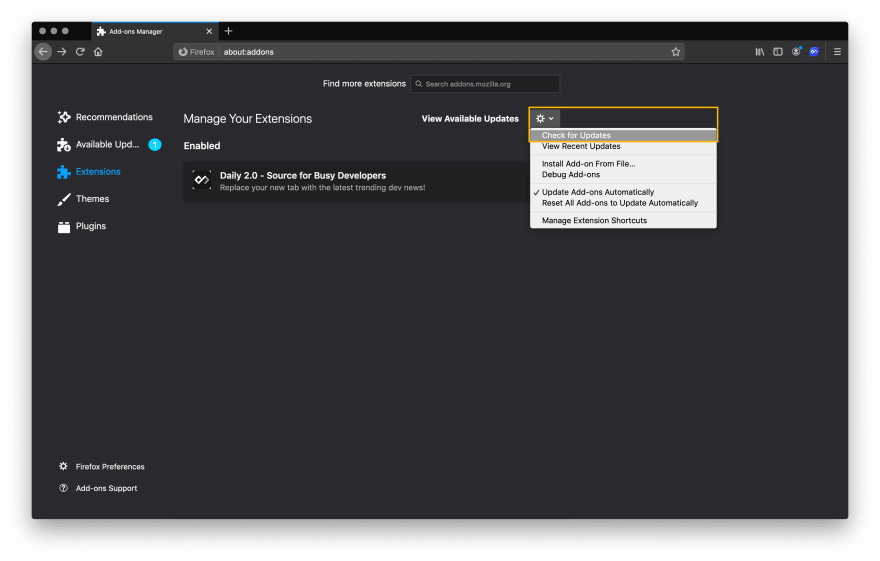
Click on the gear-like icon (⚙︎) and click on Check for Updates option. If your addons are set to update automatically, which is the default behavior, you will see a success message.
In case if you disabled the updates, it will show the available updates, that you can install. Take a look at the screenshot below, it is showing available updates for Daily when auto-update is disabled.
That's all. Your addons have been updated! 🍻
In Firefox, you can also change individual add-on settings to disable the updates. Take a look at the below sections to see how to deal with such situations.
⚡️ Reset the Update Settings
In case if your addon(s) are not set to auto-updates, you can reset the settings to update automatically. To do so, click on the gear icon, as mentioned above, and select Reset All Add-ons to Update Automatically.
It will reset all the settings and you can update using the method described above.
🤔 Settings for Individual Addons
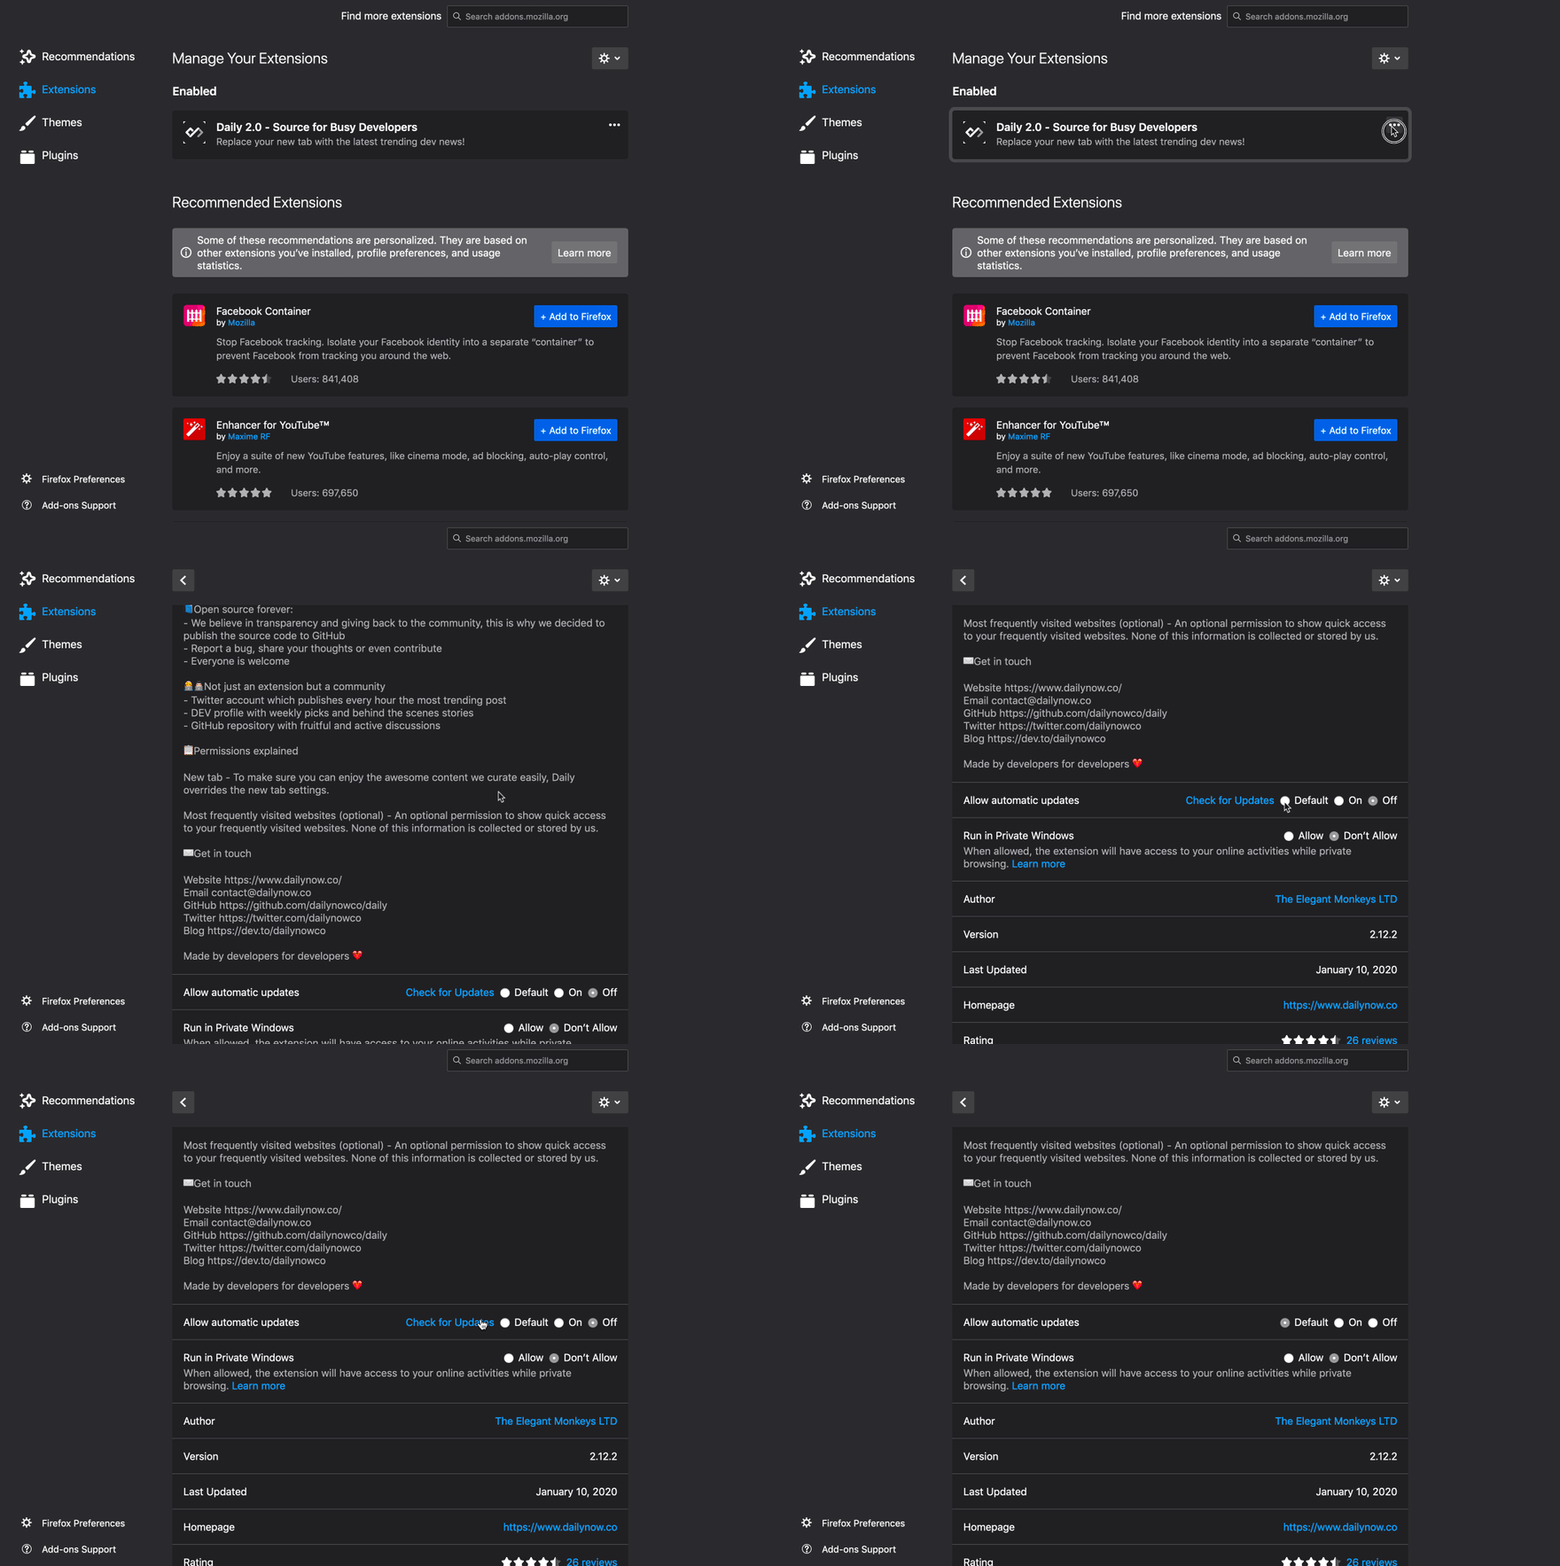
In case if you have disabled the automatic updates of an addon, you can go to its details and update it from there. To do so, click on the three dots in front of the addon and click on Manage.
Scroll down, you will see the settings for updates in the Allow automatic updates section. It should be default or on in order for automatic updates to work. In case if it is set to off, you will see a Check for Updates button in front of it. You can update individual addons using it.
Take a look at the GIF below to see how it works:
🙌 Wrap Up
That was a short and quick tutorial on how you can manually update your extensions/addons in Chrome and Firefox. Hopefully, you will be able to update your extensions using this guide. In case if you have any issues, feel free to comment below.
Peace. 🤞

.png)


