Learn the best practices for using GitHub readme badges, understanding their importance for project visibility, selecting relevant badges, customizing badge appearance, and automating badge updates.
GitHub readme badges provide a quick and visual way to convey vital information about your project, enhancing its credibility and readability. Here are the best practices for using readme badges on GitHub:
- Ensure Relevance: Only include badges that are meaningful to your project.
- Strategic Positioning: Place badges at the top of your README for immediate visibility.
- Maintain Consistency: Use badges of a similar style and from the same source when possible.
- Keep Them Accurate: Regularly update badges to reflect the current status of your project.
- Regular Maintenance: Check and update your badges to ensure they work and are up-to-date.
This guide also covers understanding GitHub readme badges, the importance of badges for project visibility, best practices for selecting badges, and tips on adding and customizing badges using services like Shields.io and Badgen. Additionally, it provides advice on organizing badges in your README, automating badge updates with GitHub Actions, and avoiding common pitfalls. Whether you're looking to create custom badges or use badges for project management, following these best practices will help make your project more attractive and trustworthy to potential contributors.
What are Readme Badges?
Readme badges are little pictures you see in GitHub readme files. They're like quick hints that tell you about the project. Here's what they do:
- Conveying status information - Badges can show if the project's build is working fine, if it's up-to-date, how much of the code is tested, and more. This gives you a fast snapshot of how the project is doing.
- Highlighting technical details - Badges can tell you what programming language is used, the license type, the latest version, and if it works with certain tools or languages. This helps you figure out if the project fits what you need.
- Building credibility - Using badges from known services shows that the project uses professional tools. This makes the project look more trustworthy.
Some usual badges you might see are:
- Build status badges that tell you if the project is working as it should
- Code coverage badges that show how much of the code is tested
- Version badges that show the latest version of the project
- License badges that tell you how the project can be used
- Compatibility badges that show what the project works with
Badges help people quickly see important details about the project, making it easier to understand at a glance.
The Importance of Badges for Project Visibility
Readme badges make GitHub projects easier to notice and trust for a few reasons:
- Enhanced readability - Badges make the text easier to read by adding color and symbols. This helps you quickly get the info you need.
- Accessibility - Badges show important details that might be hidden in long texts. This makes it simpler for developers to see if they're interested in the project.
- Social proof - Badges from third-party services show that the project follows professional standards. This makes people more confident in the project's quality.
- Professional appearance - When badges are used well, they make the project look neat and welcoming. This can attract more contributors and leave a good first impression.
In short, readme badges help projects stand out by making them look well-kept and easy to understand. This encourages more people to take a look and possibly contribute.
Best Practices for Selecting Badges
Choosing the right badges for your GitHub project means picking ones that are directly related to what your project is about and that show the true, up-to-date situation of your project.
Relevance and Accuracy
When picking badges, go for those that are most important for your project and make sure they show the real deal.
Some simple rules:
Pick badges that show off what your project is all about. For instance, if your project is about a Python library, make sure to have badges that say so, like what language you're using or how often you update.
Use badges from places that keep them current. Badges that are old or not trustworthy don't help. Look for ones from reliable sources like Shields.io or GitHub Actions.
Change badges when things change. If something goes wrong, like a build fails, update your badges to reflect that. This keeps things honest.
Get rid of badges you don't need. Having too many badges that don't really apply can be confusing. Stick to badges that tell users what they need to know.
Staying on point and truthful with your badges helps show the main things about your project clearly.
Diversity and Coverage
Try to have a variety of badges that cover different parts of your project, like how well it's doing, how good it is, and other key points.
Some advice:
- Use different kinds of status badges. Include badges for things like how up-to-date your project is, if it's compatible with other tools, and how actively it's being worked on. This shows off different sides of your project.
- Show off quality. Badges that talk about how much of your code is tested, if you're following good practices, and how often you release updates give a well-rounded view of your project's quality.
- Mention tools or services you use. Badges for things like GitHub Actions or Travis CI show you're using professional tools.
- Go for badges that look consistent. Using a service like Shields.io helps keep your badges looking uniform.
- Keep an eye on how many people are using your project. Badges for downloads, stars, and forks can show if people are interested, but remember to keep these updated.
Having a mix of badges gives a quick snapshot of your project's health and appeal in an easy-to-see way.
Adding Readme Badges with Badge Services
Using Shields.io
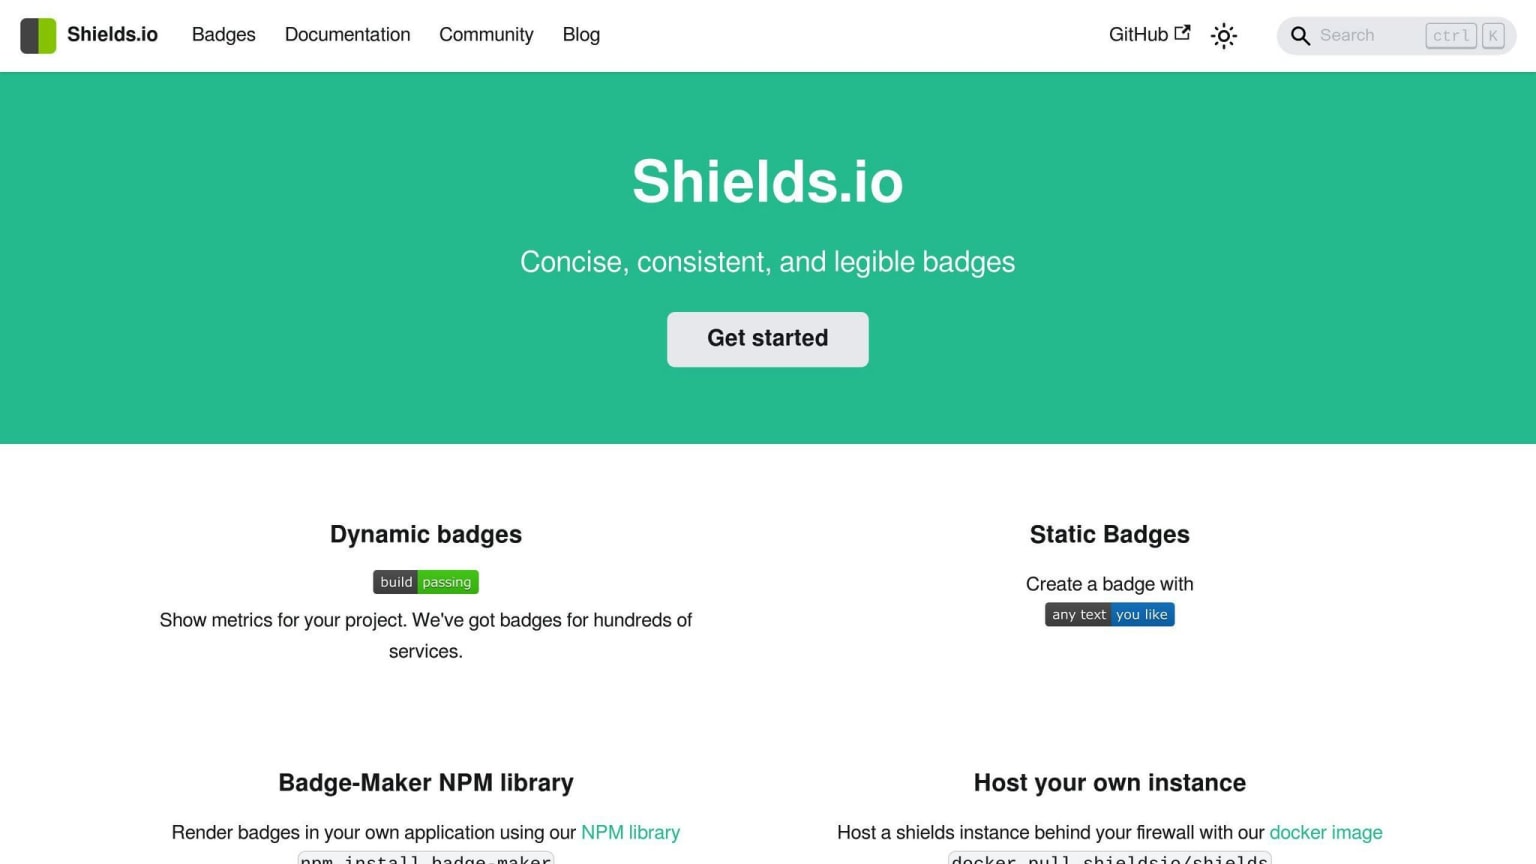
Shields.io is a go-to for making your own badges for your GitHub project. Here's how to do it:
- Visit shields.io and look through the badges they offer or use the search bar to find something specific.
- When you find a badge you like, click on it. You'll need to fill in some details like your GitHub username or project name.
- You can make the badge your own by choosing the color, adding a logo, and deciding what text it should have.
- Once you're happy with your badge, hit the "Copy Markdown" button. This copies the code you need to put the badge in your readme file.
- Paste this code into your readme file. Take a look to make sure the badge appears as expected.
Do this for any other badges you want from Shields.io to highlight different aspects of your project.
Using Badgen
Badgen is another place to get badges that show your project's status. Here's how you use it:
- Head to badgen.net and look for the badge you want. You can browse or use the search function.
- Click on the badge you're interested in, fill in any necessary details like your project's name, and see how it looks.
- Adjust the badge by changing its color, adding an icon, or editing the text to make it fit your project better.
- When you're satisfied, click the "Markdown" button to get the code for your readme file.
- Insert this code into your readme to add the badge. Check to make sure it looks right.
Repeat these steps to add more badges from Badgen that are relevant to your project.
Customizing Badge Appearance
When adding badges, it's important to make them fit with your project's look. Here's what you can customize:
Color - Choose colors that match your project's theme. Use specific color codes.
Logo - You can add a small logo or icon to make the badge more personal.
Label - This is the text on the left side of the badge. You can change it to something that fits your project.
Message - This is the text on the right side of the badge. Keep it clear and to the point.
Style - Some badge services let you pick different looks for your badge, like flat or rounded edges.
Taking a bit of time to make your badges look just right can make your project look more polished and get people's attention.
Organizing Badges in Your Readme
Putting badges into groups helps make your GitHub readme easier to read. Here's how to do it right.
Grouping Related Badges
Keep badges that share a theme together. You might have sections for:
- How the project is doing (build status, tests, dependencies)
- The quality of the code (how much is covered by tests, code style checks)
- How popular or active the project is (downloads, stars, how often it's updated)
- What it works with (programming languages, tools)
Use sections or lines to separate these groups. For example:
## Project Status
[](link)
[](link)
---
## Code Quality
[](link)
[](link)
- Arrange the groups in a way that makes sense, with the most important ones at the top.
Using Markdown Tables
- You can line up badges neatly by putting them in a table.
| Build | Tests | Coverage |
| :---: | :----: | :------: |
| [](link) | [](link)| [](link) |
Tables help keep everything looking tidy.
You might want to put less critical badges in a table below the main ones.
Strategic Placement
Always put the most important badges at the top of your readme so they're easy to see.
Start with badges that give an overview (like build status and tests) before moving on to more specific details (like which versions of software it's compatible with).
Try to keep all your badges in one or two spots, rather than spreading them out.
By organizing your badges well, you make it easier for people to quickly see what they need to know about your project.
Automating Badge Updates with GitHub Actions
GitHub Actions is a handy tool for automatically keeping your project's badges up to date. This means your badges will always show the latest information without you having to change them by hand.
Workflow Triggers for Common Badges
You can set up GitHub Actions to run automatically for certain events, like when you make a new release or update your project. This can help update badges that show things like your project's current version.
Here's an example of how to set up a workflow to update a version badge when you release a new version:
on:
  release:
    types: [published]

jobs:
  update-version-badge:
    runs-on: ubuntu-latest
    steps:
      - uses: actions/checkout@v3
      - uses: actions/setup-node@v3
        with:
          node-version: 16
      - run: npm install
      - name: Update Version Badge
        uses: schneegans/dynamic-badges-action@v1.0.0
        with:
          auth: ${{ secrets.GIST_SECRET }}
          gistID: 12345abcde
          filename: version.json
          label: Version
          message: ${{ github.ref }}
          color: blue
And here's how you can update a build status badge to show 'passing' after a successful push:
on: push

jobs:
  update-build-badge:
    runs-on: ubuntu-latest
    steps:
      - uses: actions/checkout@v3
      - name: Run tests
        run: npm test
      - name: Update build badge
        if: success()
        uses: schneegans/dynamic-badges-action@v1
        with:
          auth: ${{ secrets.GIST_SECRET }}
          gistID: 12345abcde
          filename: build.json
          label: Build
          message: passing
          color: green
Hosting Custom Badges
You can also make and host your own badges. Here's a simple way to do it:
- Make a new GitHub repo for your badge images
- Use GitHub Pages in the
/docsfolder to show your badges - Put your badge designs (like SVG or JSON files) in this folder
- Set up workflows to update these files when something changes
- Link these badges in your project's readme
This method lets you have badges that are unique to your project and automatically keep them updated.
Common Pitfalls and Tips
Using GitHub readme badges right means being careful. Here are some common mistakes and how to avoid them.
Keeping Badges Up-to-Date
Badges should show what's happening with your project now. But they can quickly become old, which isn't helpful.
Some tips:
Use GitHub Actions to automatically update badges. This makes things easier.
If badges depend on other websites, check those websites are still running. If not, your badges might stop working.
Look at your badges often - maybe every few weeks or before you release something new - to make sure they're correct.
If a service for a badge isn't around anymore, it's best to remove that badge.
Keeping your badges current shows your project is well looked after.
Too Many Badges
Having lots of badges might seem like a good idea, but it can actually make things confusing.
Some advice:
Stick to 2-4 key badges at the top of your readme. Focus on the main things like how well your project is doing.
Place less important badges further down or in a table to keep things tidy.
Think about which badges really matter and get rid of the rest. Stick to the most important ones.
If you're working on a forked project, double-check the badges. Get rid of any that don't fit anymore.
Choosing just a few important badges helps people understand your project better.
Inconsistent Styling
When badges don't match in style, it doesn't look good.
How to keep things looking nice:
Try to get all your badges from Shields.io. They make sure all badges look similar.
If you're making your own badges, decide on how they should look early on. Think about colors, shapes, and fonts.
If you have to use badges from different places, maybe put them in different sections. This can help them look less messy.
Making sure your badges look like they belong together makes your project look better.
Outdated Info from Linked Sites
Sometimes badges link to websites that aren't up-to-date. This can make people doubt your readme.
Here's what to do:
If your project has moved, make sure any links in your badges go to the right place.
For license badges, check the linked license is the latest version.
If badges link to pages that aren't useful anymore, update those links or remove the badges.
Keeping your badge links fresh and relevant helps show your project is well-managed.
Following these simple tips for badges can make your readme file more trustworthy and easier to read at a quick glance. Putting in the effort to do badges right is definitely worth it.
Advanced Usage
Creating Custom Badges with Shields.io
Shields.io lets you make your own badges to fit what your project needs. Here's how to do it:
- Visit Shields.io and click on the "Documentation" link
- Find the "Dynamic Badge" section and click on it
- Pick a badge style you like
- Click "Try it out" and play around with the label, message, color, logo, etc.
- Once you like your badge, click "Copy Markdown" to get the code
- Put this code in your project's README file to see your new badge
You can change things like:
- The text on the badge
- What the badge says
- The color
- Adding a logo or icon
- The shape of the badge (like flat or round edges)
Using Shields.io's tools, you can make badges that really show what your project is about.
Using Badges for Project Management
GitHub readme badges aren't just for show. They can help manage your project too:
Keeping Track of Good Practices
- Badges about code quality show if you're doing things right
- Neat and organized badges make your project look professional
Keeping an Eye on Dependencies
- Badges can tell you what tools or languages your project works with
- These badges can update by themselves when things change
Helping Teams Work Together
- Badges let everyone know the current state of the project, like if tests are failing
- They can be used to set goals, like getting better test coverage
For example:
- You could aim to cover 95% of your code with tests, shown by a coverage badge
- Use badges to show how you're moving to a newer version of Python
Badges can make it easier for teams to share goals and keep track of how the project is doing.
Conclusion
Badges on your GitHub projects can really help them stand out. They offer a quick peek at the important stuff and show you're using tools that professionals use. Sticking to some best practices can make badges even more useful.
Here's what to keep in mind:
Make it relevant - Only add badges that really matter to your project. Skip the ones that don't.
Where you put them is important - Put the most important badges at the top where everyone can see them easily. Group similar badges together.
Being up-to-date means people will trust you - Always make sure your badges are current and correct. Badges that are old or wrong can make people doubt your project.
Keep it consistent - Use services like Shields.io to make all your badges look similar. This makes your project look neat and organized.
Try to automate updates - Use tools like GitHub Actions to automatically update your badges. This makes your life easier.
Check your badge links - Make sure any links in your badges go to the right places. Broken links don't look good.
Don't go overboard - Having too many badges can make things look messy. Just stick to the badges that really tell something about your project.
Putting some effort into your badges can really make your project look good. It shows that you care and helps people get the right idea about your project.
Following these tips might take a bit of work, but it helps your project get noticed, builds trust, and encourages more people to join in. It's definitely worth the effort.
Related Questions
How do I use badges in GitHub README?
To put a badge in your GitHub README, follow these steps:
- Go to a website like Shields.io and pick a badge you like.
- Click on the badge. You might need to change the text or color. Then, copy the Markdown code they give you.
- Open your README file on GitHub and paste the code where you want the badge to show up.
Here's an example:

What are GitHub badges for?
GitHub badges are little images that show key info about your project, like:
- If your project is working correctly
- How much of your code has been tested
- How many people have liked or shared your project
- What kind of permission you give others to use your project
- If your project works with certain programming tools or languages
- The latest version of your project
They help people quickly understand important things about your project.
How do I get a contributor badge on GitHub?
To get a special badge on GitHub that shows you're a contributor:
- Help out with GitHub Security Advisories or the GitHub Bug Bounty program five times.
- Get at least $500 in sponsorships for your projects.
GitHub will give you the badge automatically when you reach these goals.
How do I use README in GitHub?
To make a README that shows up on your GitHub profile:
- Click the + button at the top right of GitHub and choose New repository.
- Name the repository exactly like your username.
- Make sure it's set to Public.
- Write what you want in the README file. This will be the first thing people see on your profile.
After you do this, your README will be visible to anyone who visits your GitHub profile.