
.png)


In this tutorial, we will learn about the RedwoodJS framework by building a News app. We will learn a lot from this tutorial, we will learn how to use RedwoodJS CLI tool to scaffold components, GraphQL definitions, pages, etc ; How to create a RedwoodJS application and how to fetch data in RedwoodJS. We are going to learn a lot here. So let's begin by understanding what RedwoodJS actually is and how it works.
What is RedwoodJS
RedwoodJS is a full-stack React framework used to build modern web applications. This framework was started by Tom Preston-Werner, the cofounder of GitHub.
RedwoodJS uses so many technologies:
RedwoodJS is so helpful that a basic Redwood application contains both the frontend code, backend, and database readily set up for us. Its CLI code generators generate codes for any component or GraphQL services we create.
With RedwoodJS you are way-half done in your project. We need to have some software and tools installed in your machine before we can use RedwoodJS, let's see them below.
Requirements
- Node.js: Both Strapi and Reactjs are Node.js-based tools and frameworks respectively. To download Nodejs binary, get it from here.
- NPM: This is a Node.js package manager. This comes bundled with the Node.js binary. Run the command npm --version to confirm.
- VS Code: A web editor from Microsoft. You can use other editors but VS Code is quite amazing and has a worldwide adoption by devs. So VS Code is recommended for this tutorial. You can download it from here.
We don't have to install any database because RedwoodJS by default uses SQLite.
So we start with the creation of the News app. The first thing we need to scaffold a RedwoodJS project, let's see that is done below.
Scaffolding a RedwoodJS project
A RedwoodJS project is scaffolded via command-line using either Yarn, NPM, or NPX. Run the below command to create a RedwoodJS project:
The above commands will create a RedwoodJS in a newsapp-redwood folder.
Using yarn tool, the create sub-command tells yarn that we want to create a project. The redwood-app sub-command tells it that we want to create a Redwoojs project. The newsapp-redwood is the folder we want the RedwoodJS project to be created in.
The npx is similar to yarn, the difference is that the create and redwood-app are conjoined.
Move into the newsapp-redwood folder: cd newsapp-redwood.
To start a Redwood app, we run the command:
The rw is Redwood, it tells Yarn that we are trying to run a Redwood command. The Redwood command is dev, this command starts the Redwood server in a Redwood application. Open the URL localhost:8910 in a browser, RedwoodJS does it for you automatically though. You will see the page open:

Building News model
We are building a news website, a single news item will have this model:
- The title is the title of the news.
- The body is the content of the news.
- The writtenBy is the author of the news.
- The imageUrl is the head image of the news.
Now, we translate this pseudo-model to Prisma's model. Open the db/schema.prisma and paste the below code:
Next, we run migrations. To do that run the below command:
The above command will prompt you to give this migration a name, the name does not matter it is just to describe what the migration does.
I typed "added_NewsItem". After the command completes, a migrations folder will be created under api/db. A folder also will be created under the api/db/migrations, the folder's name will be a timestamp, this same folder will contain a migrations.sql. This migrations.sql file contains SQL commands that are used to bring the database up-to-date to what is in the schema.prisma file. Like this, the api/db/migrations contains trace of the changes that took place to get to the current state.
Building GraphQL resolvers and schema definitions
RedwoodJS API is powered by GraphQL. We will create the GraphQL resolvers and definitions in the api folder.
In RedwoodJS GraphQL definitions are defined in a .sdl.js file, and the GraphQL resolvers are services that reside in the services folder. We generate a GraphQL schema and service object using the RedwoodJS CLI generator.
Now, we will create GraphQL definitions and services for our NewsItem model. Run the below command:
The above command will generate GraphQL schema definitions, mutations, queries from the NewsItem model in our schema.prisma file.
The files created are:
- api/src/graphql/newsItems.sdl.js
- api/src/services/newsItems/newsItems.js
api/src/graphql/newsItems.sdl.js see the contents below:
We see that it contains a GraphQL schema. The NewsItem is a data type for a single news item, the inputs holds the data type of the arguments to the resolvers. The Query and Mutation are the queries and mutations in our app. In the Query, we have newsItems query that will return all news items in the database and newsItem(id: Int!) to return a news item. The Mutation has createNewsItem(input: CreateNewsItemInput!) mutation to create a new news item, updateNewsItem(id: Int!, input: UpdateNewsItemInput!) to modify a news item, and deleteNewsItem(id: Int!) to delete a news item.
api/src/services/newsItems/newsItems.js contains the resolvers for the type definitions above.
The resolvers, returns all news items, a specific news item, creates a new news item, updates a news item, and deletes a news item.
See that we used the db.newsItem in performing the CRUD actions in the news item table. The db is an instance of PrismaClient from the Prisma tool. This PrismaClient instance contains objects of models in the schema.prisma file, they appear whenever the migrations are run. These objects have methods that we can use to perform CRUD actions on the object's table in the database.
The methods here are:
- db.newItems.findMany: Returns all news items in the newsItems table.
- db.newItems.findUnique: Returns a news item from the tabel.
- db.newItems.create: Creates a new news item on the newsItem table.
- db.newItems.update: Modifies a news item on the newsItem table.
- db.newItems.delete: Deletes a news item in the newsItem table.
Now, we are done with our backend let's build the frontend.
Building the frontend
Our frontend will have two pages:
- NewsItemsPage
- NewsItemPage
NewsItemsPage This page will display all the news in the database. The URL path to this page will be /news.
NewsItemPage This page displays a single news item. This page's URL path is /news/{id}.
We will generate Cell files. A Cell in RedwoodJS is used to fetch data from our backend. We will have two Cell components: NewsItemsCell and NewsItemCell.
NewsItemsCell This will fetch and render all the news in the database.
NewsItemCell This is will fetch and render a news item.
So we generate the cells:
The first command will generate src/components/NewsItems.js file. Open it and re-edit the code to below:
We have a query in QUERY that fetches all news items in the database. See that we have four functions: Loading, Empty, Failure and Success.
Loading This function is run by RedwoodJS when data is being actively fetched over the network.
Empty This function is run to display Empty when no data is returned from the data fetching.
Failure This function is run by RedwoodJS when the data fetching fails or the server returns an error.
Success This function is run when the data fetching is successful.
So we see that the functions are rendered when certain states are triggered when fetching data over the network.
We touched the Success function to include how we want to display our news items. We passed each news item to a NewsCard component to render.
Let's see the second command: yarn rw g cell NewsItem. This creates a src/components/NewsItemCell/NewsItemCell.js file. Let's see the contents:
This Cell component returns a specific news item. See the query in the QUERY variable, it uses the $id to query for a single news item. All Cell components have the same structure, the return element of the Success was altered to return a NewsItem component, this NewsItem component will render the news.
Let's generate the pages, run the below command:
The first command yarn rw g page NewsItems /news will generate a NewsItems page, it will also add a Route for the NewsItems page in the Routes.js file.
The second command will generate a NewsItem page. The /news/{id} tells the RedwoodJS CLI that this page is dynamic so its URL paths will tend to change.
Let's see the code for both pages.
NewsItemsPage
It is very simple, it renders the NewsItemsCell component. This component as we have seen it before will fetch all the news items and display them.
We have an AddNewDialog component that is conditionally rendered, this component is a modal component, it is where news items are created.
Nothing much here, so we move to the NewsItemPage.
NewsItemPage
This component receives the id of the news item to render and passes it to the NewsItemCell component, this cell component will fetch the news item from the backend and display them.
You see how RedwoodJS makes our work easy.
Next, we create the components:
- Header
- AddNewsDialog
- NewsCard
Header
This component will render the header section of our app, it will be present on all pages in our app.
Run the below command to create the component:
The file will be created: src/components/Header/index.js.
It's a simple UI that displays News Pro.
We need to make this Header render in all our pages. To do that we will create a layout component, run the below command:
The layout component will be created in src/layouts/NewsItemLayout. Open the file src/layouts/NewsItemLayout/NewsItemLayout.js and modify the code to below:
We imported the Header component and rendered it before the children.
The last thing we have to do is to go and edit the Routes.js file.
Make your Routes.js file look like below:
We used the Set component to wrap our page routes. The wrap prop on the Set component is set to NewsItemLayout, this makes the NewsItemLayout component to render the NewsItemsPage or NewsItemPage inside itself.
AddNewsDialog
Run the below command to create the AddNewsDialog component:
Paste the below code to src/components/AddNewsDialog/index.js:
This is where news items are created. In the above code, we have input boxes where the details of the news item are entered. We have the Name, ImageUrl, Written By, and Body of the news items will be typed. The Save will call the saveNews function, this function will collect the values from the input boxes, and pass them to the createNewsItem mutation function call. This will create the news item on our database and the page will reload to display the newly added news item.
NewsCard
Run the below command to generate the NewsCard component:
Paste the below code in the file src/components/NewsCard/index.js:
This component receives the news item object in its props via newsItem. The properties of the news item are destructured from this newsItem object, the properties are then rendered.
Test the app
We are done building our app. Now, start the RedwoodJS server, run the below command:
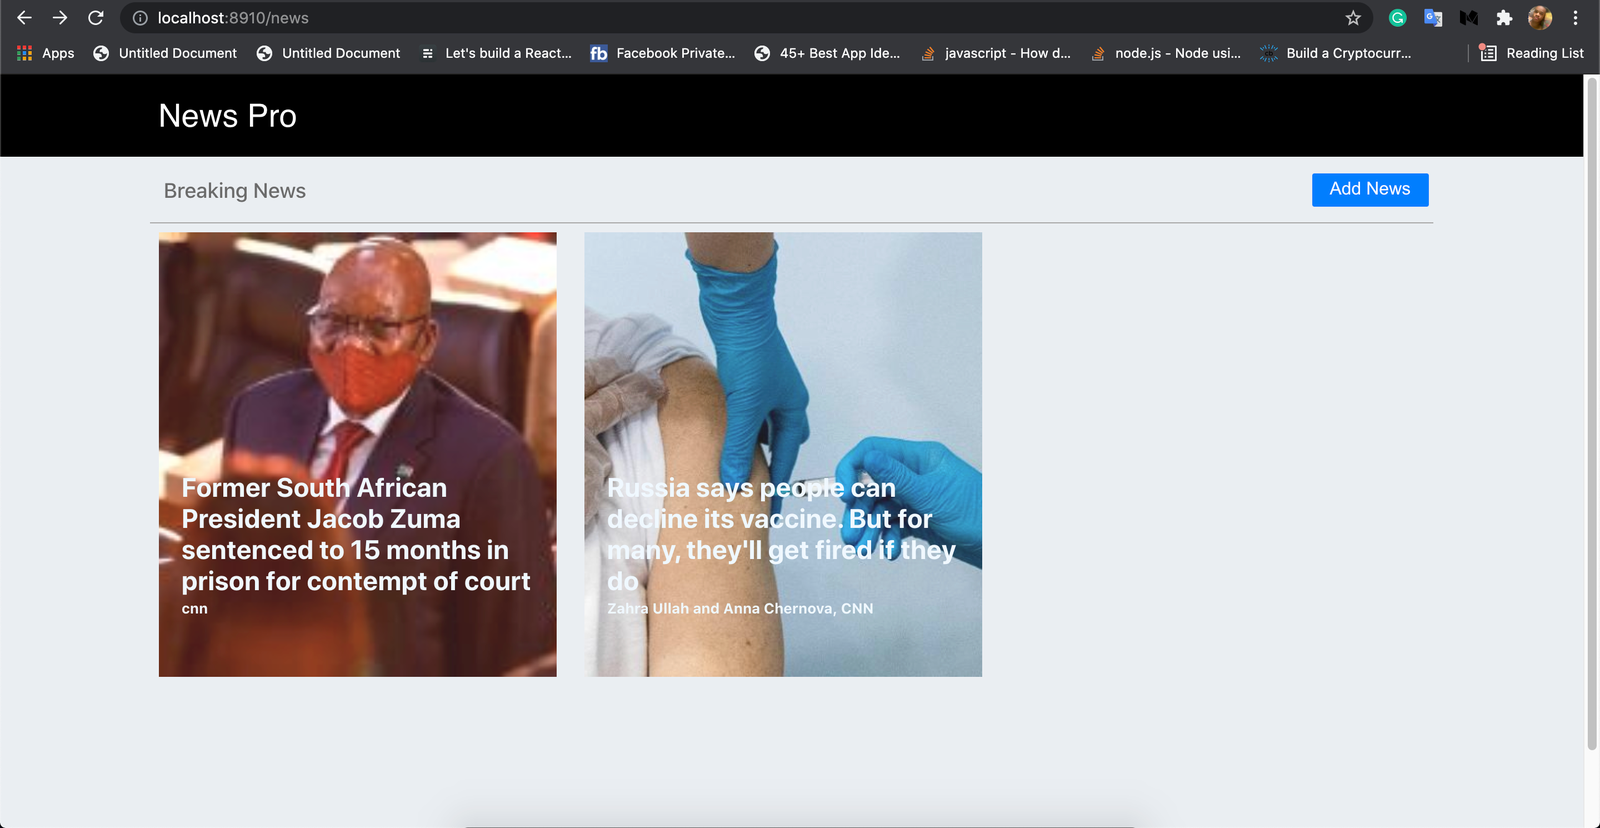
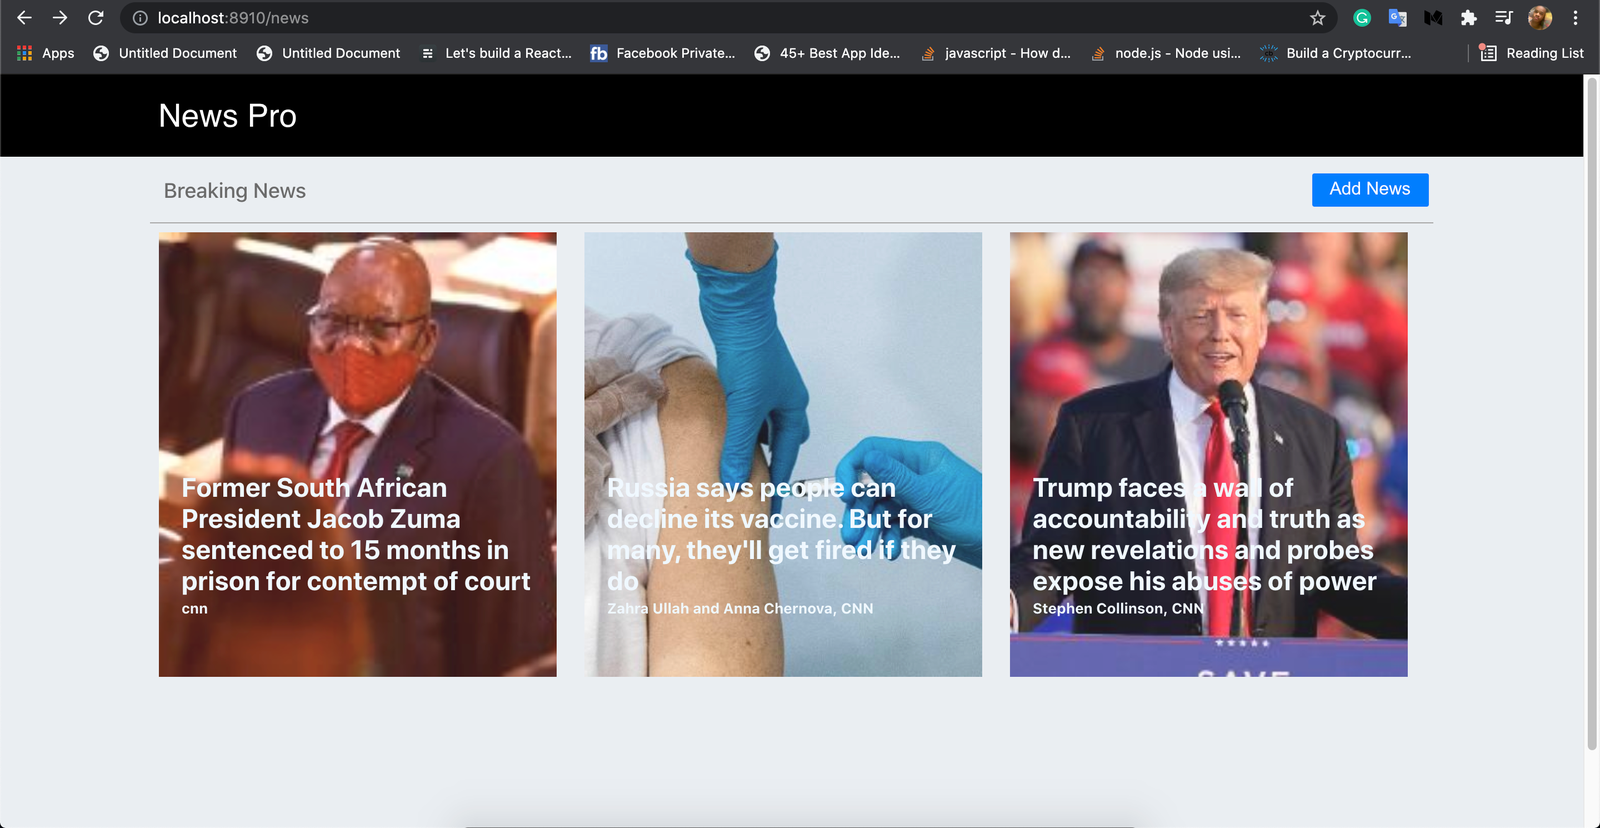
View all new items
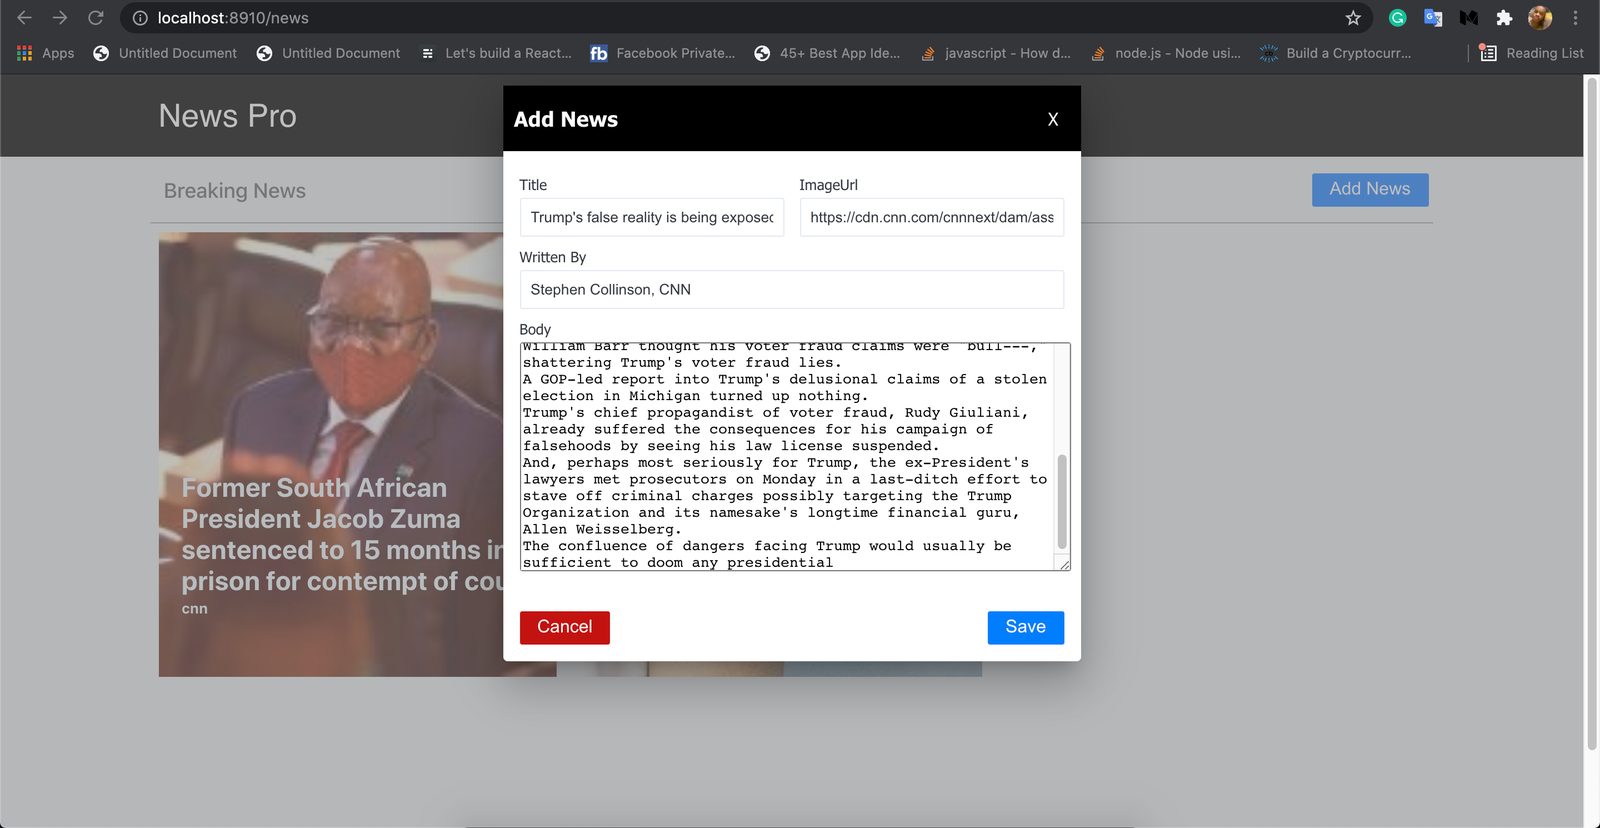
Create a news item
View a news item
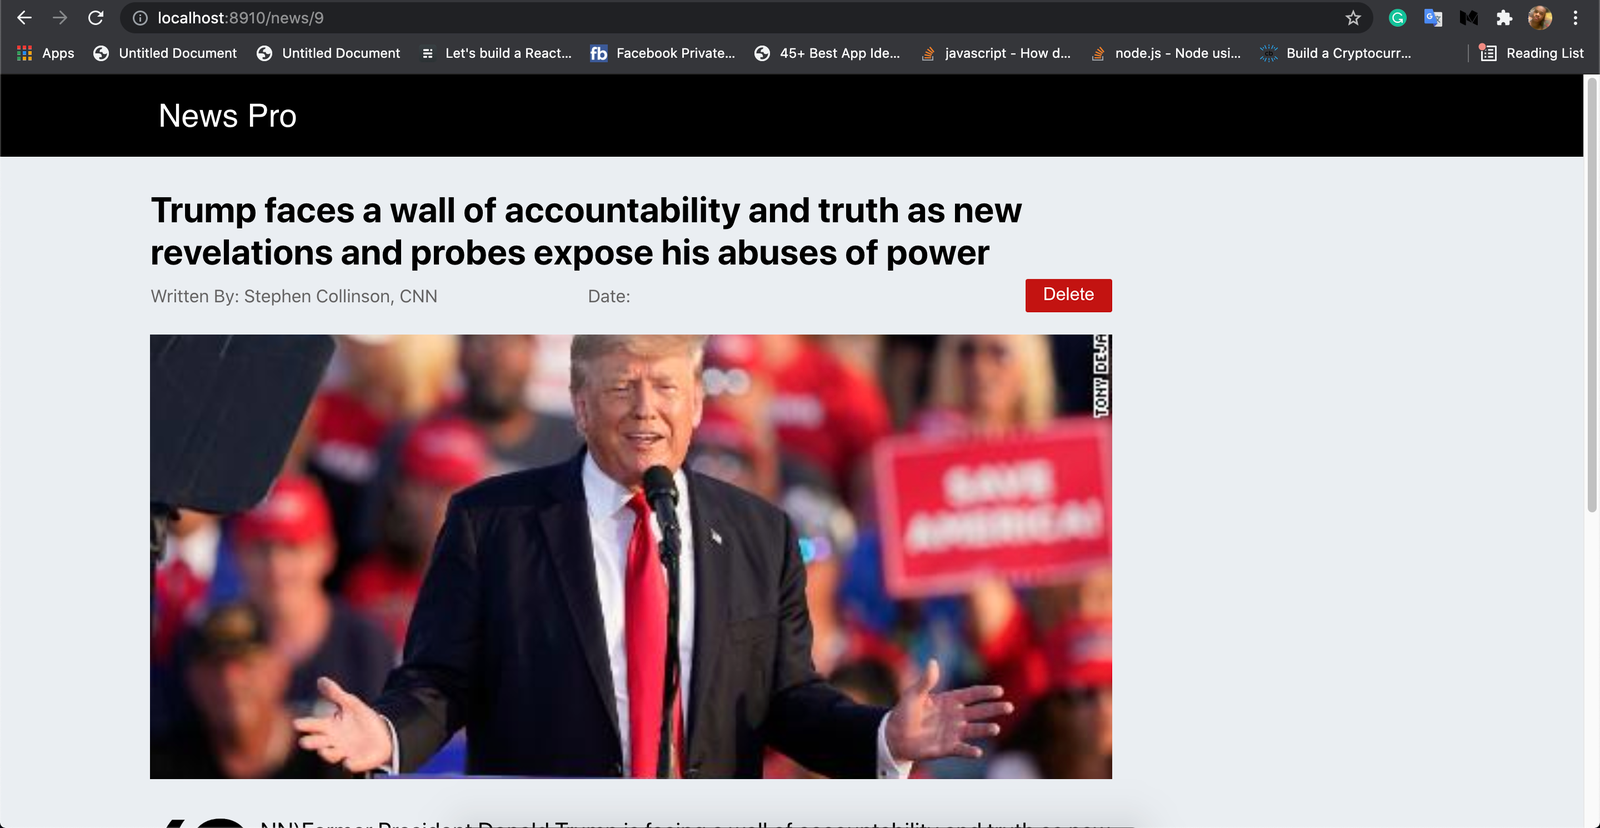

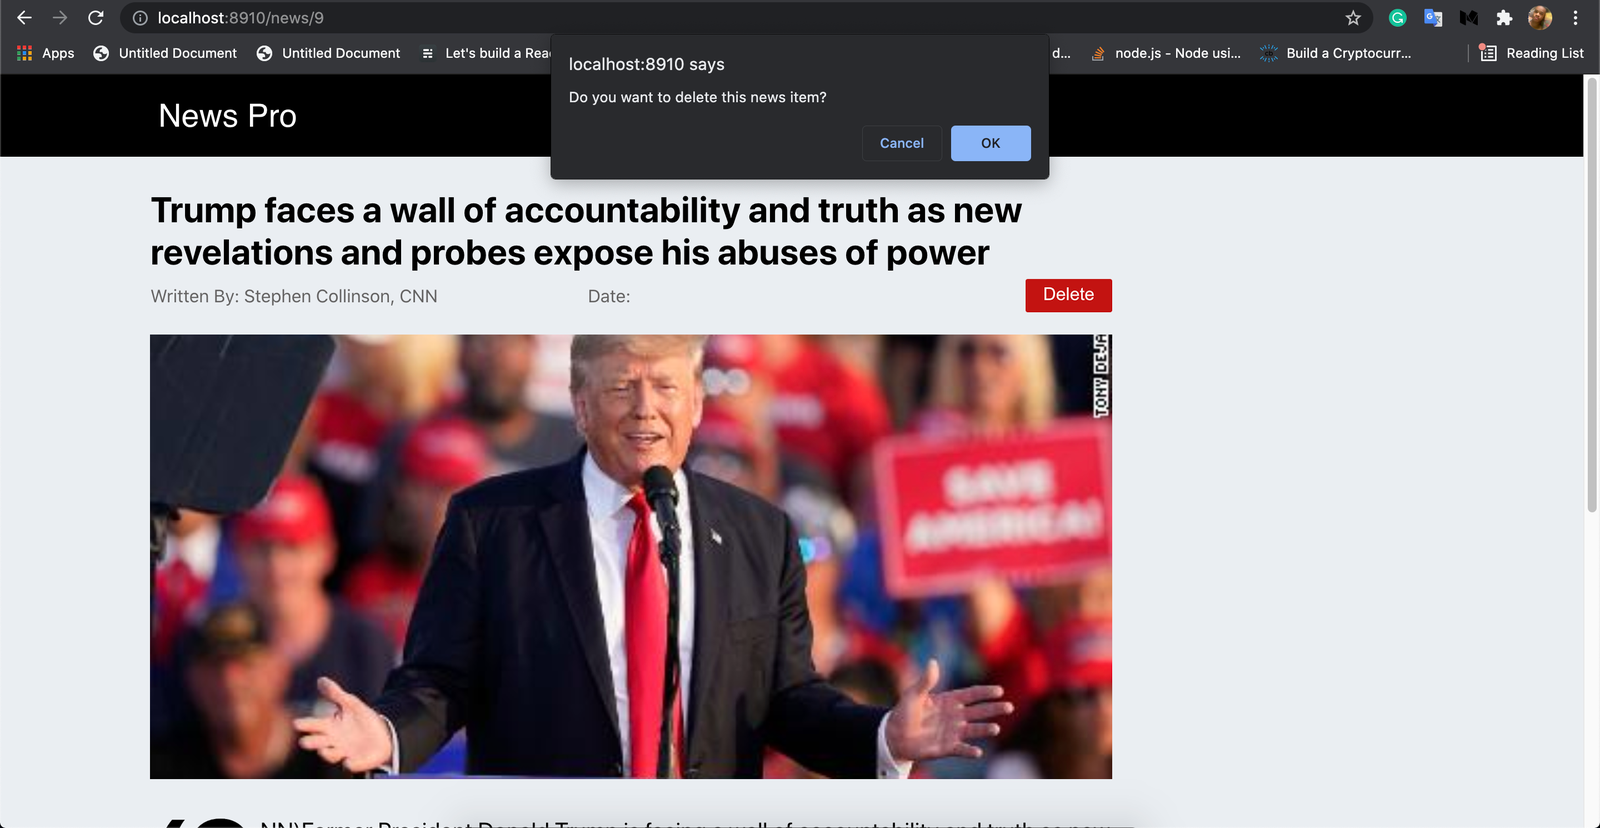
Delete a news item
Conclusion
In this tutorial, we started by introducing RedwoodJS, we went through its basic features.
Next, we built a News application to demonstrate how to use RedwoodJS to build real-world apps. During the development we saw how to apply Layouts, Cells, Pages, how to generate Cells, Pages, Layouts, and Components using the rw command.
Thanks!
Source code
References
- RedwoodJS: 5 Features that Make it Unique among JAMstack Frameworks
- Building a Full Stack Application using RedwoodJS
- Bringing full-stack to the Jamstack
- RedwoodJS - Docs Command Line Interface
- Docs - Introduction: RedwoodJS
- RedwoodJS - Getting dynamic


