
Using code splitting and smart loading strategies, you can speed up your Next.js application. Let's learn how to get it done.
Code splitting is an optimization technique that aims to reduce the size of an app's (first) payload by splitting or breaking the code modules in chunks and serving them only when needed.
Route-based splitting and Component-based splitting
Next.js routing system comes from the pages folder.
pages/
    home/
        index.js
        home.js
    user/
        index.js
        user.js
Each file is a page in Next.js, and they export a React component.
//pages/home/home.js

export default function Home() {
  return <div>Home Page</div>;
}
The file pages/home/home.js will map to the route /home/home/, the React component exported from the home.js file will be rendered when the route is navigated. We have seen that the pages folder is where the Next.js routing is set. Now, by default Next.js splits the components in each route into separate chunks. This means that when we load a route in our browser, Next.js will only load the chunk associated with the route.
For example, in our pages folder above we have four routes in the Next.js app.
home/home
home/
user/
user/user
Each of them has a component that renders the associated UI on the browser. Now, Next.js splits the routes into chunks. This means that when we navigate to home/home, only the JavaScript chunk for the home/home is loaded, other chunks for the other routes are not loaded. This happens for other routes too, the chunk for the current route is loaded and no other. This is called route-based splitting.
This is amazing and very optimal at the same time, in the sense that it shaves off chunks that are not needed when a route is being requested. This speeds up the load time and the overall performance of the app. Imagine the whole app is download when a request for a route is made. This will become a heavy load for both the client and the server because the server will have a whole lot of file size to send and the client will have a whole lot of file size to download and execute. So we see that Next.js comes in with route-based code splitting optimization fully baked in.
Now, looking at it, each page component is a React component, yes. And the components can render other components to display a specific UI. Most of these components are presentational components that can be reused, they are not associated with any routes in Next.js. These components can be split into chunks and loaded on demand. Yes, sometimes we may not want to load a component till the need comes. for example, a modal component on a page component that is shown when a button is clicked. By default, this modal component comes bundled with the page component and sits in the browser memory till it is displayed when a button is clicked. This component is only needed when the button is clicked yet it was loaded, it should not have been loaded until it is needed i.e it should be loaded when the button is clicked and then displayed. This splitting of components is called component-based splitting.
In the below sections, we will learn how we can code-split our components in Next.js and load them on demand.
Code splitting using Next.js
Using Next.js we can code split our React app using the ES2020 import() statement. The dynamic function is imported from the Next.js next/dynamic module.
import dynamic from "next/dynamic";
The argument of the dynamic is a function is a function that calls the import function, this import function takes the path to the component file that is to be code-split. import() is also used in JavaScript to import modules that will be evaluated at load time. This is used in situations where we want the modules to be loaded conditionally or on-demand. It is used in React to load components as modules, the next/dynamic made this possible by exporting the dynamic function. Let's see how it is used below.
Example:
// src/pages/index.js
import dynamic from "next/dynamic";

const HelloComponent = dynamic(() => import("../components/hello"));

// src/components/hello.js
function HelloComponent() {
  return <div>Hello from over here !!</div>;
}

export default HelloComponent;
Here we are splitting out the HelloComponent from the main bundle. The HelloComponent in the '../components/hello' is split into a manageable chunk, so it can be loaded by Next.js from the server when needed. The HelloComponent can then be used as a component.
// src/pages/index.js
import dynamic from "next/dynamic";

const HelloComponent = dynamic(() => import("../components/hello"));

function Home() {
  return (
    <div>
      <HelloComponent />
    </div>
  );
}

export default Home;
See, we used the component returned by the dynamic(...) function call, so when the Home component is rendered, the HelloComponent component in the '../components/hello' file is loaded. Let's demonstrate this with a Next.js app. First, scaffold a Next.js app: npx create-next-app code-split. This will create a code-split Next.js app in your current directory.
The directory will look like this:
cod-split
    pages/
        index.js
        _app.js
        api/
            hello.js
    public/
    styles/
    .gitignore
    node_modules/
Open the pages/index.js and paste the code:
import dynamic from "next/dynamic";

export default function Home() {
  return <div>Home component</div>;
}
Run yarn dev and open your browser to localhost:3000. We will see the Home component rendered. Open the DevTools and got to the Network tab:
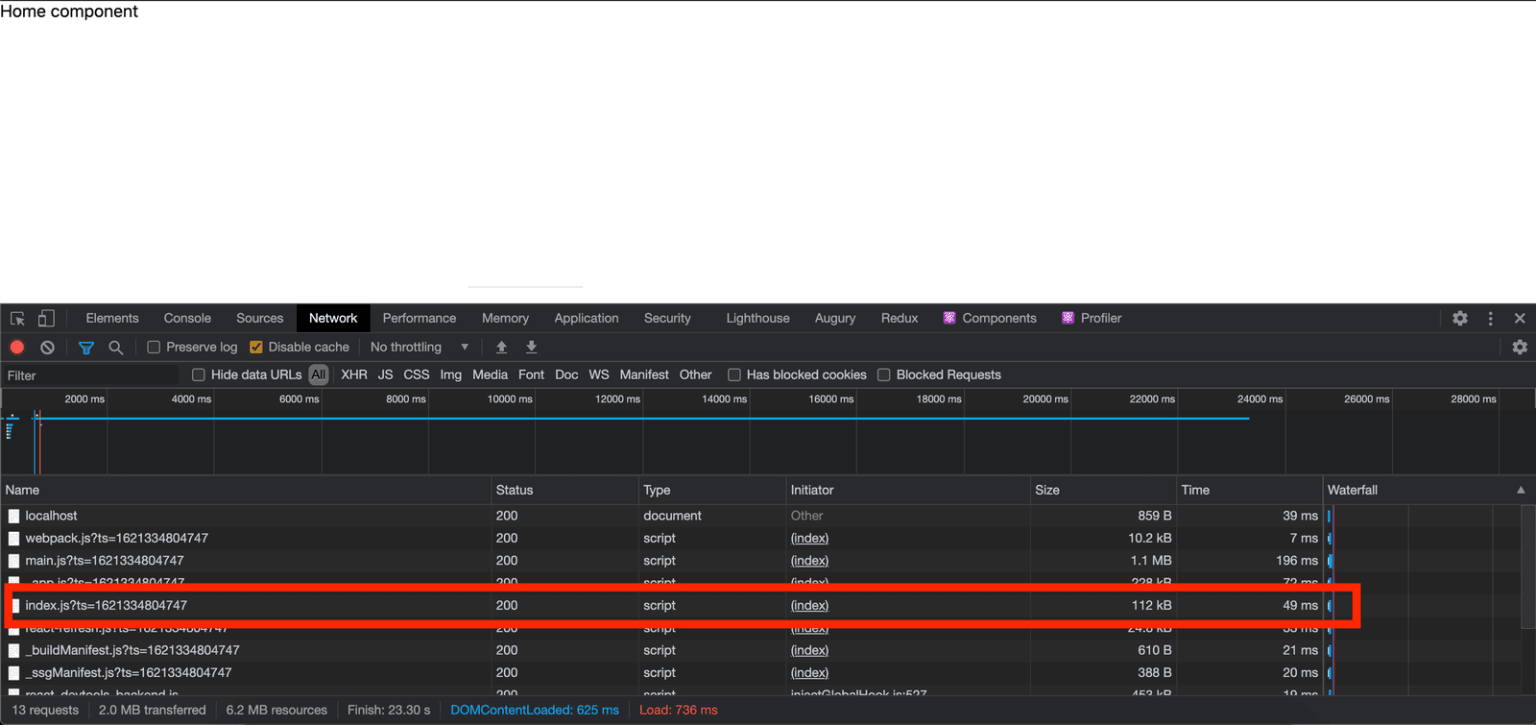
pages/index.js is loaded in the index.js?ts=1621334909497 chunk
See the chunk of the pages/index.js loaded as index.js?ts=1621334909497. Click on it to see it clearer:
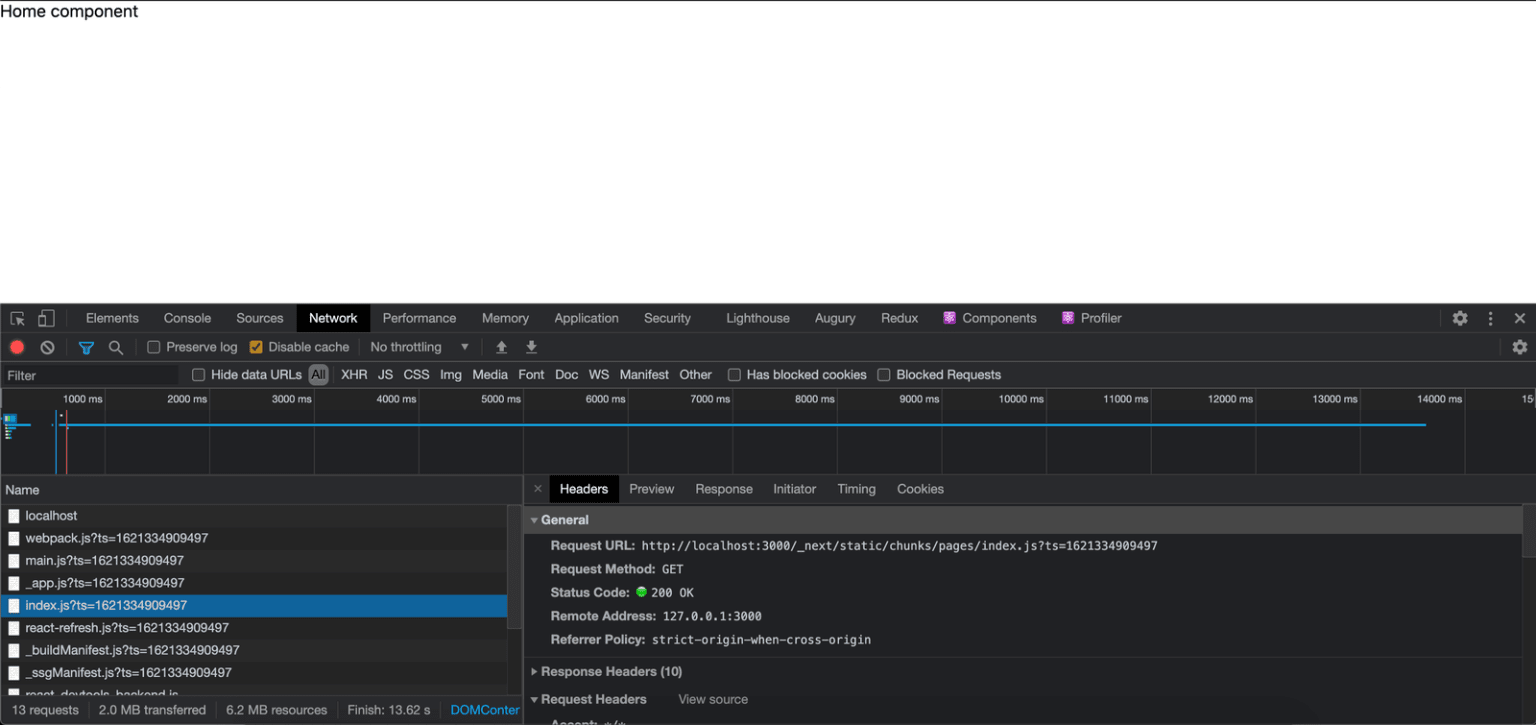
index.js?ts=1621334909497 is loaded via static/chunks/pages
See the chunk is stored at http://localhost:3000/\_next/static/chunks/pages/index.js. We have proved that Next.js code-splits our page components. Now, create a components folder at the root folder of our Next.js app and add a hello.js file in it. This file will export a HelloComponent. Open it and paste the code:
export default function Hello() {
  return (
    <div>
      <span>Welcome</span>
      <div>Hello from here!</div>
    </div>
  );
}
Go back to the pages/index.js and edit it to this:
import HelloComponent from "./../components/hello";

export default function Home() {
  return (
    <div>
      Home component
      <div>
        <HelloComponent />
      </div>
    </div>
  );
}
We are not code-splitting the HelloComponent component yet. So it is bundled together with the Home component. See the DevTool:

Home component is loaded in the main bundle, no code-split
Let's code-split the HelloComponent:
import dynamic from "next/dynamic";

const HelloComponent = dynamic(() => import("../components/hello"));

export default function Home() {
  return (
    <div>
      Home component
      <div>
        <HelloComponent />
      </div>
    </div>
  );
}
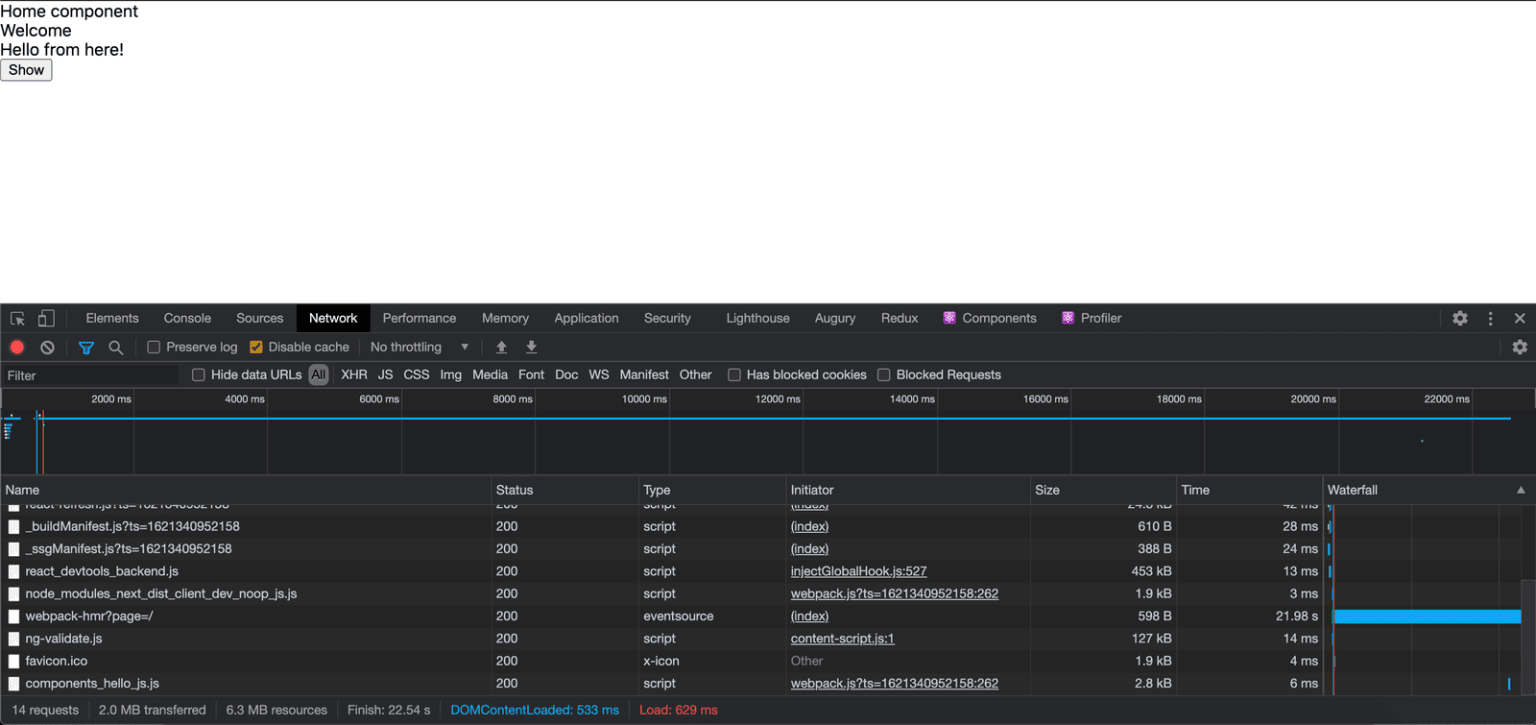
Reload and look in your Network tab:
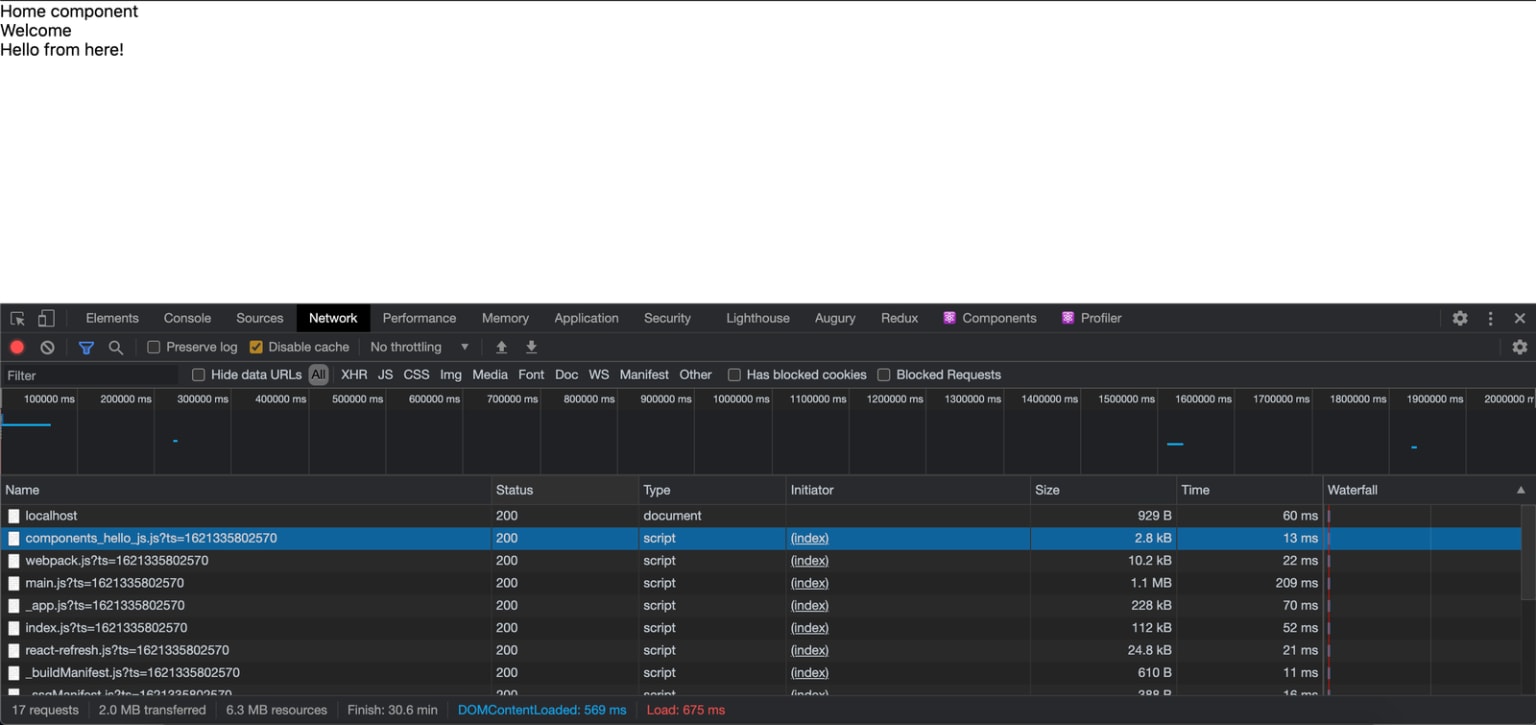
HelloComponent is loaded in components_hello_js.js chunk.
See we have components_hello_js.js?ts=1621335802570 loaded. This is the chunk where the HelloComponent resides. Click on it to see that it has its own file generated for itself.
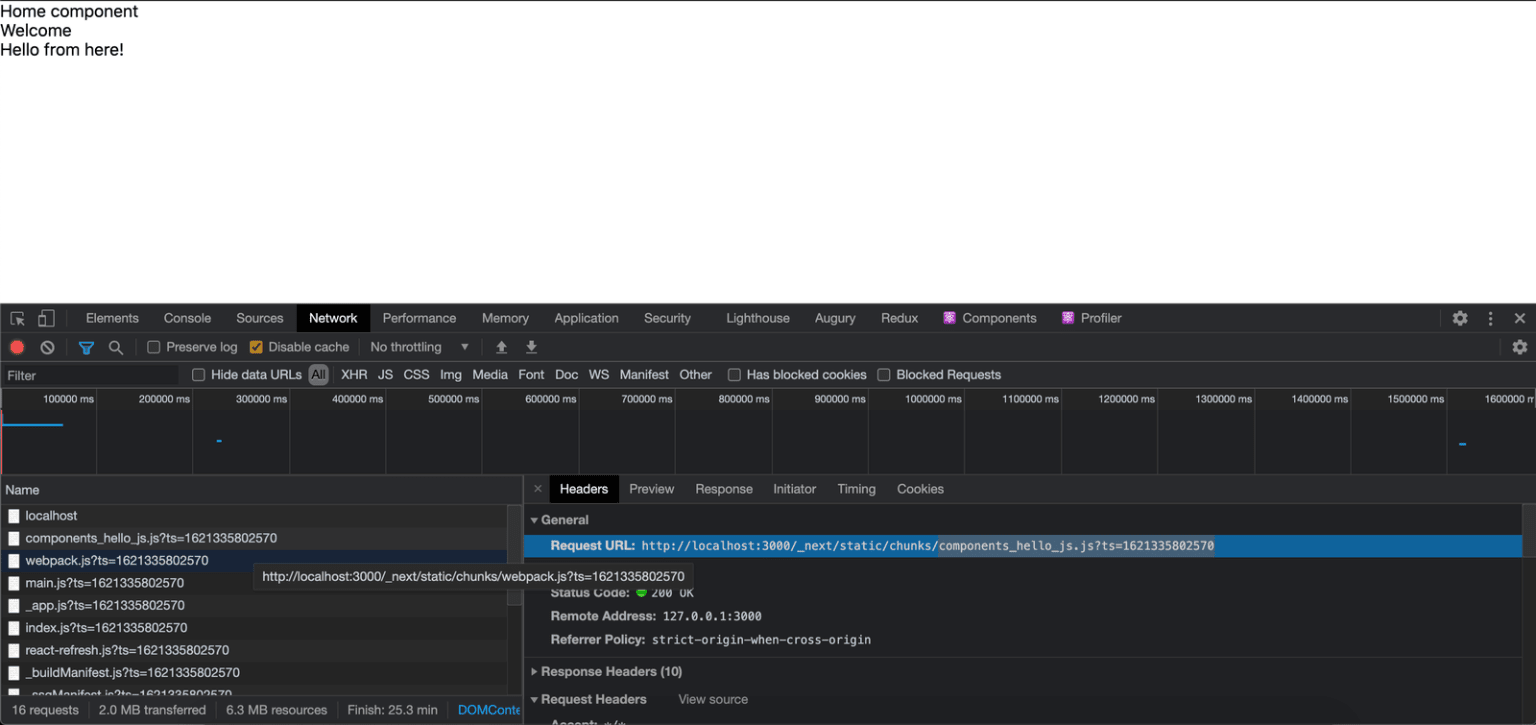
Full details of HelloComponent loaded in components_hello_js.js
Conditional rendering of components
Let's add more spice to our examples. Here, we will conditionally render our code-split components. To do that we will set a boolean state and use it to render a component when the state is true. See code:
import dynamic from "next/dynamic";
import { useState } from "react";

const HelloComponent = dynamic(() => import("../components/hello"));

export default function Home() {
  const [show, setShow] = useState(false);
  return (
    <div>
      Home component
      <div>{show ? <HelloComponent /> : null}</div>
      <div>
        <button onClick={() => setShow((pV) => !pV)}>Show</button>
      </div>
    </div>
  );
}
The show state is initially set to false, this will make the HelloComponent not load when the page component is rendered.
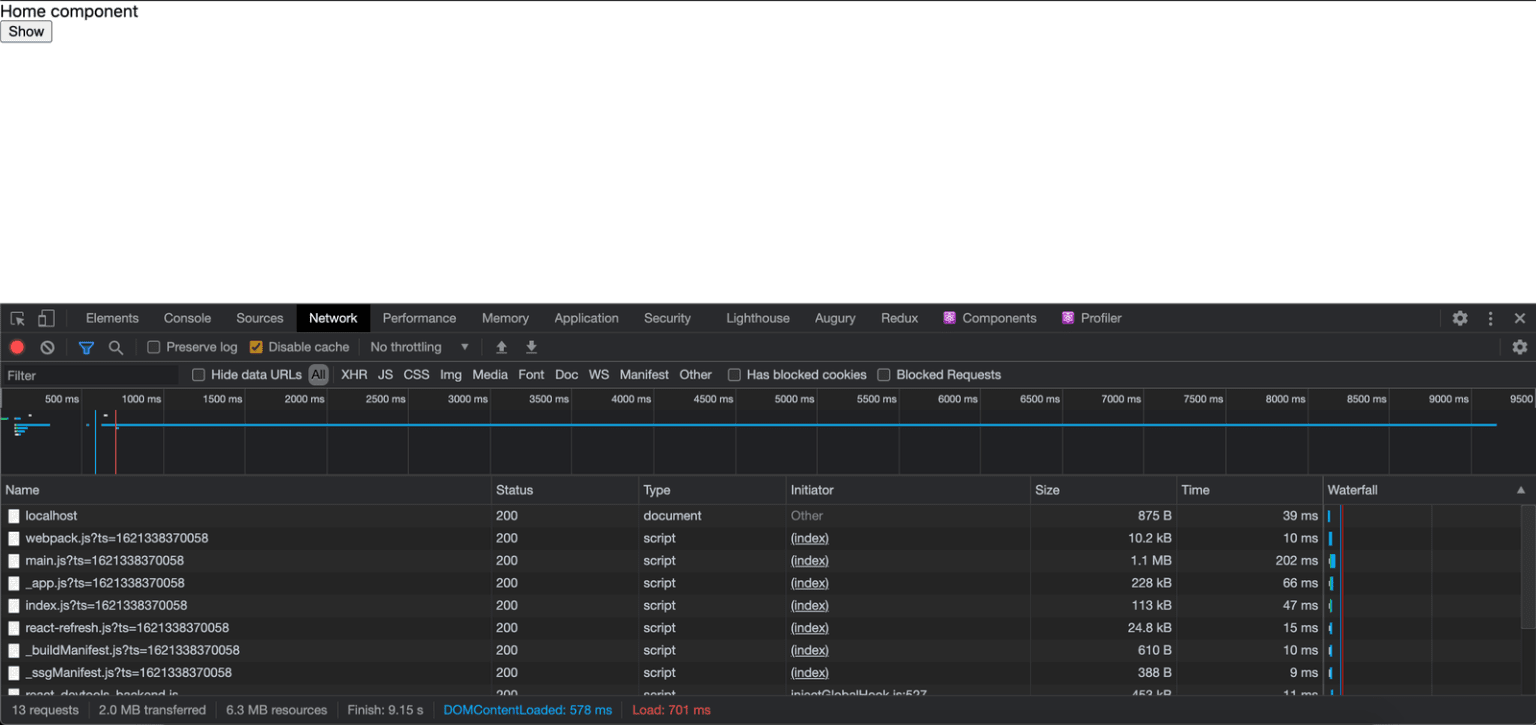
HelloComponent is not yet loaded
View 2: HelloComponent is not yet loaded.
See in the DevTools Network, there is no components_hello_js.js?ts= loaded. Now, when we click on the Show button, the state is flipped to true, this will make Home component re-render, the HelloComponent will be loaded from the server and be rendered.
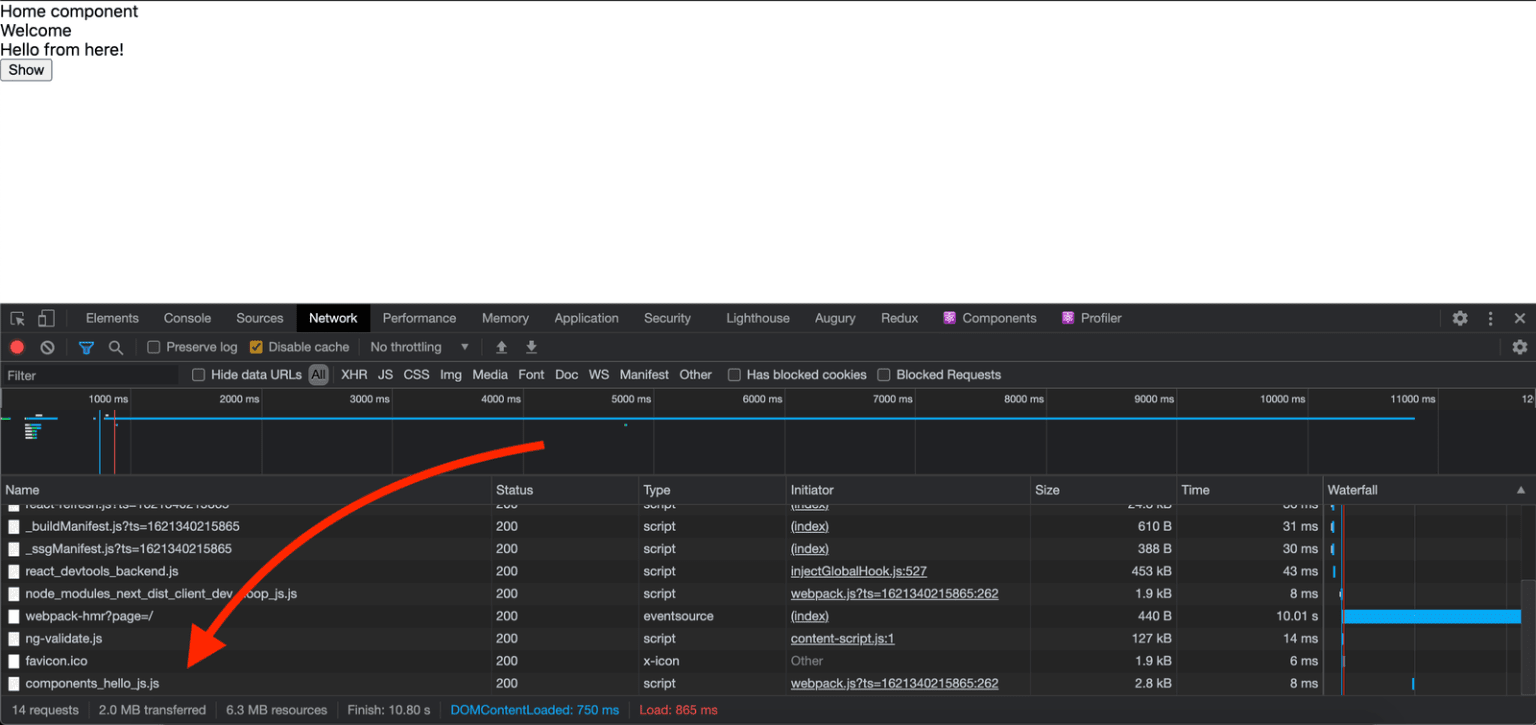
HelloComponent is loaded.
See, the components_hello_js.js?ts= appears because the HelloComponent has been fetched. A code-split component is loaded once from the server and stored in the browser. It will not be loaded from the server when it is rendered again. Like in our above app, clicking on the Show button over and over after the first will no longer load the HelloComponent from the server, the first server load has stored it in the browser.
named exports
Next.js supports named exports when we are trying to code-split a component from a file that is not exported by default.
// src/components/hello.js
function HelloComponent() {
    return (
        <div>Hello!!</div>
    );
}

export HelloComponent
Here, HelloComponent is not exported by default. To import it using the dynamic import() from the src/components/hello.js file, we will use named exports.
import dynamic from "next/dynamic";

const HelloComponent = dynamic(() =>
  import("../components/hello").then((module) => module.HelloComponent)
);
To use named exports in the dynamic import() function, we will resolve the Promise returned by the import(), then use the resolved value module to access the component HelloComponent and return it.
Loading... effect
With what we have done so far, the user will not see any visual cue when the code-split component chunk is being loaded. It is a bad UI design because we need to give the users a cue that something is being loaded and will be rendered soon. We will have to add some loading effects like Loading... To do this we pass a second argument to the dynamic() function. This second argument is an object, we set a loading property in the object with a function value that returns an HTML. This HTML will be the loading visual cue that will be shown when the code split is being loaded.
import dynamic from "next/dynamic";

const HelloComponent = dynamic(() => import("../components/hello"), {
  loading: () => <b>Loading...</b>,
});
Here, we set our loading effect to show Loading... when our HelloComponent is being loaded. Let's demonstrate this in the Next.js app we scaffolded previously. Make the pages/index.js to be this:
import dynamic from "next/dynamic";
import { useState } from "react";

const HelloComponent = dynamic(() => import("../components/hello"), {
  loading: () => <b>Loading...</b>,
});

export default function Home() {
  const [show, setShow] = useState(false);
  return (
    <div>
      Home component
      <div>{show ? <HelloComponent /> : null}</div>
      <div>
        <button onClick={() => setShow((pV) => !pV)}>Show</button>
      </div>
    </div>
  );
}
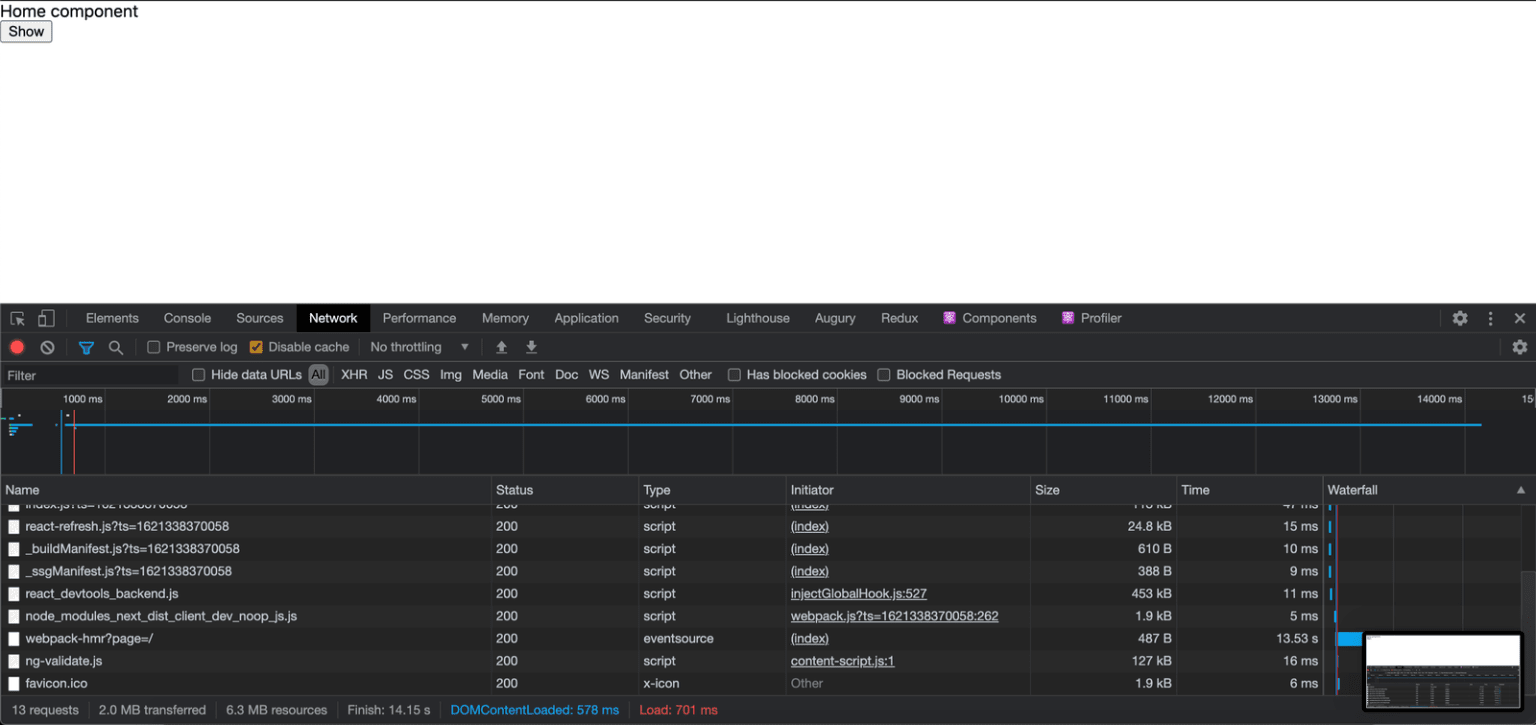
This is the same as what we have seen in the previous demonstrations the difference here is that there is a loading... effect. Now, after the component has been loaded, we will click on the Show button:
The View before the Show button is pressed.
This will initiate a server load for the HelloComponent. We will see a Loading... appear on the UI:
Note: To see this effect, set the internet speed to "fast 3G". Click on the "No throttling" dropdown and select "Fast 3G". If it is too fast, you can add your custom profile.
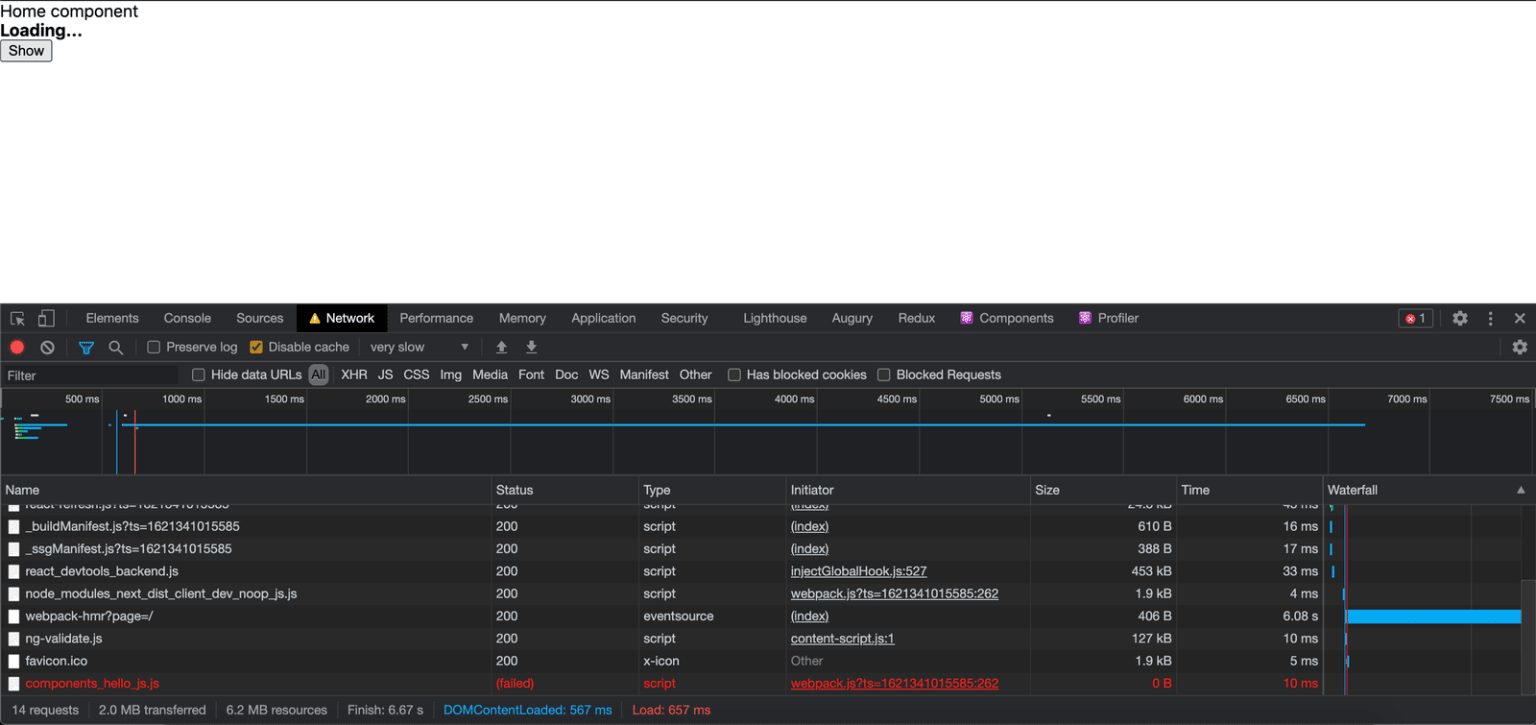
Loading… effect showing.
Then, when the component is done being loaded from the server, the Loading... goes away and is replaced by the HelloComponent UI.
HelloComponent loaded.
We can set it to a loading effect of our choice. We can add spinners, rolling stones, hourglass effects, etc.
No SSR
So far, our code-split components are being server-side rendered when loaded, this is the default rendering option for Next.js for all components it serves. Next.js has an option that enables us to switch off the server-side rendering of code-split components. Switching off server-side rendering of code-split components is sometimes needed if you want to access variables that are not available in the server. E.g the window object.
This is done in the dynamic() function, it accepts a second parameter, which is an object. This object is where we pass a boolean ssr property to toggle the server-side rendering option of code-split components. If the ssr is true, the code-split components are pre-rendered on the server, if false they are rendered on the client-side(i.e in the browser).
const HelloComponent = dynamic(() => import("../components/hello"), {
  ssr: false,
});
No pre-rendering of the HelloComponent.
const HelloComponent = dynamic(() => import("../components/hello"), {
  ssr: true,
});
The HelloComponent will be rendered on the server.
Conclusion
In this post, we learned how to code-split our routes and components in Next.js. We first, learned what code-splitting is and what goodies it brings to the performance of frontend apps. Next, we learned about using Next.js dynamic import() syntax to code-split components, how to use named exports, how to set a loading indicator to show when dynamic components are being loaded, and finally how to toggle the server-side rendering option for the code-split components.
If you have any questions regarding this or anything I should add, correct or remove, feel free to comment, email, or DM me.
Source code
Find the source of the examples in this post here.