

In this post, we will learn how to use Prisma, an ORM for JavaScript and TypeScript, in a Next.js app.
What is Prisma?
Prisma is an open-source ORM tool for Node.js and TypeScript, that simplifies connection, querying, migrations, and data modeling to SQL databases.
ORM is Object-Relational Mapping, it is a technique in which we can query data, connect and manipulate databases using the object-oriented paradigm. ORMs can be written in any language, in whatever language it is written in, it encapsulates the code required to manipulate the database. This eliminates the use of SQL because that is being taken care of by the ORM library. The ORM represents each table in the data schema as a single class. For example, a Food table will turn to a class in an ORM library and we can read all food items, delete foods, etc using this class.
To query for all foods in the database manually, we will write the code:
var mysql = require("mysql");
var connection = mysql.createConnection({
  host: "localhost",
  user: "me",
  password: "secret",
  database: "my_db",
});

connection.connect();

connection.query("SELECT * FROM food", function (error, results, fields) {
  if (error) throw error;
  console.log("Results: ", results);
});

connection.end();
So much code. But with an ORM library, it will be this:
const allFoods = Food.getAll("foods)
Simple and neat. With Prisma, it is simpler:
async function main() {
  const allFoods = await prisma.food.findMany();
  console.log(allFoods);
}
Using Prisma is very simple. The team at Prisma provides us with a CLI tool that makes generating Prisma client code a breeze. To get started with Prisma, we define the schema of our database in a schema.prisma file:
model Food {
  id      Int      @default(autoincrement()) @id
  name    String?
}
Prisma will run migrations of these against our database. We will now use Prisma client library to query the database.
// Get all foods in the "food" db
await prisma.food.findMany();

// Create new food
await prisma.food.create({
  data: {
    name: "Jollof Rice",
  },
});

// Update the food db
await prisma.food.update({
  where: { id: 1 },
  data: { name: "Rice and Steww" },
});
The findMany, create, and update methods run SQL queries against our database. But as we can see we don't have to write SQL commands and queries, Prisma takes care of that for us. We are left with a cleaner code that is easier to maintain. The mechanical part is automatically taken care of for us by Prisma
That's lit! 🔥
Prisma and Next.js
Prisma integrates well with Next.js. Next.js combines both frontend code and backend code. This means that we can build the UI components in Next.js and also build our API routes in the same Next.js app, so Next.js contains the client and server. Prisma's being a connection to a database makes it ideal for us to call it in our Next.js app to fetch data from the backend for us. There are many ways in Next.js where we can fetch data. Next.js has three unique functions we can use to fetch data for pre-rendering:
getStaticProps (Static Generation): Fetch data at build time. We will use the Prisma client to perform queries to our DB.
import { PrismaClient } from "@prisma/client";

const prisma = new PrismaClient();

export async function getStaticProps() {
  // Get all foods in the "food" db
  const allfoods = await prisma.food.findMany();

  return {
    props: allFoods,
  };
}
Next.js will perform the query during build time to fetch the data, then we return the results in the props object, this will make Next.js pass the results to the props of the corresponding component.
getServerSideProps (Server-side Rendering): Runs when the page is being pre-rendered on each request. We can also call the Prisma client methods here to fetch data that we want to pass to the Next.js components.
import { PrismaClient } from "@prisma/client";

const prisma = new PrismaClient();

export async function getServerSideProps() {
  // Get all foods in the "food" db
  const allfoods = await prisma.food.findMany();

  return {
    props: allFoods,
  };
}
API routes: API routes in Next.js are kept in the pages/api folder. Each file and folder maps to an API endpoint. They are served under the same URL path as the frontend code, localhost:3000. So as localhost:3000/foods renders the food page, so also localhost:3000/api/getAllFoods is an API endpoint that returns lists of food recipes from the Next.js app.
We can make calls to our database via Prisma from here. For e.g localhost:3000/api/getAllFoods endpoint can query the database to retrieve all the food recipes and send it as a response:
// Next.js API route support: https://nextjs.org/docs/api-routes/introduction
import { PrismaClient } from "@prisma/client";

const prisma = new PrismaClient();

export default async (req, res) => {
  const data = req.body;
  try {
    const result = await prisma.foods.findMany();
    res.status(200).json(result);
  } catch (err) {
    console.log(err);
    res.status(403).json({ err: "Error occured." });
  }
};
See that we are using the Prisma from Node.js; the API routes, getServerSideProps and getStaticProps. All those are run on the Next.js server, we can't use Prisma from the browser:
...
function Foods(props) {
    //...
  useEffect(async () => {
    await prisma.food.findMany();
  });
  //...
}
...
doing that will give an error:
Error: PrismaClient is unable to be run in the browser.
In case this error is unexpected for you, please report it in https://github.com/prisma/prisma/issues
To fully demonstrate how to use Prisma and Next.js, we will build a Food app in Next.js. The Food app will be able to:
- list all foods
- get a particular
- Display a food; its ingredients, description, and price.
- Delete a food
- Edit a food recipe.
All these actions will be performed by Prisma from the Next.js app. The foods will be stored in a Postgres database, and we will use the Prisma client to get all the foods and modify them as we listed above. Our final app will look like this:
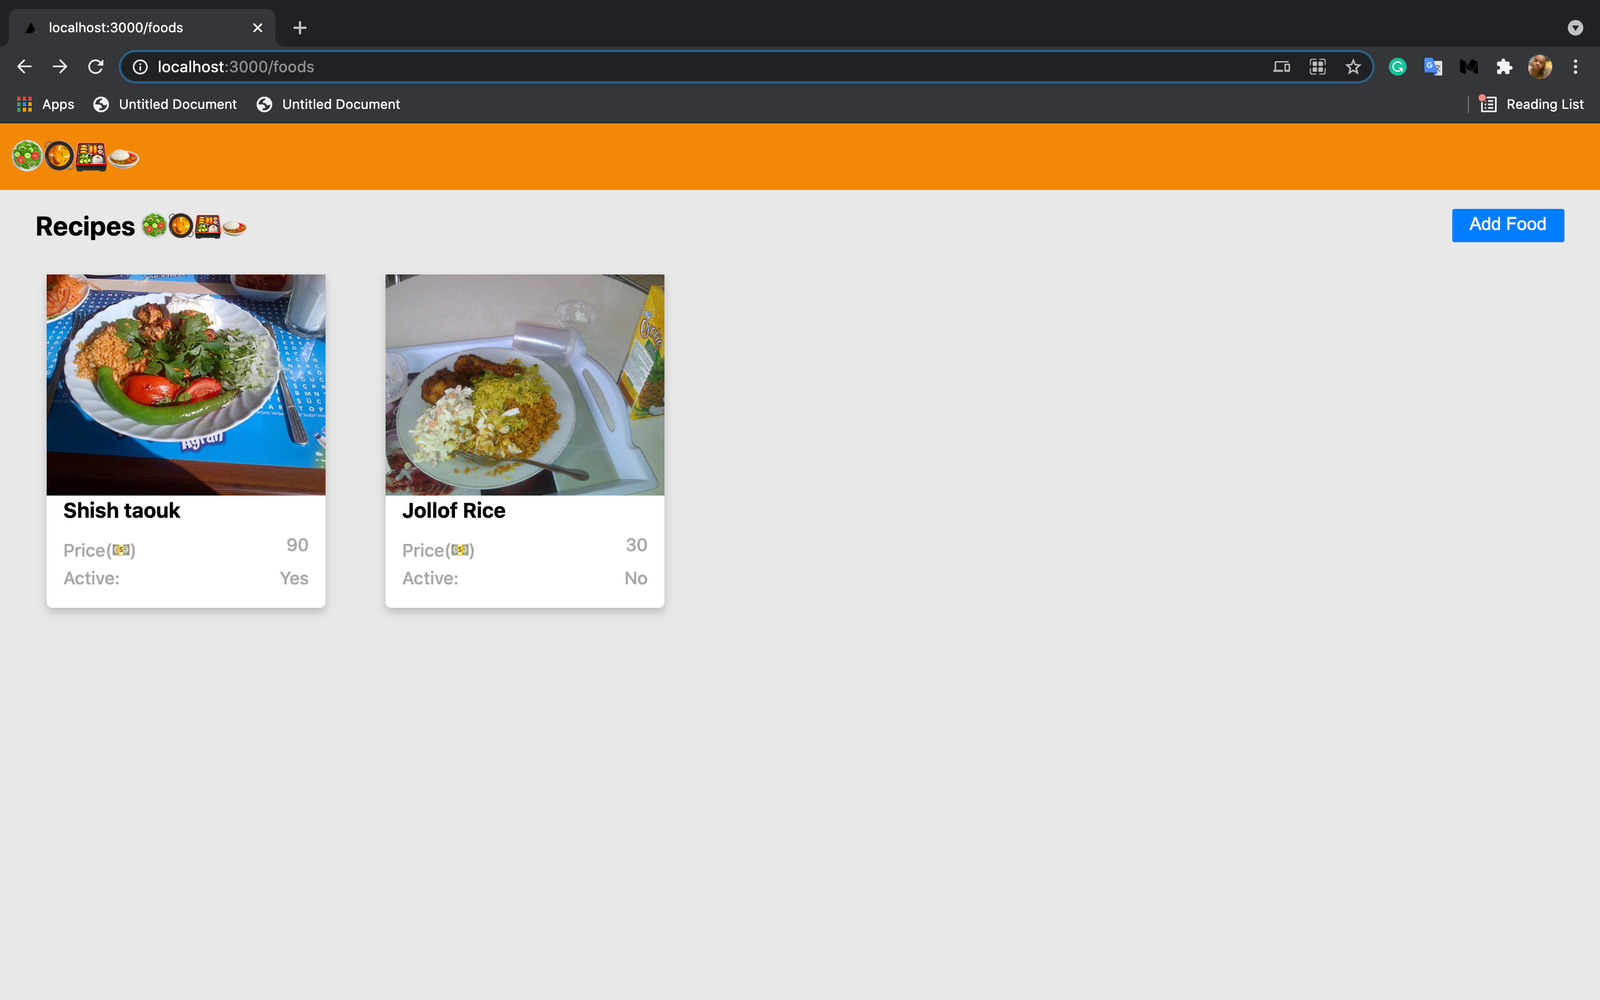
Displays food recipes
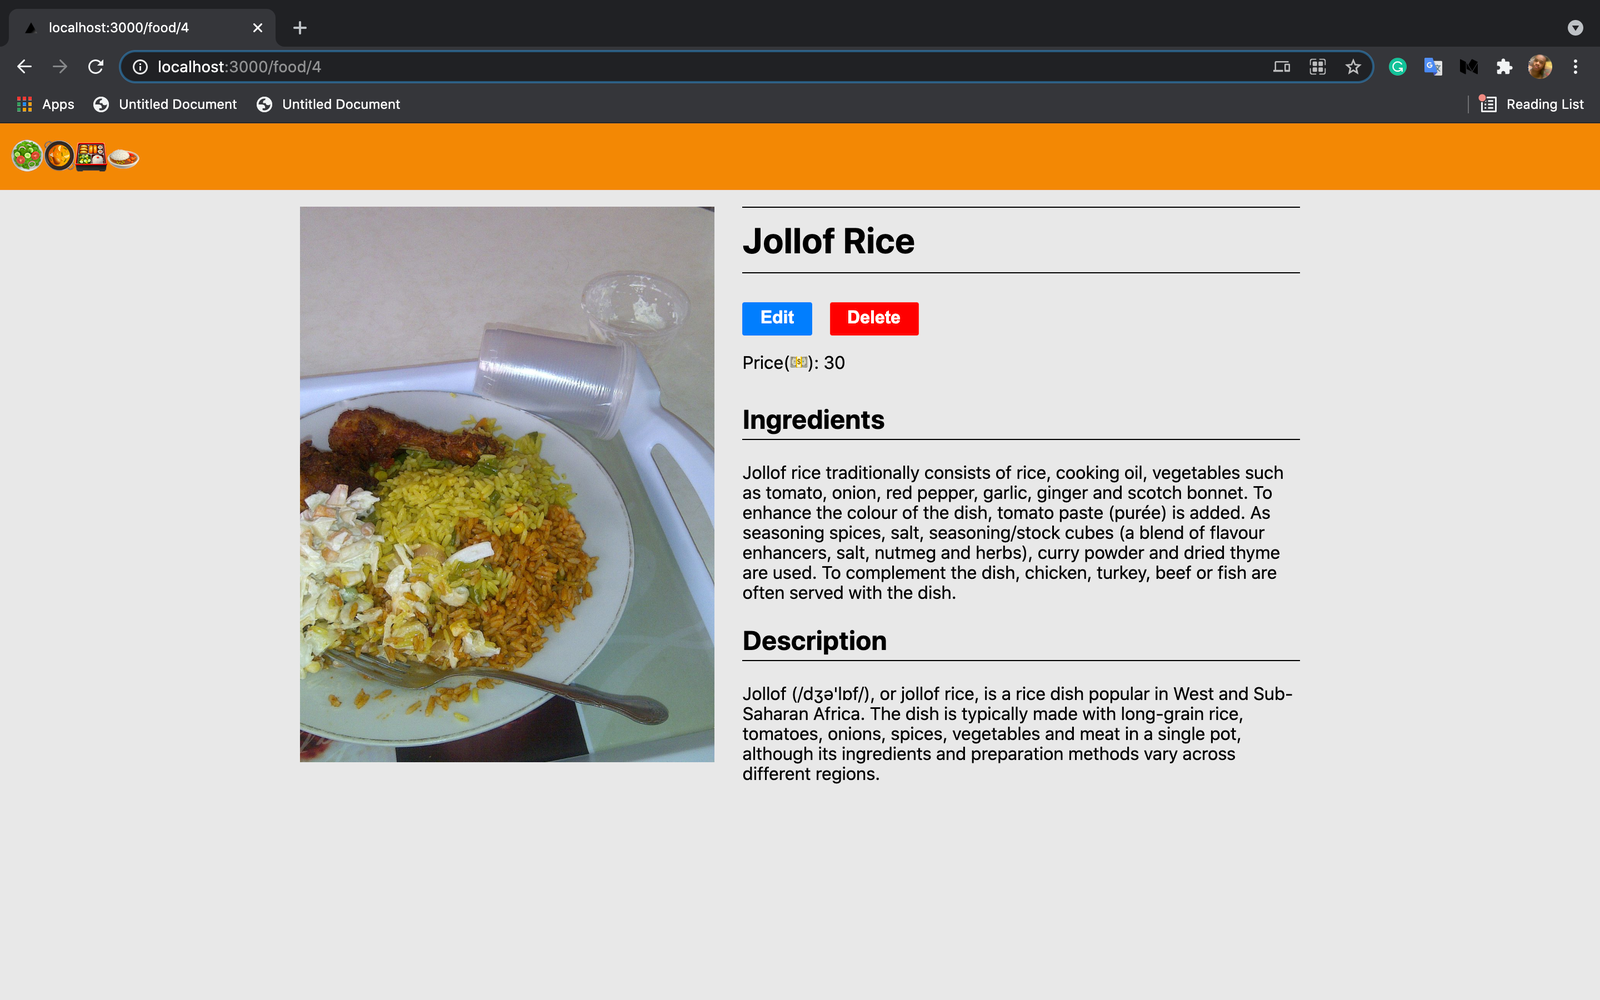
View a food recipe

Add a food recipe
Our app will have two pages, one to display all the food recipes and the other to display a specific food recipe. So our Next.js app will have two components for the two views/routes/pages. The page routes will be:
- /foods: Displays all the food recipes in our app.
- /food: Display a specific food recipe.
We will have presentational components that will display little detail of each recipe on the foods list page, and a header component to display the header. We will have two modals/dialogs where we can add new food recipes and edit an existing food recipe. We will have API routes that will expose three endpoints: one to add a new food recipe to the db, the other to edit a specific food recipe, and the last to delete a food recipe from the db.
Let’s roll.
Setup Postgres in your machine
We will be using Postgres as our database. Prisma connects to any SQL database: Postgres, MySQL, SQL Server, SQLite. It also has connections to MongoDB. If you don't have PostgresSQL installed in your machine head over to PostgresSQL downloads and download the binaries for your machine.
After installation, start the Postgres server. Make sure you remember the Postgres port, username, password because we will use them in connecting the Prisma client to the Postgres.
Scaffold a Next.js project
Now, we will scaffold a Next.js app, run the command to do so:
npx create-next-app prisma-next

yarn create next-app prisma-next
Move inside the folder: cd prisma-next. We will install the following dependencies:
- axios: HTTP library for performing HTTP requests.
- @prisma/client: Prisma client for JavaScript. It only runs on Node.js.
Run the below command:
yarn add axios @prisma-client
We are done, next, we initialize a Prisma environment in our project.
Prisma init
Run the below command:
npx prisma init
This command will create a prisma folder inside prisma-next project and a .env file. The prisma folder will contain a schema.prisma file, this is where we declare our Prisma database models. Next, we set up the Prisma connections to our Postgres DB.
Setup Prisma connection to the database
Open the .env, we will see it has a DATABASE_URL:
DATABASE_URL="postgresql://johndoe:randompassword@localhost:5432/mydb?schema=public"
This is the URL connection to a Postgres database server.
- johndoe is the name of the database user.
- randompassword is the password for the database user.
- localhost is the host of the database.
- 5432 is the port number, it is always 5432 by default.
- mydb is the name of the database you want to connect to. Create this in your Postgres server.
Now change them to your own Postgres details. Mine is:
DATABASE_URL="postgresql://postgres:0000@localhost:5432/food"
Define our model
Now, we will define our model. Since our app will be on food recipes. Our food model will be this:
model Food {
  id          Int      @default(autoincrement()) @id
  name        String?
  price       String?
  ingredients String?
  active      String?
  description String?
  imageUrl    String?
}
The id is set by the database and auto-incremented. The name will be the name of the food recipe. The price will be the price of the food recipe. The ingredients will contain the ingredients used to prepare the food. The active indicates whether this food is currently available. The description describes the food recipe. The imageUrl is the URL to the picture of the food recipe. The Food model will map to a table in our database.
Run migrations
Next, we run migrations. Running migrations, will create an SQL migration file for the current schema, and run the migrations against the database. Migrations run whenever we update the schema. Migrations are just SQL commands that are generated based on what was performed on the schema. If we create a new Model in the schema, the migrations will create an SQL command to create a table, eg:
-- CreateTable
CREATE TABLE "newTable" (
    "id" SERIAL NOT NULL,
    "name" TEXT,

    PRIMARY KEY ("id")
);
This SQL command will then be executed to create the table in the database. That's the summary of running migrations. So whenever you hear of migrations, bear in mind that this is what is being done. OK, so back to our project. Now, we run the below command to run migrations on our Postgres database:
npx prisma migrate dev --name init
This command will generate the migrations file and run them against your db. The --name sub-arg sets the name of the migration. The value which is init will be the name of the migrations folder generated. The output is: {NUMBER_GENERATED_BY_PRISMA}_init. So this will generate a folder/file inside the prisma/migrations folder. A new folder with a migration.sql SQL file will be generated for each migration run. In my machine the command generated this:
prisma/
    migrations/
        20210521082328_init/
            migration.sql
The migration.sql contains SQL command to create the Food table:
-- CreateTable
CREATE TABLE "Food" (
    "id" SERIAL NOT NULL,
    "name" TEXT,
    "price" TEXT,
    "ingredients" TEXT,
    "active" TEXT,
    "description" TEXT,

    PRIMARY KEY ("id")
);
This is because we added a model to the schema. So Prisma generated the command from the schema and ran it. OK, let's build our components.
Build the components
Like we said, our app will have two pages: foods and food. Let's create them:
mkdir pages/foods
touch pages/foods/index.js
touch pages/foods/Foods.module.css

mkdir pages/food
touch pages/food/[id].js
touch pages/food/Food.module.css
food is a dynamic route, that's why we used [id].js. The square bracket syntax is how to tell Next.js that a route is a dynamic route. The route can map to anything e.g food/1, food/2, food/1987, etc. We will create the presentational components: header and FoodCard:
mkdir components

mkdir components/header
touch components/header/index.js
touch components/header/Header.module.css

mkdir components/foodcard
touch components/foodcard/index.js
touch components/foodcard/FoodCard.module.css
We create the modal components: editfood and addfood:
mkdir components/editfood
touch components/editfood/index.js
touch components/editfood/EditFood.module.css

mkdir components/addfood
touch components/addfood/index.js
touch components/addfood/AddFood.module.css
The *.module.css is CSS Modules way to style each component separately Now we flesh out the components:
FoodCard
Open the components/foodcard/index.js and paste the below code:
import styles from "./FoodCard.module.css";
import Link from "next/link";
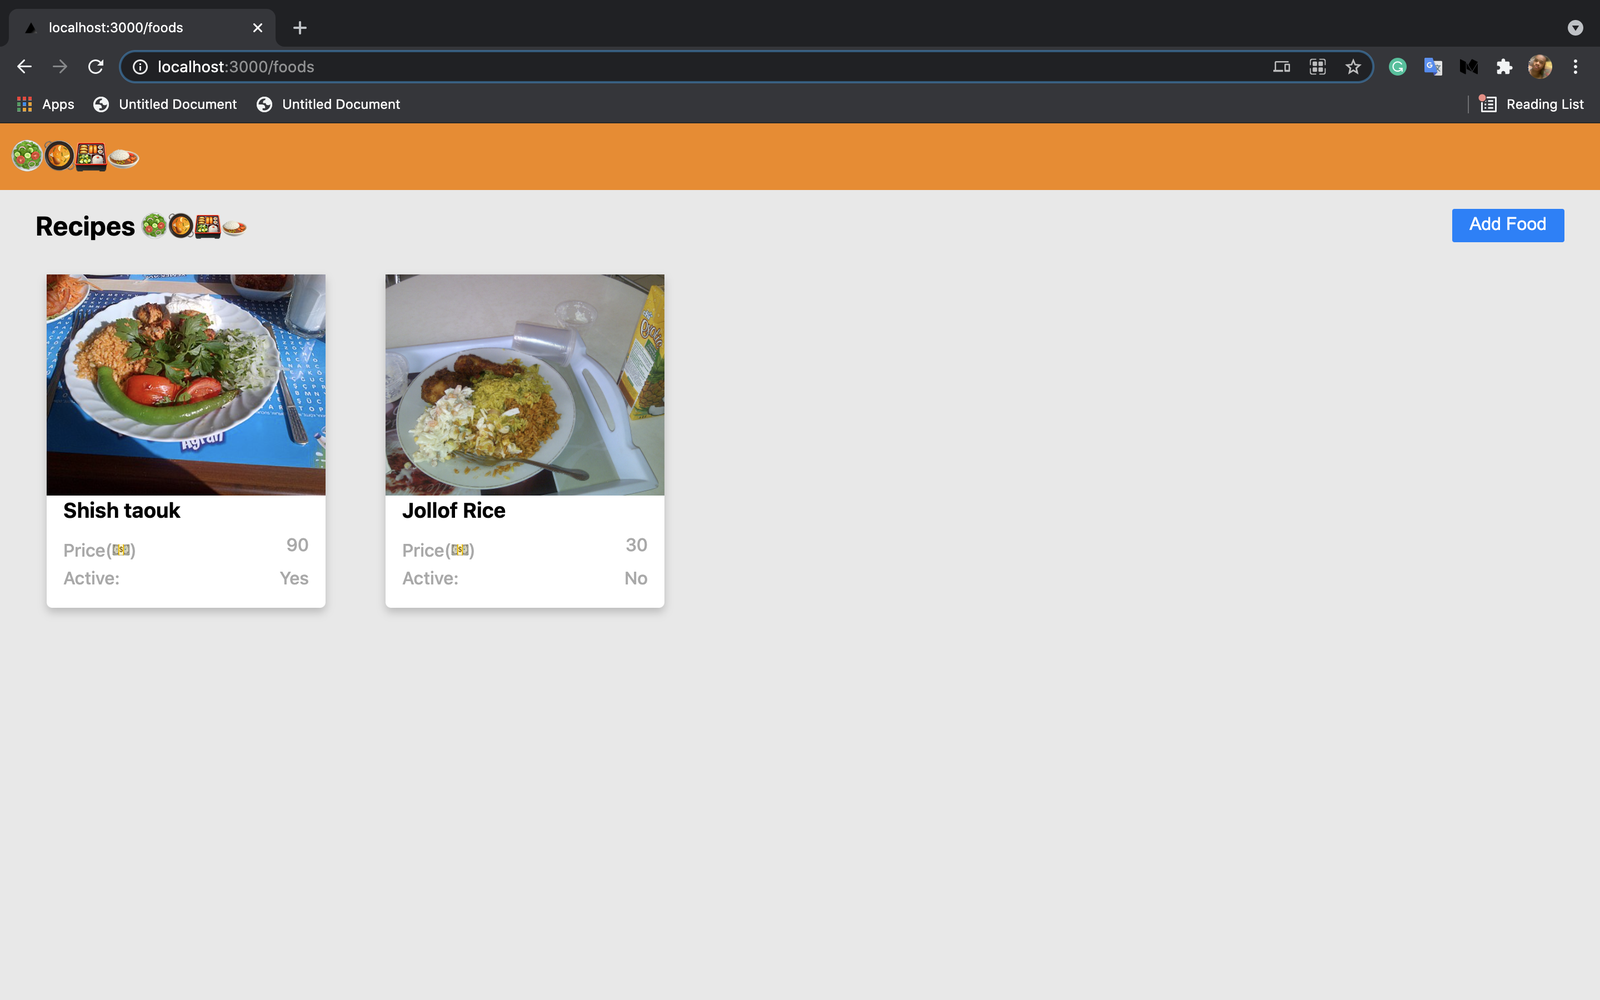
export default function FoodCard({ food }) {
return (
<Link href={`/food/${food.id}`}>
<div className={styles.foodCard}>
<div
alt={`Food Image of: ${food?.name}`}
aria-label={`Food Image of: ${food?.name}`}
className={styles.foodCardImg}
style={{ backgroundImage: `url(${food.imageUrl})` }}
></div>
<div className={styles.foodCardFooter}>
<div className={styles.foodCardName}>
<h3>{food.name}</h3>
</div>
<div className={styles.foodCardPrice}>
<span>Price(💵)</span>
<span>{food.price}</span>
</div>
<div className={styles.foodCardActive}>
<span>Active:</span>
<span>{food.active}</span>
</div>
</div>
</div>
</Link>
);
}
This FoodCard component renders the details of a food recipe, just the name, image, price, and availability of the food. It accepts the food recipe from its props in the props.food.
Header
Open the components/header/index.js and paste the below code:
import styles from "./Header.module.css";

export default function Headers() {
  return (
    <header className={styles.header}>
      <div className={styles.headerName}>🥗🥘🍱🍛</div>
    </header>
  );
}
This component renders the header.
Foods
Open the pages/foods/index.js and paste the below code:
import styles from "./Foods.module.css";
import FoodCard from "./../../components/foodcard";
import { PrismaClient } from "@prisma/client";
import AddFood from "../../components/addfood";
import { useState } from "react";

const prisma = new PrismaClient();

function Foods(props) {
  const [showAddFoodModal, setShowAddFoodModal] = useState(false);
  const foods = props.foods;

  return (
    <div className={styles.foodsCnt}>
      <div className={styles.foodsBreadcrumb}>
        <div>
          <h2>Recipes 🥗🥘🍱🍛</h2>
        </div>
        <div>
          <button
            className="btn"
            style={{
              paddingLeft: "15px",
              paddingRight: "15px",
              fontWeight: "500",
            }}
            onClick={() => setShowAddFoodModal((pV) => !pV)}
          >
            Add Food
          </button>
        </div>
      </div>
      <div className={styles.foods}>
        {foods?.map((food, i) => (
          <FoodCard food={food} key={i} />
        ))}
      </div>
      {showAddFoodModal ? (
        <AddFood closeModal={() => setShowAddFoodModal(false)} />
      ) : null}
    </div>
  );
}

export async function getServerSideProps() {
  const allFoods = await prisma.food.findMany();
  return {
    props: {
      foods: allFoods,
    },
  };
}

export default Foods;
This component fetches the food recipes and renders them in a list. See that it initializes the Prism client:
const prisma = new PrismaClient();
And the foods are gotten in the getServerSideProps method.
export async function getServerSideProps() {
  const allFoods = await prisma.food.findMany();

  return {
    props: {
      foods: allFoods,
    },
  };
}
We call the prisma.food.findMany() method to get all the foods on the food table. See that the models in the prisma.schema are available in prisma object. We have Food model, so that's why we have food in the prisma object. Now, each model available in the prisma object contains methods to get all the model data, modify the model data and delete the model data: findMany, update, upsert, delete, find, etc.
So we set a foods key in the props to hold the food recipes result in the allFoods so this way Foods can access the food recipes returned by doing this props.foods. Looking inside the Foods component we have a showAddFoodModal state that we use to toggle the AddFood modal. Next, the food recipes are retrieved from the props and stored in the foods variable. Then, we render the food recipes in the foods array, each food in the array is rendered by the FoodCard. Each food in the array is passed to it via the food prop.
Food
Open pages/food/index.js and paste the below code:
import styles from "./Food.module.css";
import { PrismaClient } from "@prisma/client";
import { useState } from "react";
import EditFood from "../../components/editfood";
import axios from "axios";
import { useRouter } from "next/router";

const prisma = new PrismaClient();

export default function Food(props) {
  const [showEditFoodModal, setShowEditFoodModal] = useState(false);
  const router = useRouter();
  const { food } = props;

  async function deleteFood() {
    if (window.confirm("Do you want to delete this food?")) {
      // ...
      await axios.post("/api/deleteFood", { id: parseInt(food?.id) });
      router.push("/foods");
    }
  }

  return (
    <div className={styles.foodContainer}>
      <div className={styles.food}>
        <div
          alt={`Food Image of: ${food?.name}`}
          aria-label={`Food Image of: ${food?.name}`}
          className={styles.foodImage}
          style={{ backgroundImage: `url(${food?.imageUrl})` }}
        ></div>
        <div className={styles.foodDetails}>
          <div className={styles.foodName}>
            <h1>{food?.name}</h1>
          </div>
          <div style={{ padding: "5px 0" }}>
            <span>
              <button
                onClick={() => setShowEditFoodModal((pV) => !pV)}
                style={{ marginLeft: "0" }}
                className="btn"
              >
                Edit
              </button>
              <button onClick={deleteFood} className="btn btn-danger">
                Delete
              </button>
            </span>
          </div>
          <div style={{ padding: "5px 0" }}>
            <span> Price(💵): {food?.price}</span>
          </div>
          <div className={styles.foodDescIngreCnt}>
            <h2>Ingredients</h2>
            <div className={styles.foodSynopsis}>{food?.ingredients}</div>
          </div>
          <div className={styles.foodDescIngreCnt}>
            <h2>Description</h2>
            <div className={styles.foodSynopsis}>{food?.description}</div>
          </div>
        </div>
      </div>
      {showEditFoodModal ? (
        <EditFood food={food} closeModal={() => setShowEditFoodModal(false)} />
      ) : null}
    </div>
  );
}

export async function getServerSideProps(context) {
  const { id } = context.params;
  const food = await prisma.food.findUnique({ where: { id: parseInt(id) } });
  return {
    props: {
      food,
    },
  };
}
This page will get the id of a food recipe, use the id to fetch the food recipe, and display all its details. See in the getServerSideProps method:
export async function getServerSideProps(context) {
  const { id } = context.params;
  const food = await prisma.food.findUnique({ where: { id: parseInt(id) } });
  return {
    props: {
      food,
    },
  };
}
We retrieved the value of the id of the route from the context.params. Now we called the prisma.food.findUnique method to fetch the food recipe whose id is the value of the id we retrieved from the context.params. The result is passed to the props object in a food key.
The Food component, retrieves the food result from its props arg and uses it to render all the content of the food recipe. There are Edit and Delete buttons. The Delete button when clicked clears out the food from the db. It calls the api/deleteFood in our app, the endpoint does the work and returns the response and we move to the foodslist since the food recipe we are viewing no longer exists. The Edit brings up the EditFood modal for us to edit the current food we are viewing. This is done by the showEditFoodModal state, it toggles the modal on or off.
EditFood
Open the components/editfood/index.js and paste the below code:
import { useState, useRef } from "react";
import axios from "axios";

export default function EditFood({ closeModal, food }) {
  const formRef = useRef();
  const [disable, setDisable] = useState(false);

  async function editFood() {
    setDisable(true);
    const {
      editFoodName,
      editFoodPrice,
      editFoodImageUrl,
      editFoodActive,
      editFoodDescription,
      editFoodIngredients,
    } = formRef.current;
    const name = editFoodName.value;
    const price = editFoodPrice.value;
    const imageUrl = editFoodImageUrl.value;
    const active = editFoodActive.value;
    const description = editFoodDescription.value;
    const ingredients = editFoodIngredients.value;

    await axios.put("/api/editFood", {
      id: parseInt(food?.id),
      name,
      price,
      imageUrl,
      active,
      description,
      ingredients,
    });
    setDisable(false);
    window.location.reload();
  }

  return (
    <div className="modal">
      <div className="modal-backdrop" onClick={() => closeModal()}></div>
      <div className="modal-content">
        <div className="modal-header">
          <h3>Edit Food</h3>
          <span
            style={{ padding: "10px", cursor: "pointer" }}
            onClick={() => closeModal()}
          >
            X
          </span>
        </div>
        <div className="modal-body content">
          <form ref={formRef}>
            <div style={{ display: "flex", margin: "2px 2px 0 0" }}>
              <div
                style={{ flex: "1 1 100%", margin: "0 0 2px 5px" }}
                className="inputField"
              >
                <div className="label">
                  <label>Name</label>
                </div>
                <div>
                  <input
                    defaultValue={food?.name}
                    name="editFoodName"
                    type="text"
                  />
                </div>
              </div>
              <div
                style={{ flex: "1 1 50%", margin: "0 0 2px 5px" }}
                className="inputField"
              >
                <div className="label">
                  <label>Price($)</label>
                </div>
                <div>
                  <input
                    defaultValue={food?.price}
                    name="editFoodPrice"
                    type="text"
                  />
                </div>
              </div>
              <div
                style={{ flex: "1 1 50%", margin: "0 0 2px 5px" }}
                className="inputField"
              >
                <div className="label">
                  <label>Active</label>
                </div>
                <div>
                  <input
                    defaultValue={food?.active}
                    name="editFoodActive"
                    type="text"
                  />
                </div>
              </div>
            </div>
            <div className="inputField">
              <div className="label">
                <label>ImageUrl</label>
              </div>
              <div>
                <input
                  defaultValue={food?.imageUrl}
                  name="editFoodImageUrl"
                  type="text"
                />
              </div>
            </div>
            <div className="inputField">
              <div className="label">
                <label>Ingredients</label>
              </div>
              <div>
                <textarea
                  defaultValue={food?.ingredients}
                  style={{ width: "100%", height: "100px" }}
                  name="editFoodIngredients"
                  type="text"
                ></textarea>
              </div>
            </div>
            <div className="inputField">
              <div className="label">
                <label>Description</label>
              </div>
              <div>
                <textarea
                  defaultValue={food?.description}
                  style={{ width: "100%", height: "100px" }}
                  name="editFoodDescription"
                  type="text"
                ></textarea>
              </div>
            </div>
          </form>
        </div>
        <div className="modal-footer">
          <button onClick={() => closeModal()}>Cancel</button>
          <button disabled={disable} className="btn" onClick={() => editFood()}>
            Save
          </button>
        </div>
      </div>
    </div>
  );
}
This is modal component that we can edit a food recipe passed to it. The food to edit is passed via its props arg in the food key. Also, closeModal function is passed too, this is called from the component to toggle the modal's visibility. The component has input boxes that render the values of the food's info, we can edit them there and press the Save button. This calls the editFood method, which retrieves the values from the input boxes and calls the /api/editFood API endpoint with the data. This API endpoint is responsible for updating food info on the db.
AddFood
Open the compoennt/addfood/index.js file and paste the below code:
import { useRef, useState } from "react";
import axios from "axios";

export default function AddFood({ closeModal }) {
  const [disable, setDisable] = useState(false);
  const formRef = useRef();

  async function addNewFood(params) {
    setDisable(true);
    const {
      addFoodName,
      addFoodPrice,
      addFoodImageUrl,
      addFoodActive,
      addFoodDescription,
      addFoodIngredients,
    } = formRef.current;
    const name = addFoodName.value;
    const price = addFoodPrice.value;
    const imageUrl = addFoodImageUrl.value;
    const active = addFoodActive.value;
    const description = addFoodDescription.value;
    const ingredients = addFoodIngredients.value;
    await axios.post("/api/addFood", {
      name,
      price,
      imageUrl,
      active,
      description,
      ingredients,
    });
    setDisable(false);
    window.location.reload();
  }

  return (
    <div className="modal">
      <div className="modal-backdrop" onClick={() => closeModal()}></div>
      <div className="modal-content">
        <div className="modal-header">
          <h3>Add Food</h3>
          <span
            style={{ padding: "10px", cursor: "pointer" }}
            onClick={() => closeModal()}
          >
            X
          </span>
        </div>
        <div className="modal-body content">
          <form ref={formRef}>
            <div style={{ display: "flex", margin: "2px 2px 0 0" }}>
              <div
                style={{ flex: "1 1 100%", margin: "0 0 2px 5px" }}
                className="inputField"
              >
                <div className="label">
                  <label>Name</label>
                </div>
                <div>
                  <input name="addFoodName" type="text" />
                </div>
              </div>
              <div
                style={{ flex: "1 1 50%", margin: "0 0 2px 5px" }}
                className="inputField"
              >
                <div className="label">
                  <label>Price($)</label>
                </div>
                <div>
                  <input name="addFoodPrice" type="text" />
                </div>
              </div>
              <div
                style={{ flex: "1 1 50%", margin: "0 0 2px 5px" }}
                className="inputField"
              >
                <div className="label">
                  <label>Active</label>
                </div>
                <div>
                  <input name="addFoodActive" type="text" />
                </div>
              </div>
            </div>
            <div className="inputField">
              <div className="label">
                <label>ImageUrl</label>
              </div>
              <div>
                <input name="addFoodImageUrl" type="text" />
              </div>
            </div>
            <div className="inputField">
              <div className="label">
                <label>Ingredients</label>
              </div>
              <div>
                <textarea
                  style={{ width: "100%", height: "100px" }}
                  name="addFoodIngredients"
                  type="text"
                ></textarea>
              </div>
            </div>
            <div className="inputField">
              <div className="label">
                <label>Description</label>
              </div>
              <div>
                <textarea
                  style={{ width: "100%", height: "100px" }}
                  name="addFoodDescription"
                  type="text"
                ></textarea>
              </div>
            </div>
          </form>
        </div>
        <div className="modal-footer">
          <button style={{ marginLeft: "0" }} onClick={() => closeModal()}>
            Cancel
          </button>
          <button
            disabled={disable}
            className="btn"
            onClick={() => addNewFood()}
          >
            Add
          </button>
        </div>
      </div>
    </div>
  );
}
Here, we create a new food recipe. The input boxes are where we add the info for a new food recipe. The Add button when clicked will call the addNewFood function. This function will retrieve the new food data from the input boxes and call the api/addFood API endpoint with this info. The endpoint is responsible for adding new food recipe to our database. After the API endpoint call, the page is reloaded so we see the newly created food recipe. Now we are done with our components let's create the API endpoints.
Creating the API routes
Create the following files:
touch pages/api/addFood.js
touch pages/api/editFood.js
touch pages/api/deleteFood.js
/api/addFood
The api/addFood.js will create a new food recipe in our database. Paste the below code in it:
// Next.js API route support: https://nextjs.org/docs/api-routes/introduction
import { PrismaClient } from "@prisma/client";

const prisma = new PrismaClient();

export default async (req, res) => {
  const data = req.body;
  try {
    const result = await prisma.food.create({
      data: {
        ...data,
      },
    });
    res.status(200).json(result);
  } catch (err) {
    console.log(err);
    res.status(403).json({ err: "Error occured while adding a new food." });
  }
};
The data of the food recipe is retrieved from the req argument in its .body object. According to the Next.js docs:
req: An instance of http.IncomingMessage, plus some pre-built middlewares you can see here
res: An instance of http.ServerResponse, plus some helper functions you can see here
So back to our addFood.js code, we call the prisma.food.create method passing in the data to create the new food recipe in the database. Then, the result is returned as a response with a status code of 200.
editFood
Open the pages/api/editFood.js and paste the below code:
// Next.js API route support: https://nextjs.org/docs/api-routes/introduction
import { PrismaClient } from "@prisma/client";

const prisma = new PrismaClient();

export default async (req, res) => {
  const {
    id,
    name,
    price,
    imageUrl,
    active,
    description,
    ingredients,
  } = req.body;
  try {
    const updateFood = await prisma.food.update({
      where: {
        id: parseInt(id),
      },
      data: {
        name,
        price,
        imageUrl,
        active,
        description,
        ingredients,
      },
    });
    res.status(200).json(updateFood);
  } catch (error) {
    res.status(403).json({ err: "Error occurred while updating a food item." });
  }
};
The new info of the food recipe is extracted from the req.body object. Next, the prisma.food.update method is called to update the food recipe whose id is equal to the id extracted from the req.body with the new info.
deleteFood
Open the pages/api/deleteFood.js, and paste the below code:
// Next.js API route support: https://nextjs.org/docs/api-routes/introduction
import { PrismaClient } from "@prisma/client";

const prisma = new PrismaClient();

export default async (req, res) => {
  const { id } = req.body;
  try {
    const deleteFood = await prisma.food.delete({
      where: {
        id,
      },
    });
    res.status(200).json(deleteFood);
  } catch (error) {
    res.status(403).json({ err: "Error occured while deleting a food item." });
  }
};
This extracts the id of the food recipe to delete. Next, we deleted the food recipe by calling prisma.food.delete method by the id of the food recipe. The prisma.food.delete method deletes a single food recipe from the Food record in the Postgres database. The where object is used to tell the Prisma the condition in which the Prisma will select a record from the table to delete. Now, let's test our app.
Testing
Run:
yarn dev
and open your browser to localhost:3000.
Adding a new food:
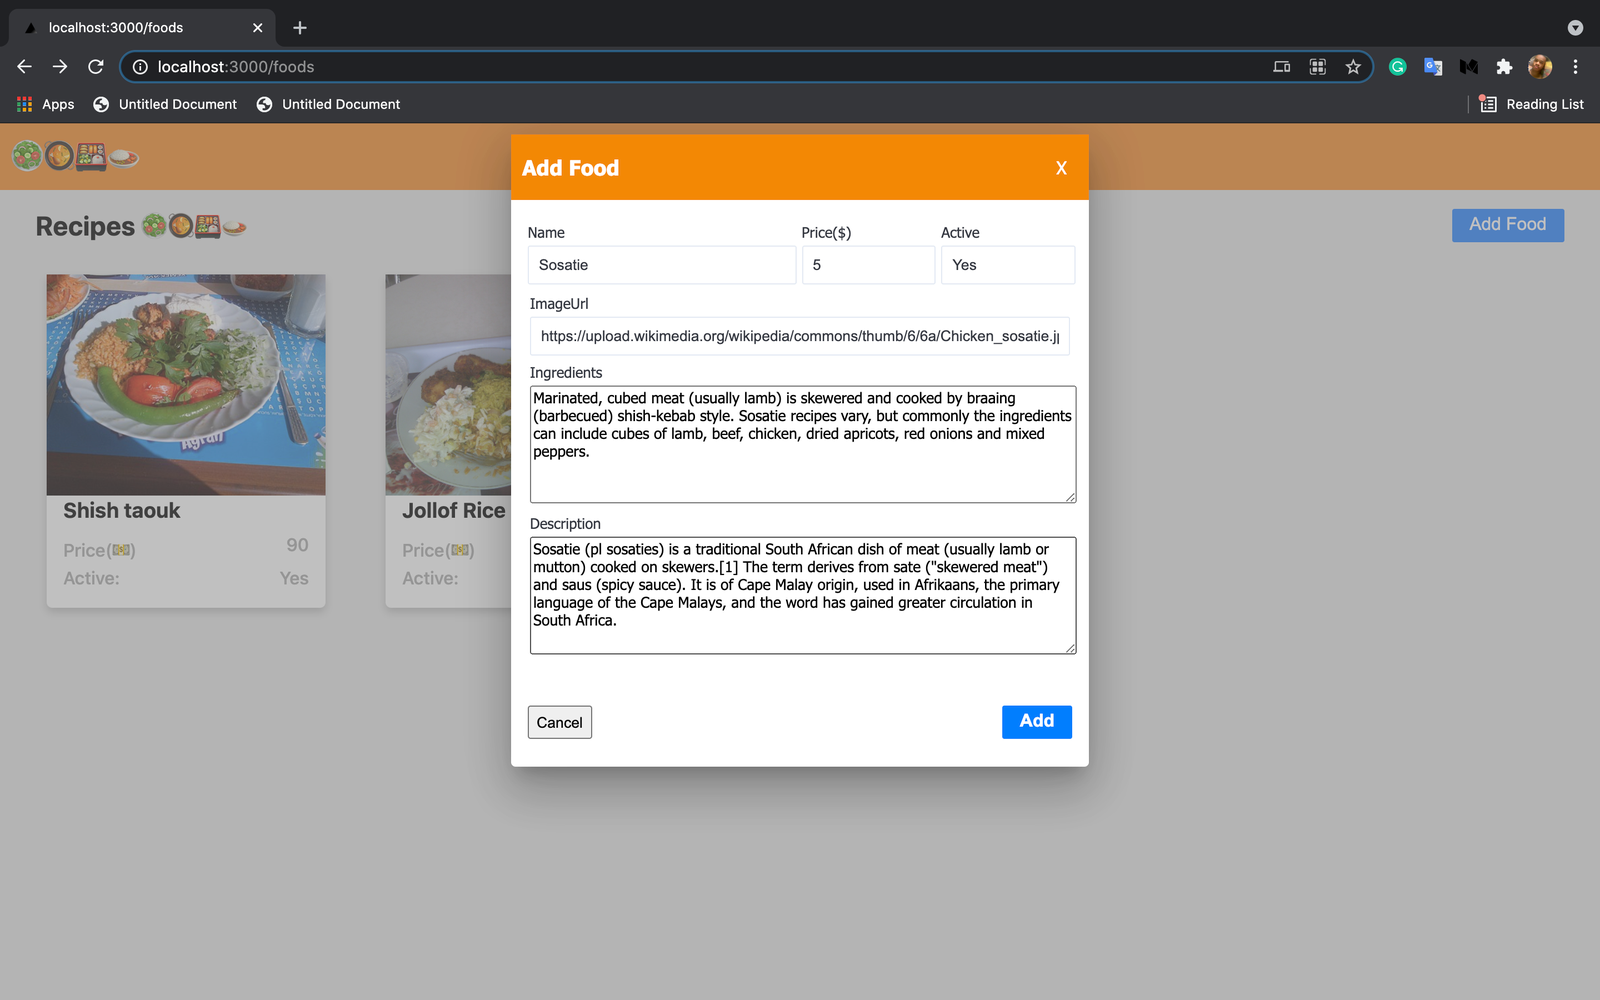
Adding new food (Sosatie)
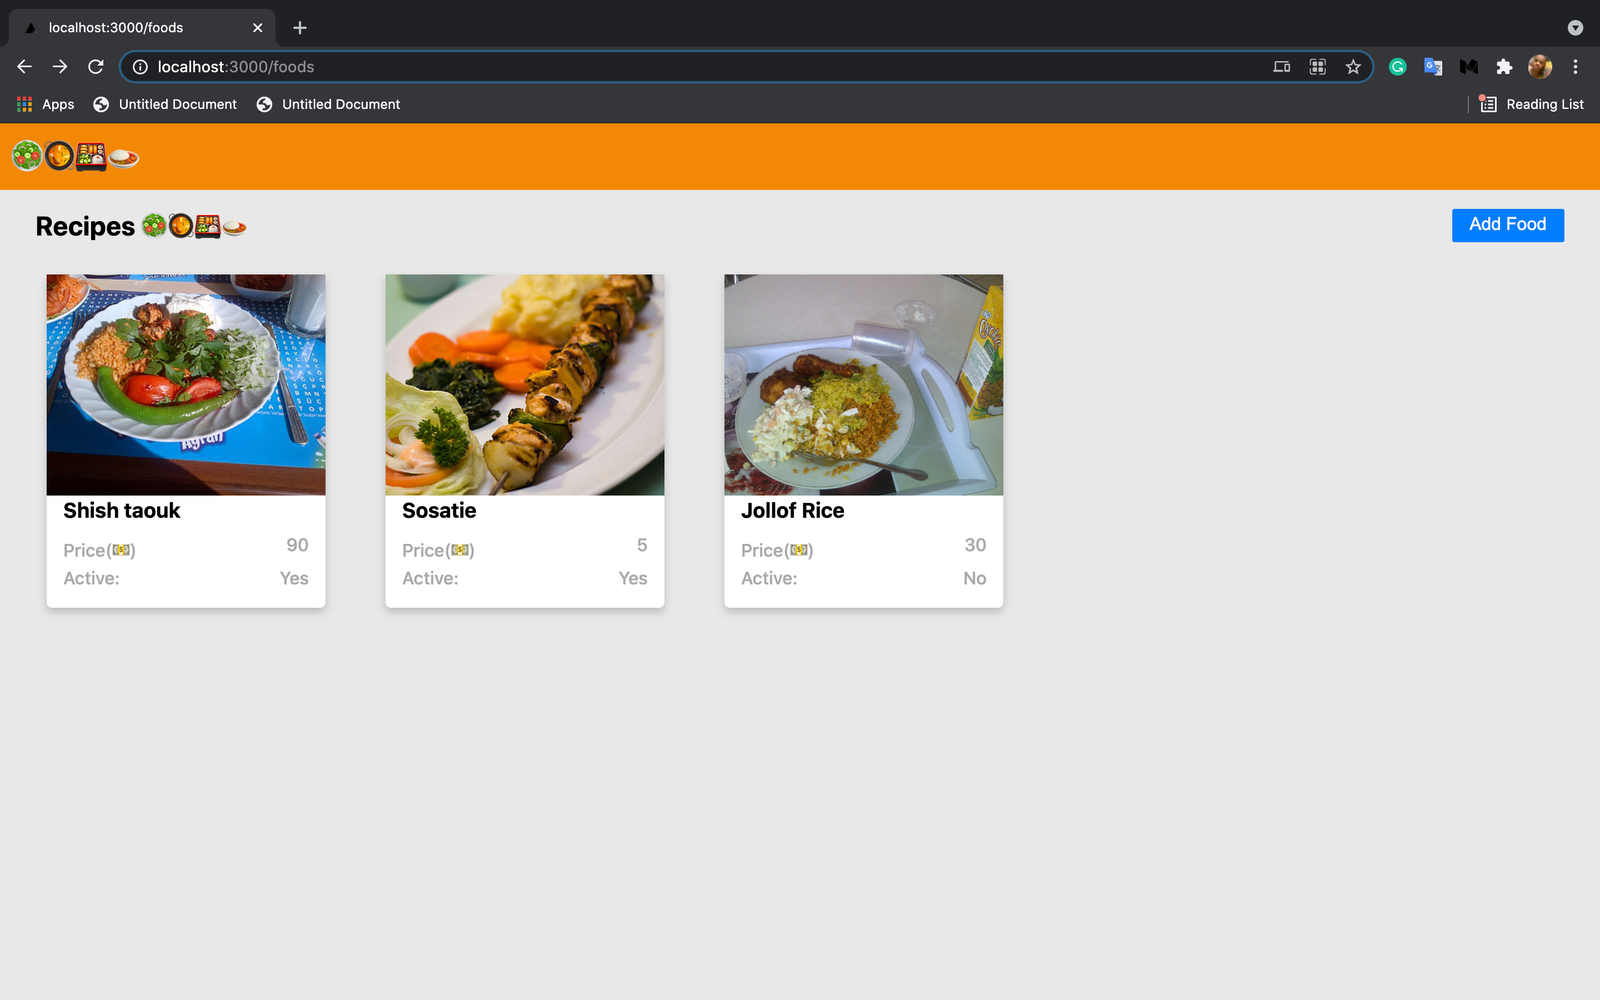
Sosatie is displayed in the list
Viewing a food:
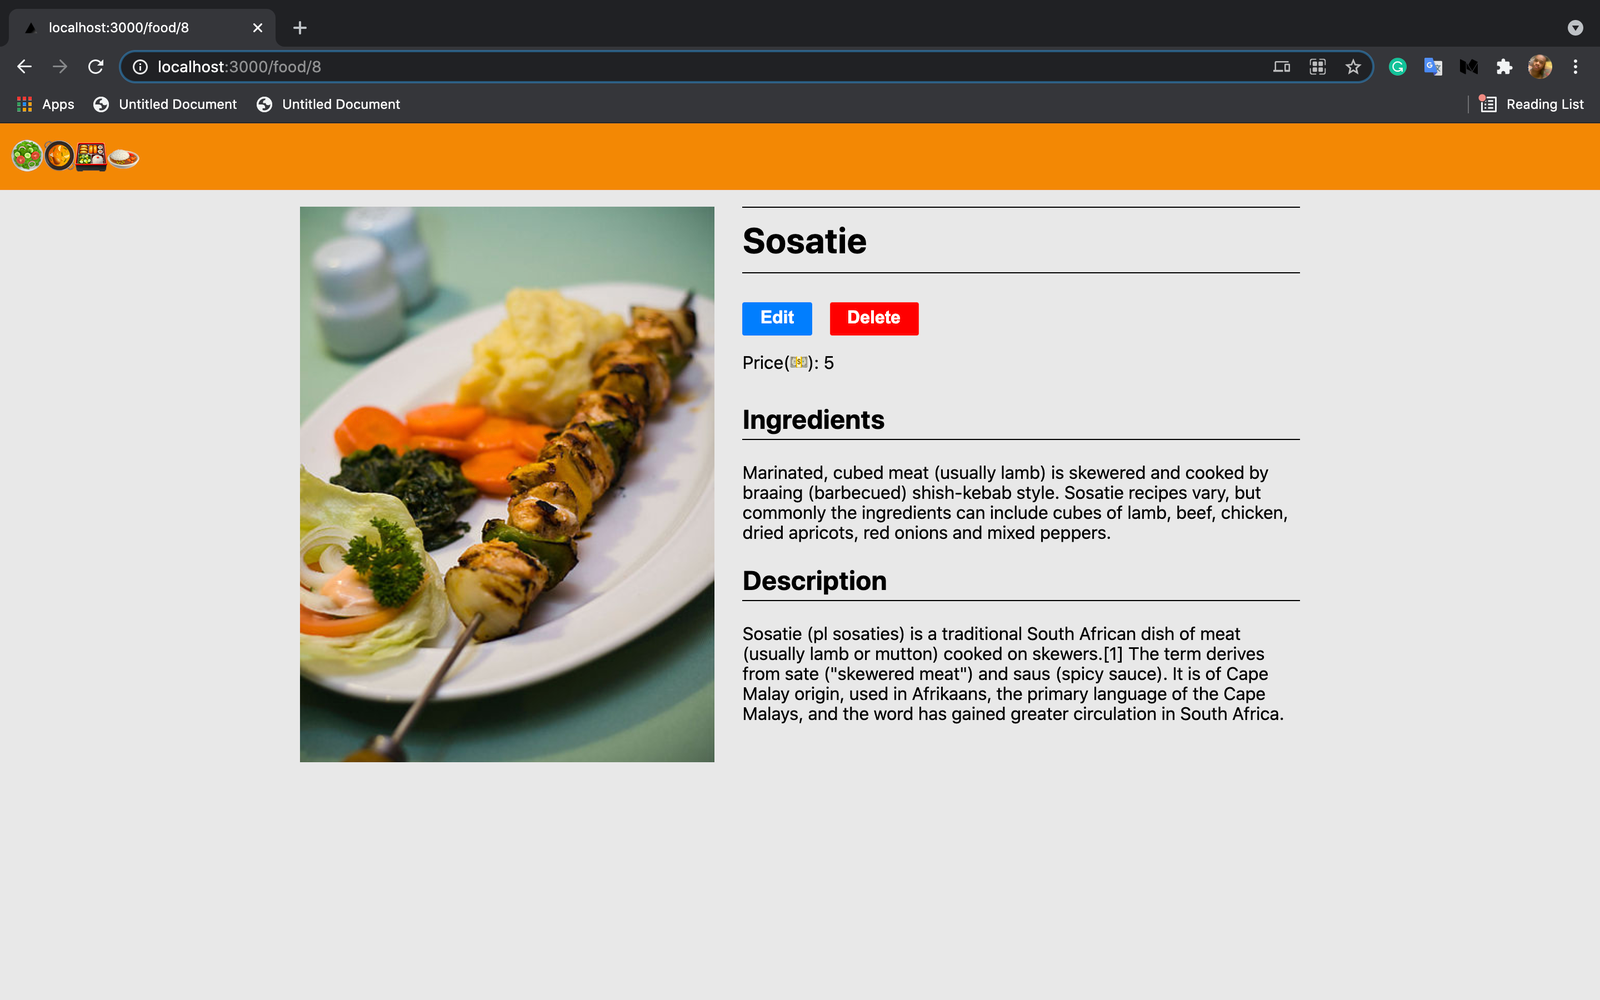
Viewing Sosatie food recipe
Editing a food:
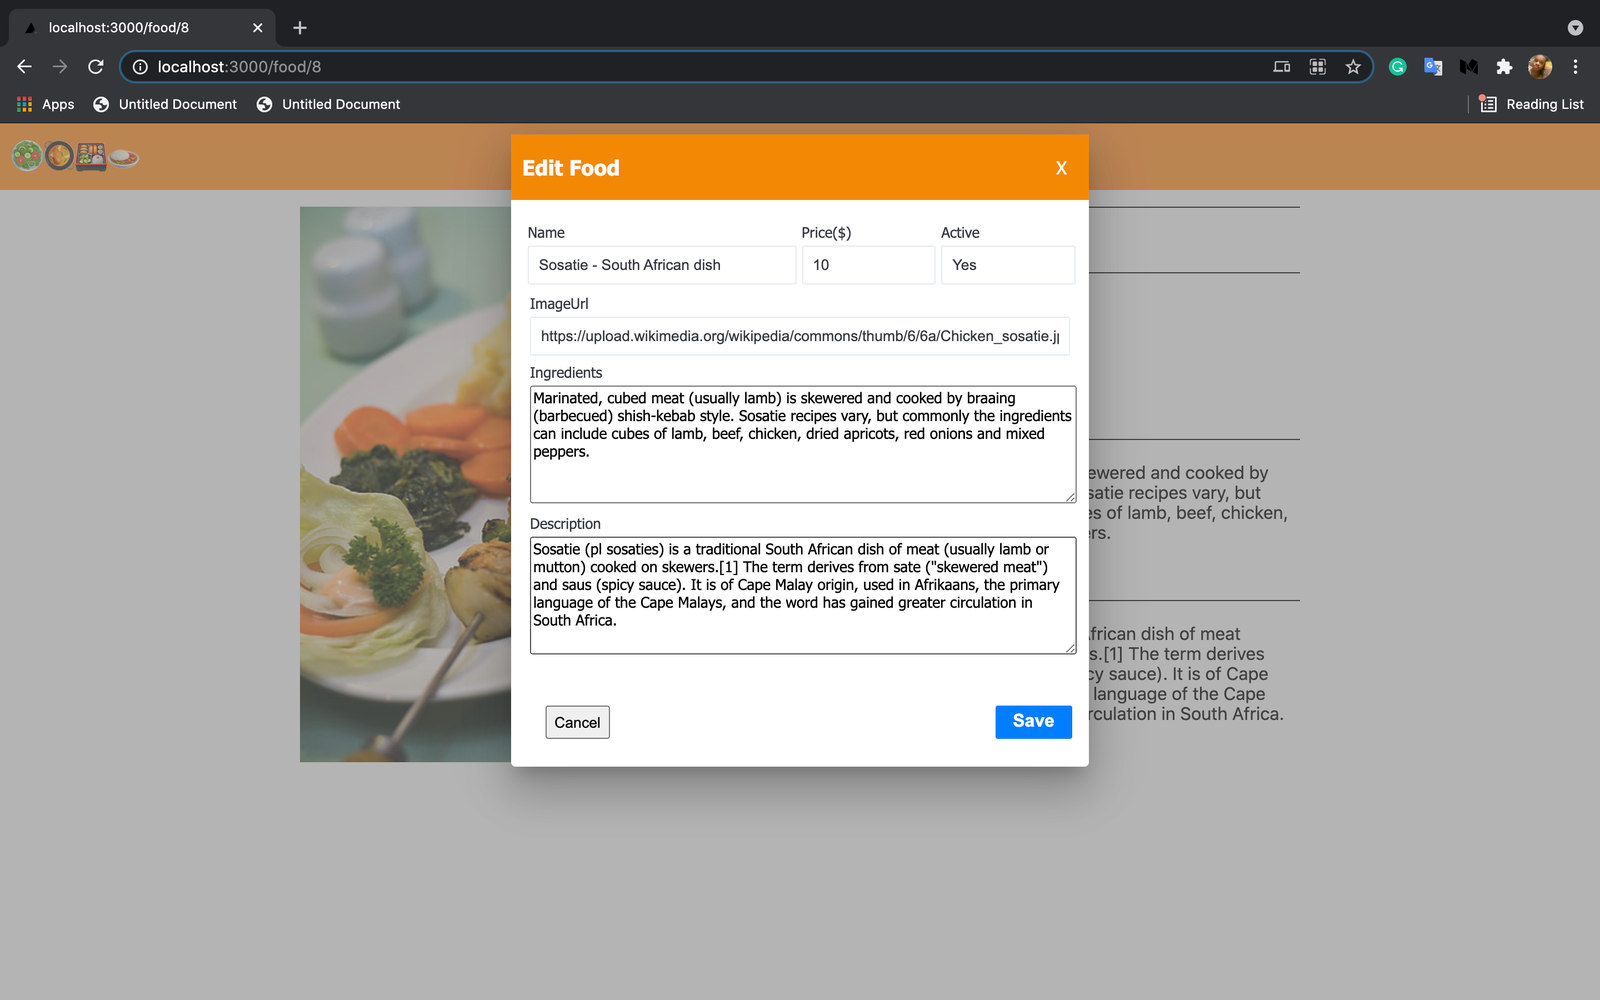
Editing Sosatie
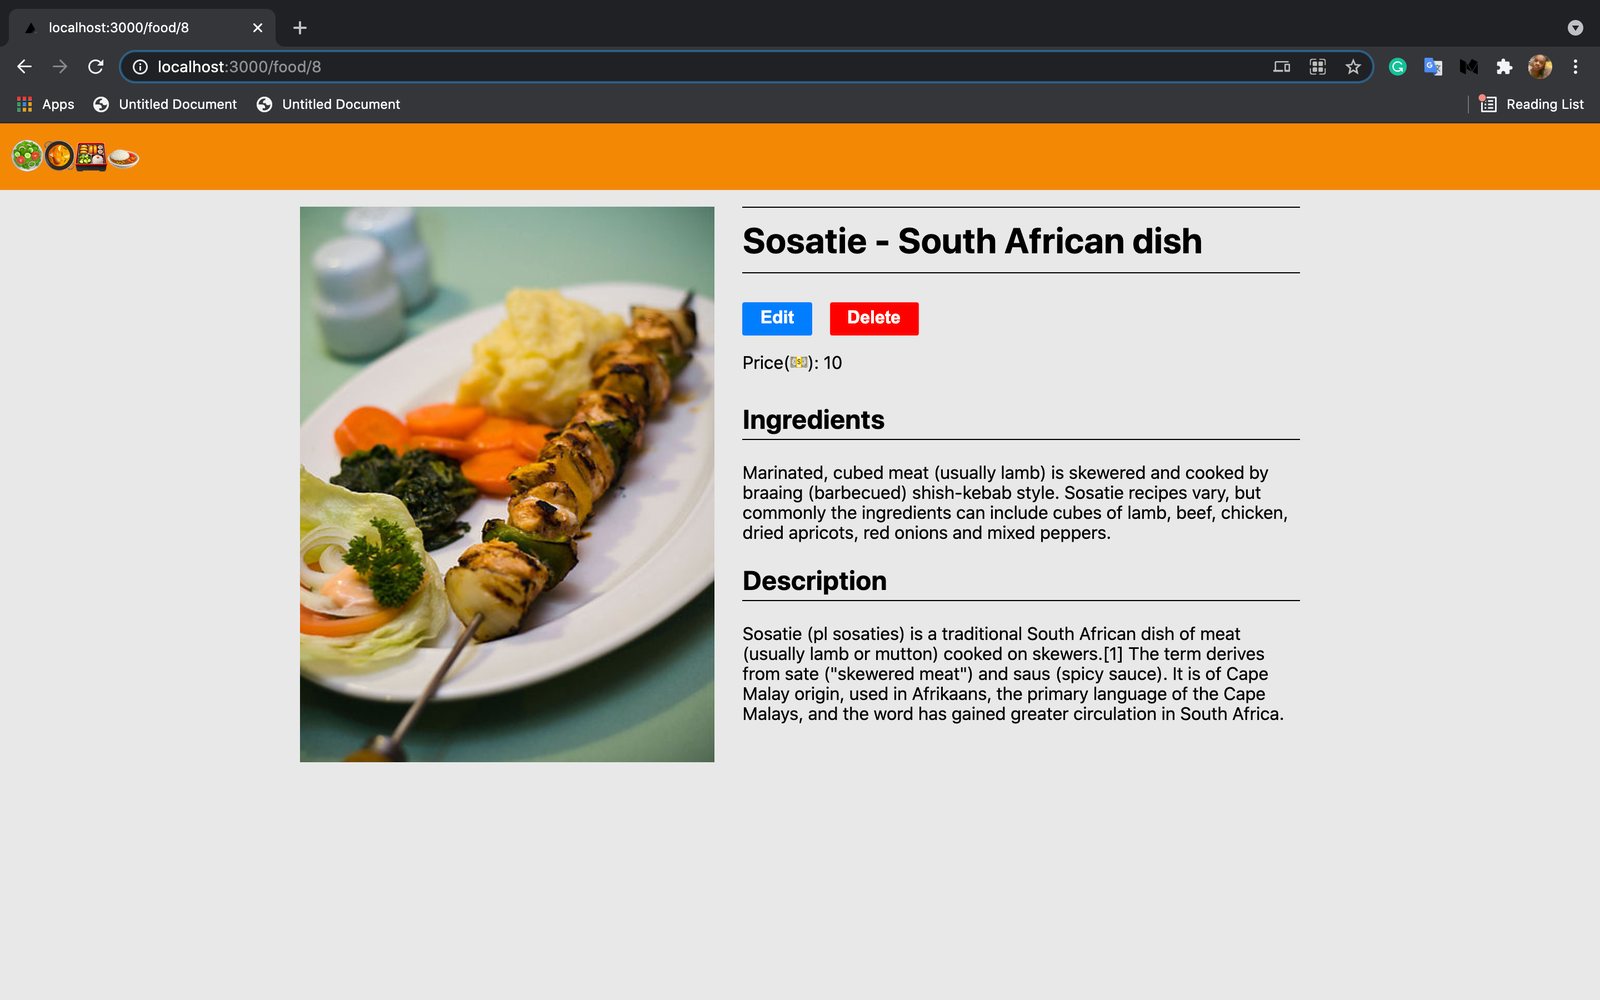
Edited Sosatie
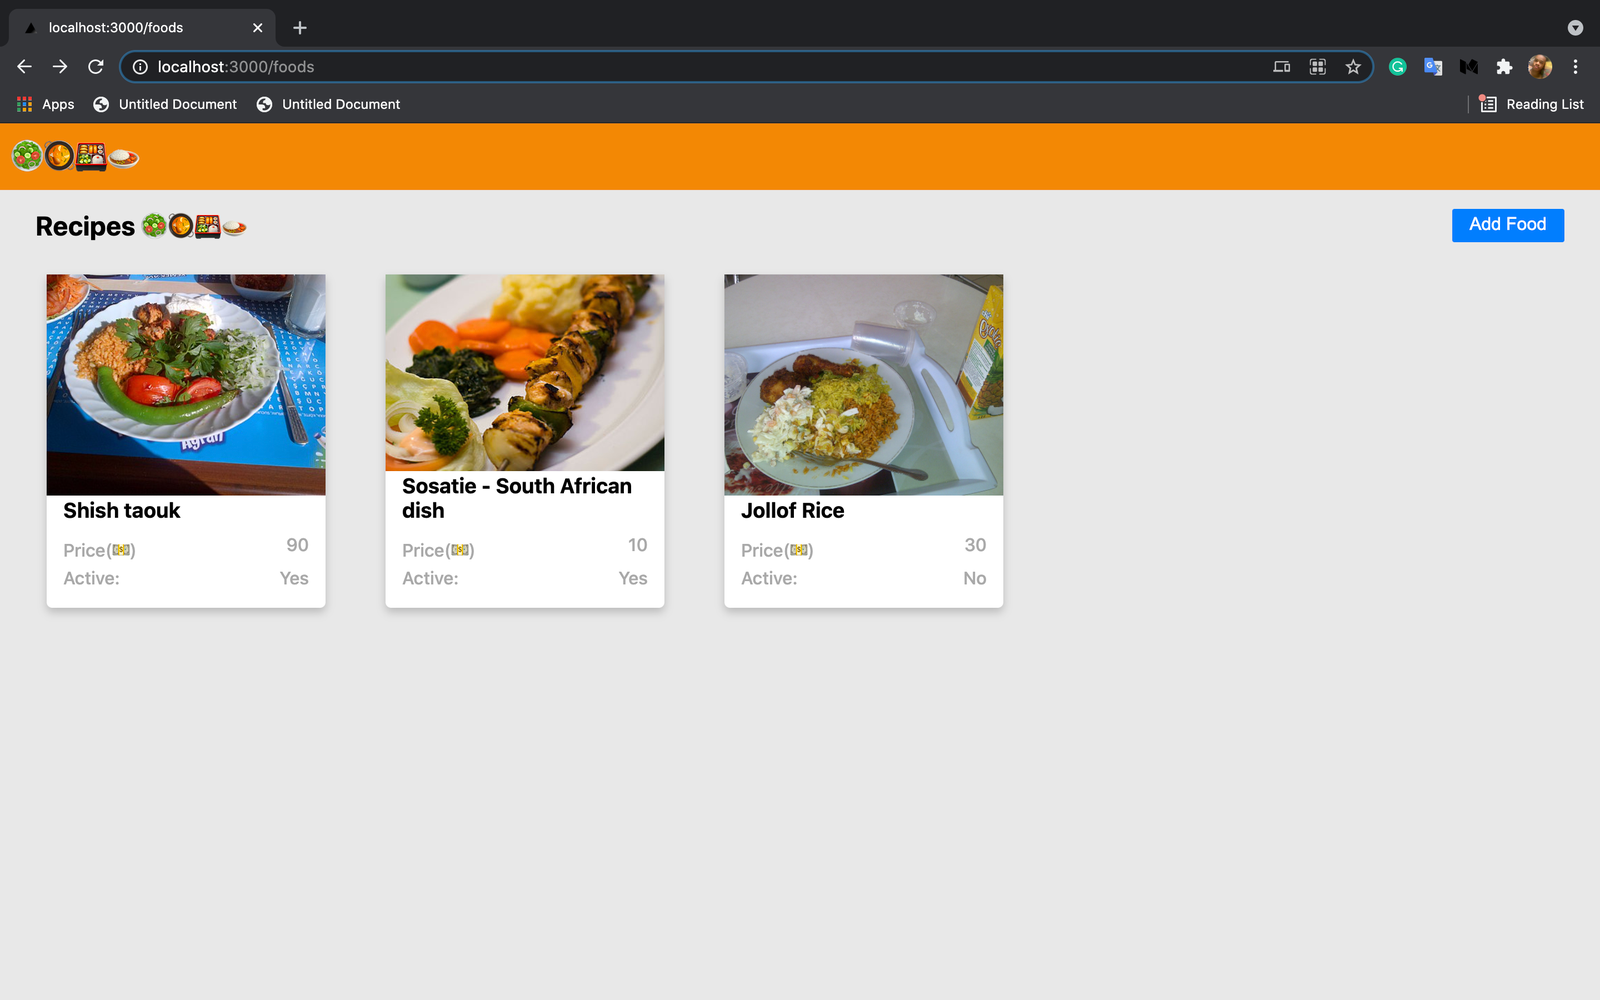
Edited Sosatie showing in the food list
Deleting a food:
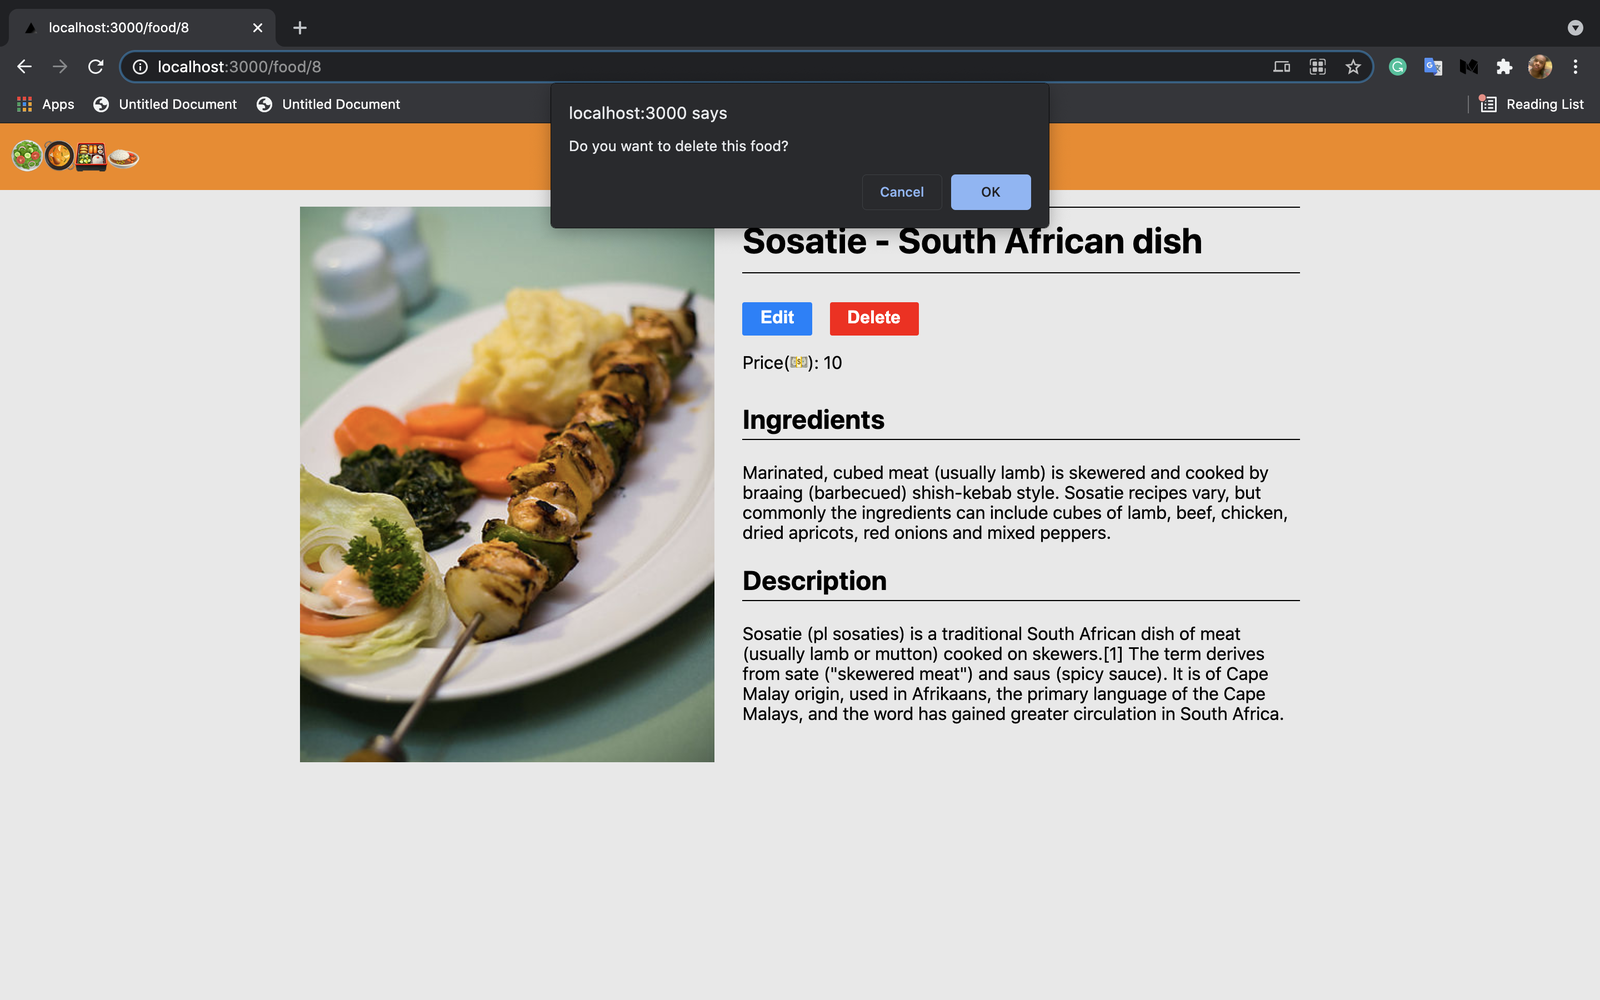
Deleting Sosatie
Sosatie is no longer in the list
Conclusion
Prisma is mind-blowing. The combination with Next.js will be the best combo of the century. It was flawless using an SQL database in Next.js. All the mechanical parts of using SQL have been abstracted away by Prisma. That's perfect!🔥
Source code
Find the source code of the project here