.png)


In this post we will demystify this magical connection between Blitzjs and Prisma to show how Prisma ORM tool works in a Blitzjs application.
Prisma is a very powerful ORM (Object-Relational Mapping) tool, it encapsulates the complexity of using SQL databases and provides us with a simple interface to connect and manipulate databases. Blitzjs on other hand is a new and fast full-stack JavaScript framework, full-stack in the sense that the frontend and backend code are handled by Blitzjs. The frontend connects with the backend to request and retrieve data and Blitz does the magic using Prisma.
We will learn:
- How Blitzjs works.
- How Prisma works.
- How Blitzjs communicates with Prisma.
- How to define models in Prisma.
- Configurations options in Prisma.
- How to run migrations in Blitzjs
What is Blitzjs?
Blitzjs is another new JavaScript framework on the block. Blitzjs is a full-stack React framework built on the Next.js framework. Its full-stack structure was inspired by Ruby on Rails.
Blitzjs being a full-stack React framework is that we build the frontend in Reactjs and also build the server and backend of the project using the same framework. A Blitzjs project provides us code, folders, and files for both the frontend and the backend of the project.
Being based on Nextjs means that Blitzjs uses the same file-system routing, and unique features of Nextjs are included on it. Its foundation is on Netxjs, so using Blitzjs is like using Nextjs but with more extended features to include the backend and database.
According to Blitzjs manifesto, the framework was built with seven foundational principles:
- Fullstack & Monolithic
- API Not Required
- Convention over Configuration
- Loose Opinions
- Easy to Start, Easy to Scale
- Stability
- Community over Code
What is Prisma?
Prisma is an open-source ORM (Object-Relational Mapping) library that plugs perfectly well with SQL databases so we can query data or modify data from the database.
What do we mean when we say "ORM"?
ORM like we have known stands for Object Relational Mapping. It uses models to map the objects to tables in a database. ORM can be written in any language but provides APIs with which we can use to query and perform actions on the SQL database without any need for writing SQL statements.
The complexity of writing SQL statements is handled by the ORM. To create tables, we have to define the table's model in the ORM schema, and with this model the ORM will then know the tables to create.
This is what Prisma does, in its case it's a Nodejs/JavaScript-based ORM tool. We can define our models in a schema.prisma file:
Prisma will generate/create the table note on our SQL database when we run migrations. Then, on the Prisma JavaScript object prisma, we will have an object note. This note object will have methods with which we can use to create new note entries in the SQL database, get a note entry, get all notes entries, edit a note or delete a note.
The code above creates a new note in our SQL database. You see one good thing about Prisma, you don't have to write an SQL command to create the note. All we did was to call the create() method in the note model passing the info of the note and boom we have the entry created in our SQL db.
In SQL, the above would have been:
Each model in the schema.prisma will have its object in the prisma instance, and each object will contain the methods create(), find(), insert(), update(), etc that can be used to manipulate the object's table in the database.
Prisma in Blitzjs
Blitzjs incorporates or uses Prisma to access the database. So whenever we are using the Blitzjs framework to build an app we are using the Prisma library to access our database.
In a Blitzjs project, the database files and configurations are kept in the db folder. This folder is where we:
- Define our Prisma models.
- Seed mock data.
- The migrations files and folders are generated.
Let's go through the db folder in a Blitzjs app.
You need to have the Blitzjs CLI installed globally in your system. If not, install it by running the below command:
Test to know the blitz CLI is correctly installed, run the below command:
You will see series of info about the Blitzjs CLI and your system info cascade down the terminal.
Now, we can scaffold a Blitzjs project:
A Blitzjs project will be created in the blitz-prisma folder. Move into the folder: cd blitz-prisma.
The app structure will look like this:
The db folder in the blitz-prisma is this:
db.sqlite: The default database of Blitzjs is the SQLite. The db.sqlite is the database where the tables and their contents are stored. This is great for local development but for production it’s better to consider solutions such as PostgreSQL or MySQL.
index.ts: The index.ts file exports a PrismaClient instance. PrismaClient is a class exported by the Prisma, the instance of this class is where the objects of the models in our schema.prisma are all set, and it is from this instance we can call the find(), create() methods to access the model's table in the database.
The enhancePrisma function creates a PrismaClient instance. It ensures you only have one instance of Prisma Client in your application to reduce the number of database connections.
So if we import the files as db we can access the models in the schema.prisma like this
- db.note.find(): returns all entries in the note table.
- db.user.create(): creates a new user.
- etc.
schema.prisma
This file is where we define our models and database connection.
The datasource db determines how Prisma connects to your database.
The provider states the database data source connector. The url specifies the connection URL of the database. Here, the url points to DATABASE_URL="file:./db.sqlite". This is the SQLite database file.
We have models User, Token and Session already defined by Blitzjs. The User model is used to hold users' info in the Blitz app, the User model will be mapped to a users table in the SQLite database, the fields in the User model will be mapped to columns in the users table. The same thing applies to the Session and the Token models.
migrations
The migrations folder is where migrations files and folders are kept. We will explain about migration in the below sections.
seeds.ts
This is where we seed our database with test data.
Let's say we have a Note model in our schema.prisma file:
We will write our seed code like this:
This code will add five test data to our note table in the database.
To run the seeds.ts we will have to run the below command:
The command will run the seeds.ts file. The result in the database will be like this:
Migrations
We know that each model maps to a table in the database, and each field in a model maps to a column in the table. Now, how does the ORM map the state in the model to the database? It is through migrations, migrations maps, or recreates the state schema in the models to the database. What this means is that the ORM tool generates SQL statements from the models in the schema file. These SQL statements are run to map the model state to the database. The first or initial migration is the creation of tables. See the file db/migrations/20210616090443_initial_migration/migration.sql, it is the first migration in a Blitzjs app. It generates User, Session, and Token as per the models in the schema file.
See the file contents:
It contains SQL code to create the tables in the SQLite database.
So we can say that migrations involve generating SQL commands and statements from the schema.prisma file so the SQL commands can be run against the database to recreate the state in the schema in the database.
Now, whenever we make any changes in our models or add new models to the schema we have to run migrations. To run a migration in Blitz we use the command:
This will create migrations files and folders from the name specified in the terminal. After creating the SQL files, Prisma will run the SQL against the database to apply the changes.
Blitzjs and other databases
As we already know SQLite is the default database of a Blitzjs project, we can change the database to other databases. We can change the database to be Postgres, MongoDB, etc.
In the below sub-sections we will learn how to configure our Blitzjs app to use other databases.
Postgres
We can use Postgres in our Blitzjs app. First, we have to install the Postgres binaries.
Go to PostgresSQL downloads and download the binaries for your machine. Make sure Postgres is installed in your machine.
Start your Postgres server. Make sure you remember your database's user, password, host, port, and name.
Open the .env.local and add the following:
This is the URL connection to a Postgres database server. Change the above to your Postgres values. Then, go to the schema.prisma and change the datasource object to this:
The provider points to postgres which is a datasource connector for the Postgres database. The url is set to DATABASE_URL env variable, the value points to our Postgres database connection URL.
We will have to run migrations, so we will have all the state and content in our new database.
This will run all SQL in the db/migrations folder. This is done to bring up our new database to the latest state. With this configuration, our Blitzjs project seamlessly switches to PostgreSQL database. There are no code changes to our frontend or backend in the project. 😁
Just like that? Yeah, just like that.
MySQL
We can use a MySQL database with Prisma. We will see how to configure our Blitzjs db project to use the MySQL database. Make sure you have MySQL installed in your system. If not head over to MySQL downloads page to download the MySQL server binary. The configuration for MySQL in Prisma is the same as Postgres but slightly different in terms of the connection URL.
Open the .env and add an environment variable for the MySQL connection:
Make you have your MySQL user, password, host, and port values when installing the server.
Open the schema.prisma file and add the below in the datasource db object:
The provider points to mysql, this will make the Prisma use the MySQL connector for the database connection. The url points to the DATABASE_URL env variable which resolves to the MySQL connection URL.
Now, all that is left is to run migrations so that all the tables and columns in the previous database will be replicated in this current database.
With this, our Blitzjs project has successfully migrated to using a MySQL database.
Mutations and Queries
Not really like the mutations and queries in GraphQL. Blitzjs uses the concept of mutations and queries to separate code logic so we know where data is being affected in the database and where data is being retrieved from the database.
mutations is a folder in a Blitzjs project that houses files that we use to create, edit and delete data from the database. Any file in this folder affects data in the database.
queries is a folder in a Blitzjs project that houses files that we use to fetch data from the database.
So now these folders are where we import the db/index.ts file and use the exported PrismaClient instance in db. The db is then used to access the objects of our models in the Schema and call the methods create(), findFirst(), etc to get, modify or delete content from their tables in the db. We will soon see a real example of mutations and queries.
To demonstrate all we have learned here we will build a Notes app. Let's begin below.
Building a notes app
This app will enable users to add a quick note. This app will be simple, it will have two pages:
- /notes to display all the notes in the database.
- /notes/[noteId] to display a single note.
Also, we will have component modals where we can add new notes and edit notes.
After building this app, you will be able to port the database to the different databases we demonstrated above.
So let's start.
We already have a Blitzjs app scaffolded so we use it. We will move into the blitz-prisma folder: cd blitz-prisma.
We create a Note model in the schema.prisma file:
Run the command blitz prisma migrate dev to generate and run migrations for this addition. After the migration has successfully run, a note object with methods will be available in the db object when imported from our db/index.ts
Now we will create the pages for our routes:
This will create the files:
Remove:
We won't be needing them because we will be using modals to edit and add notes.
Now, we manually create our modals. Our modals will be AddNote and EditNote. Also, we will have a NoteCard component that will help us display notes in the index route and a Header that will hold the header section of our app.
Now, we create our mutations and queries for the Notes app. Run the below command:
It will create the files and folders:
app/notes/mutations/createNote.ts
This creates a new note when the API http://localhost:3000/api/notes/mutations/createNote is called. See that the new note is created via the db.note.create() method call. The input is the details of the note to create.
The db is imported from the db/index.ts and it's an instance of PrismaClient. The Note we defined in our model is available in the db object as db.note. The db.note.create() will perform a query to our database to create a new note data in the note table.
So we see that the database and SQL are abstracted away from us. We can change the database without changing the code. The create method call will create data in the database, no matter which database MySQL, PostgreSQL, SQLite, MongoDB. All Prisma does is to use the connector in the datasource db to make the connection and query and return the results.
app/notes/mutations/deleteNote.ts
This mutation deletes a note from the database. The code db.note.deleteMany() is what does the job, it deletes a column from a table based on the condition passed to it.
app/notes/mutations/updateNote.ts
This mutation updates a note to a new value. the db.note.update method does the job. The id to update is passed and the data to update the note with is also passed.
app/notes/queries/getNote.ts
This is a query. It retrieves a note from the database. The db.note.findFirst({ where: { id } }) gets the note based on the one whose is id equal to the id passed id.
This function in this file is executed when the API endpoint localhost:3000/api/notes/queries/getNote is called.
app/notes/queries/getNotes.ts
This file returns all the note entries in the database. This is called when we want to get all the notes in the database.
Now, let's see how we call all the mutations and queries from our components.
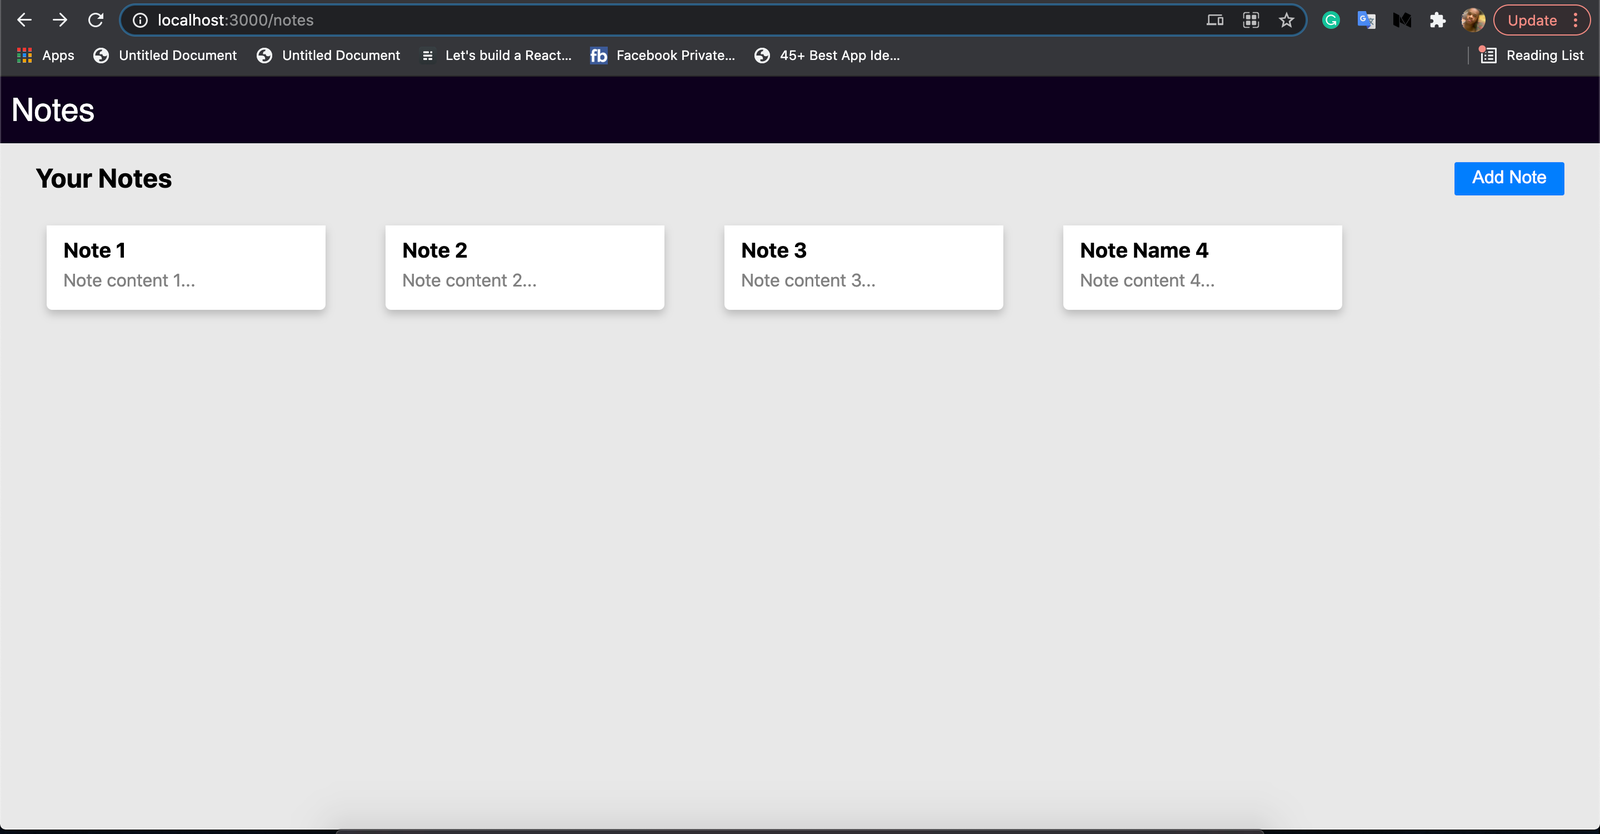
Let's begin with the app/pages/notes/index.tsx
app/pages/notes/index.tsx
See that we imported a useQuery function from "blitz", and inside the component we called the useQuery function passing in the getNotes query function from "app/notes/queries/getNotes".
What we have learned here is that in Blitzjs, we use the useQuery function from the blitz library to call query functions in a Blitzjs project. The query function is passed as an argument to the useQuery function, the useQuery function calls the query function and returns the result. This is kind of resembles what we do using apollo-client.
The useQuery returns the notes in the note tables. Looking inside the network tab, we will see the URL localhost:3000/api/notes/queries/getNotes, this is the API endpoint called by the useQuery with the getNotes arg. The [notes] destructured from the result is used to render the notes in the UI.
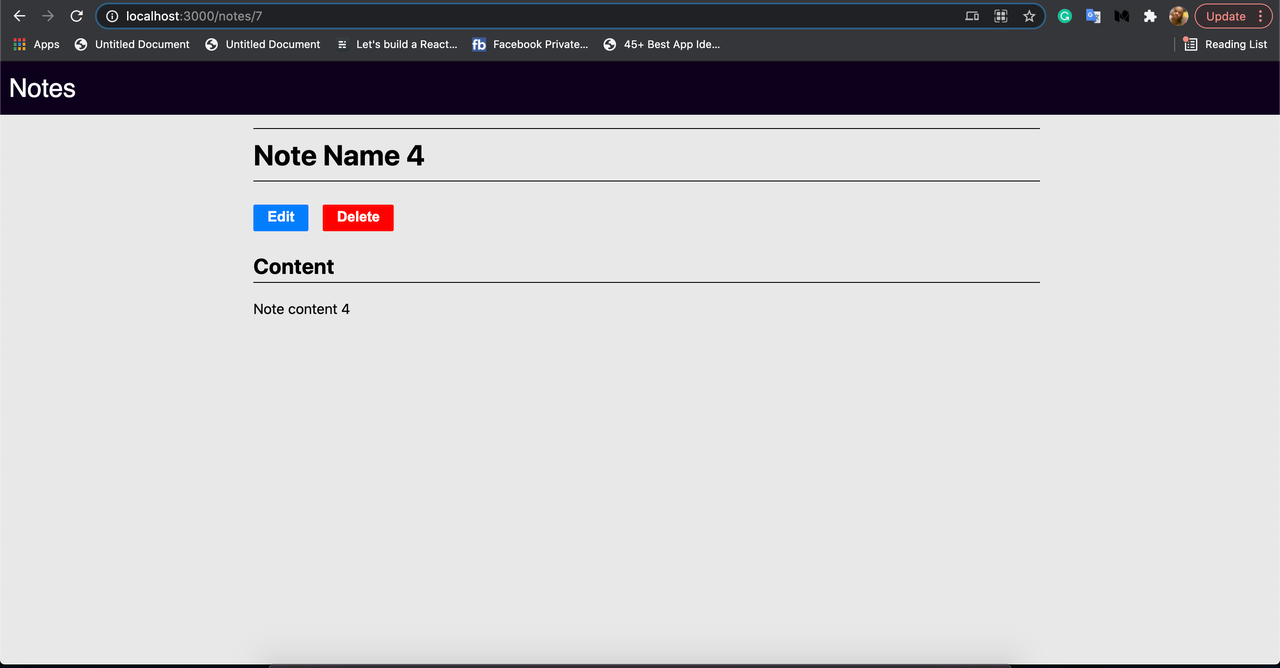
Let's look at the code where we request a single note.
app/pages/notes/[noteId].tsx
See here, the id of the note is retrieved using the useParam hook from "blitz". The first arg noteId passed to its is the dynamic route name, and the second arg number is the data type of the value of the param. The value of the [noteId] is returned by the hook and set in the noteId variable.
See that we called the useQuery but with an extra args here. the first arg is the query function to call getNote, the second arg is the args to pass to the function getNote. Here useQuery will call the API endpoint localhost:300/api/queries/getNote with the second args { id: noteId } as the payload.
The returned note in the useQuery(getNote, { id: noteId }) function note is used to render its details in the component.
We have another function here, useMutation. This useMutation is used to call the mutations in Blitzjs. The mutation function to call is passed to it. useMutation function returns a function that when called will make the HTTP request to the function's mutation file.
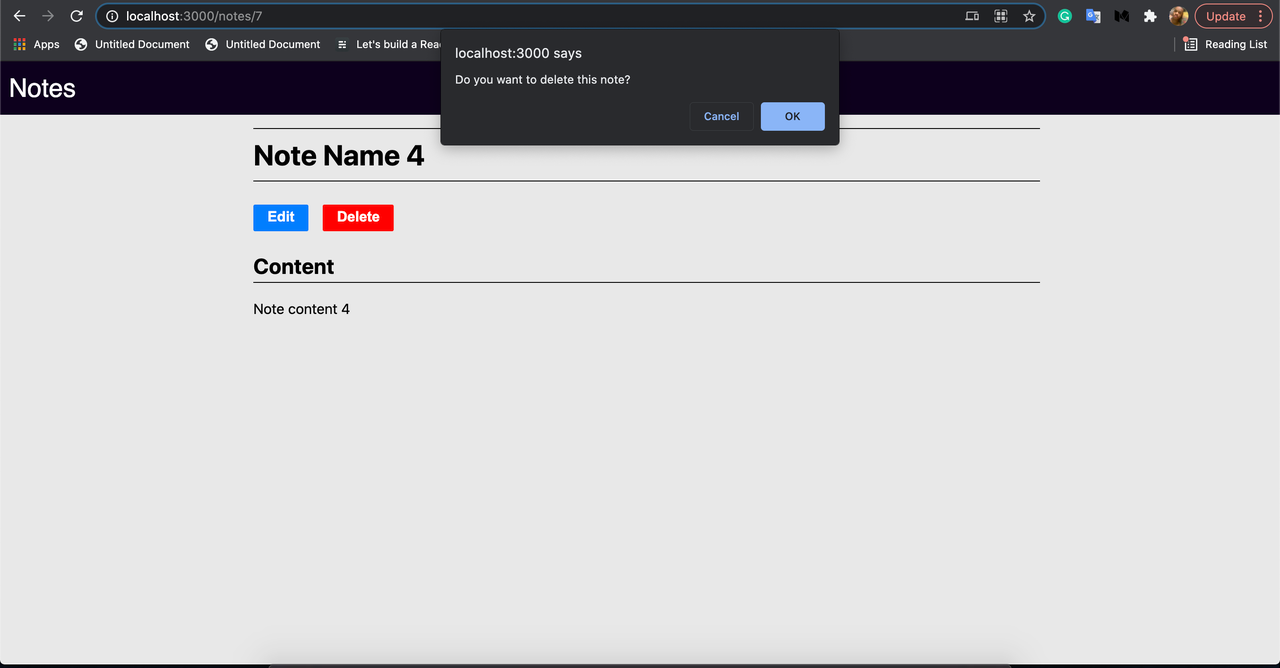
The useMutation function is called with the deleteNote function passed as an arg to it. This returns a function, deleteNoteMutation, this deleteNoteMutation will call the deleteNote function in the app/notes/mutations/deleteNote via HTTP.
Here this note will be deleted when the Delete button is clicked. Looking into the deleteNoteFn function that is called when the Delete button is clicked, we see that the function deleteNoteMutation function is called with args { id: note?.id }, this will delete the note from the note table.
We have seen how we delete entries in the database from the frontend. Now, let's see how to add a new note to the database.
app/core/components/AddNote/index.tsx
See that the useMutation is called with the createNote, and the function returns a createNoteMutation. This createNoteMutation function is used in the addNewNote function to create a new note in the database. The details of the new note are gotten from the input boxes in the UI and passed to the createNoteMutation function.
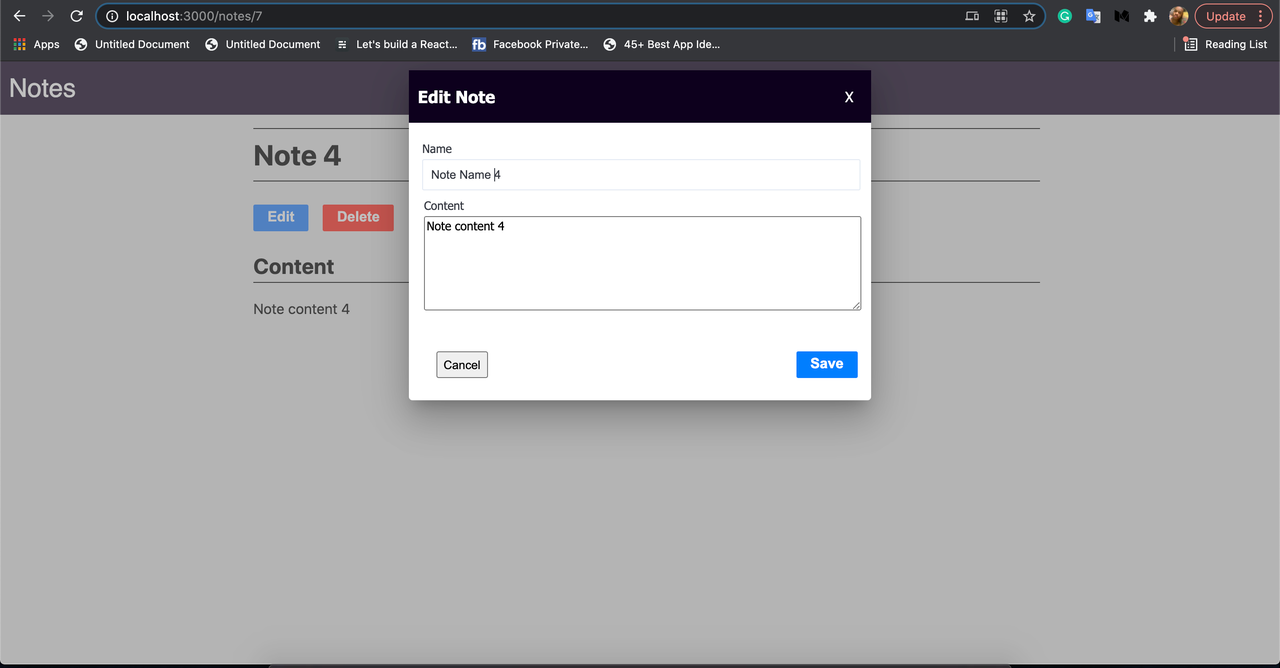
Let's see how we edit a note.
app/core/components/EditNote/index.tsx
Here the useMutation is called with updateNote function. The returned value updateNoteMutation is called in the editNote function. The new potential values of the note are passed to the updateNoteMutation function, this updates the note with the values.
We have seen how we can configure our backend code to use different databases, the configuration does not affect our frontend code, both of them are independently separated.
So now, we test our app.
Test the app
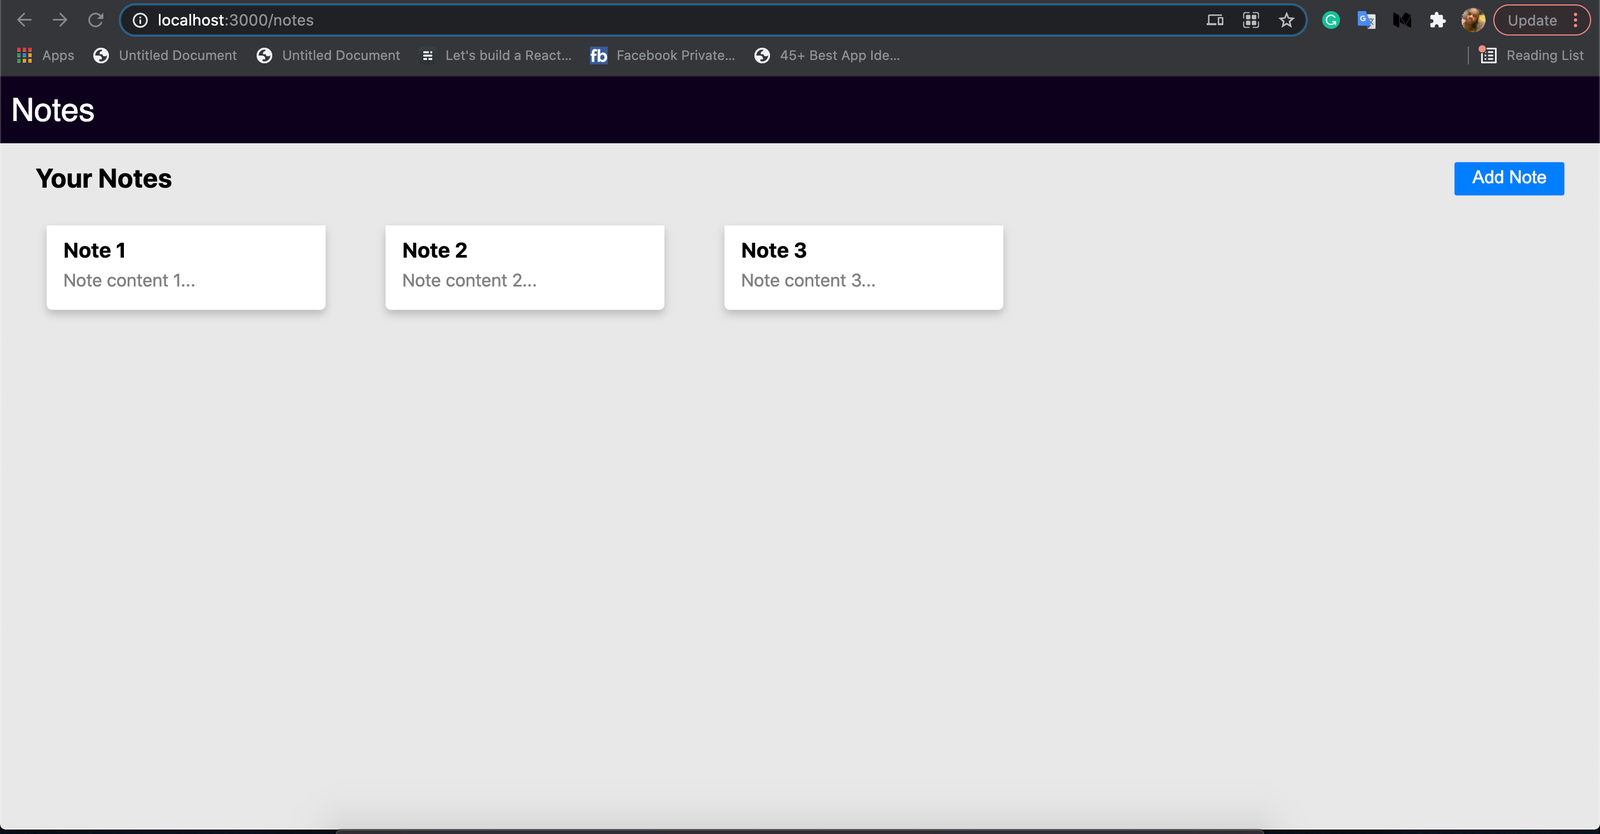
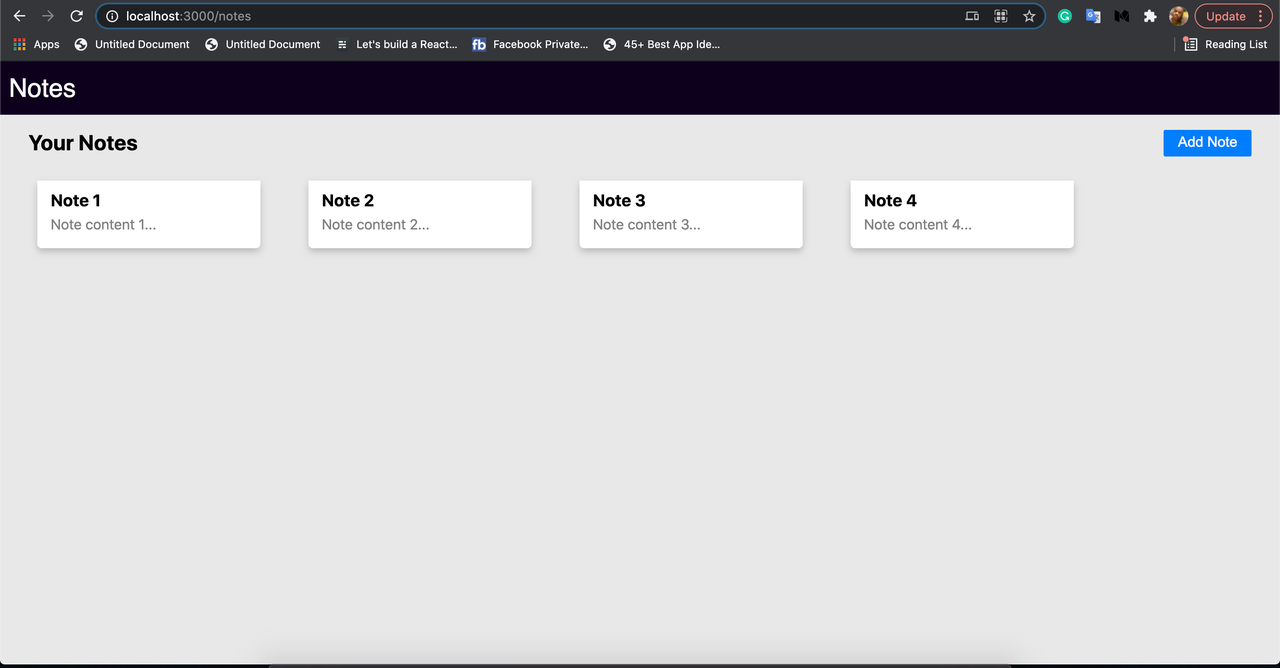
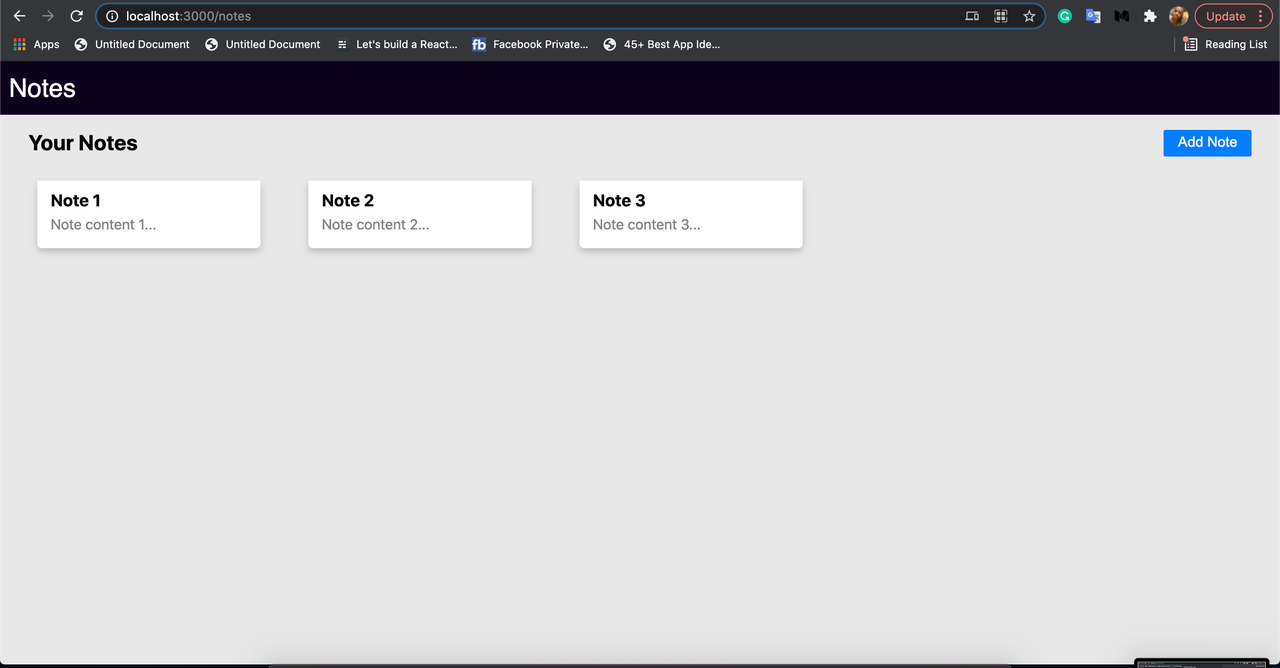
Notes list
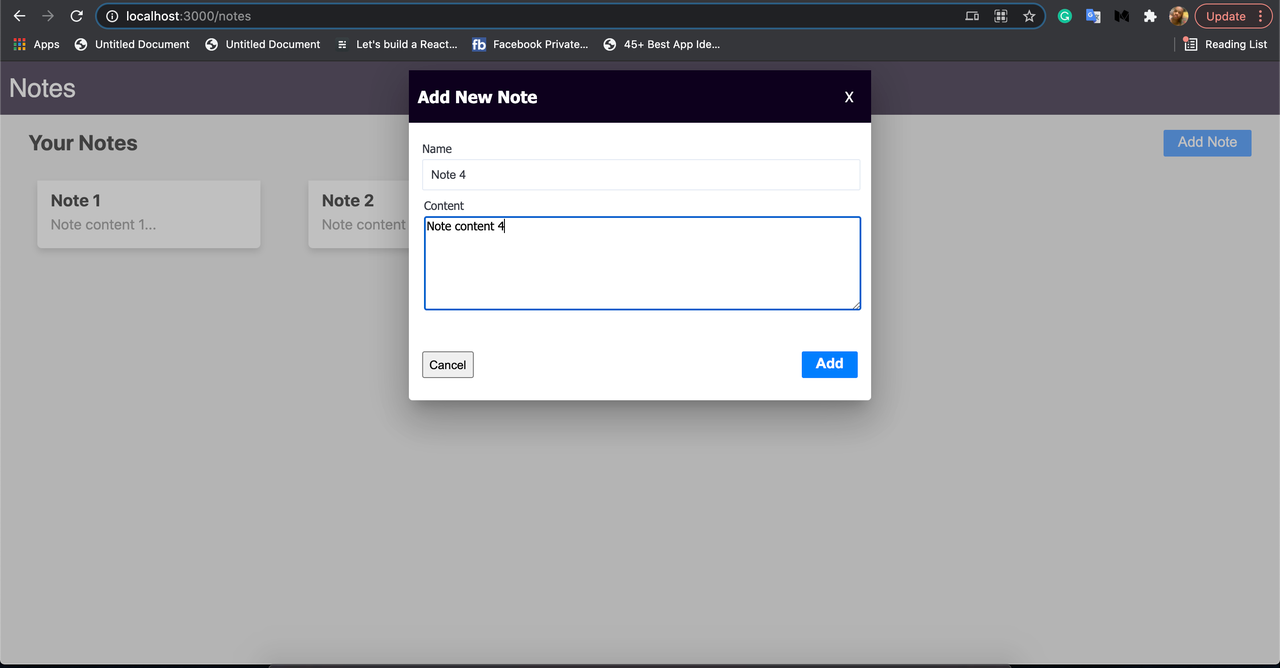
Create note
View note
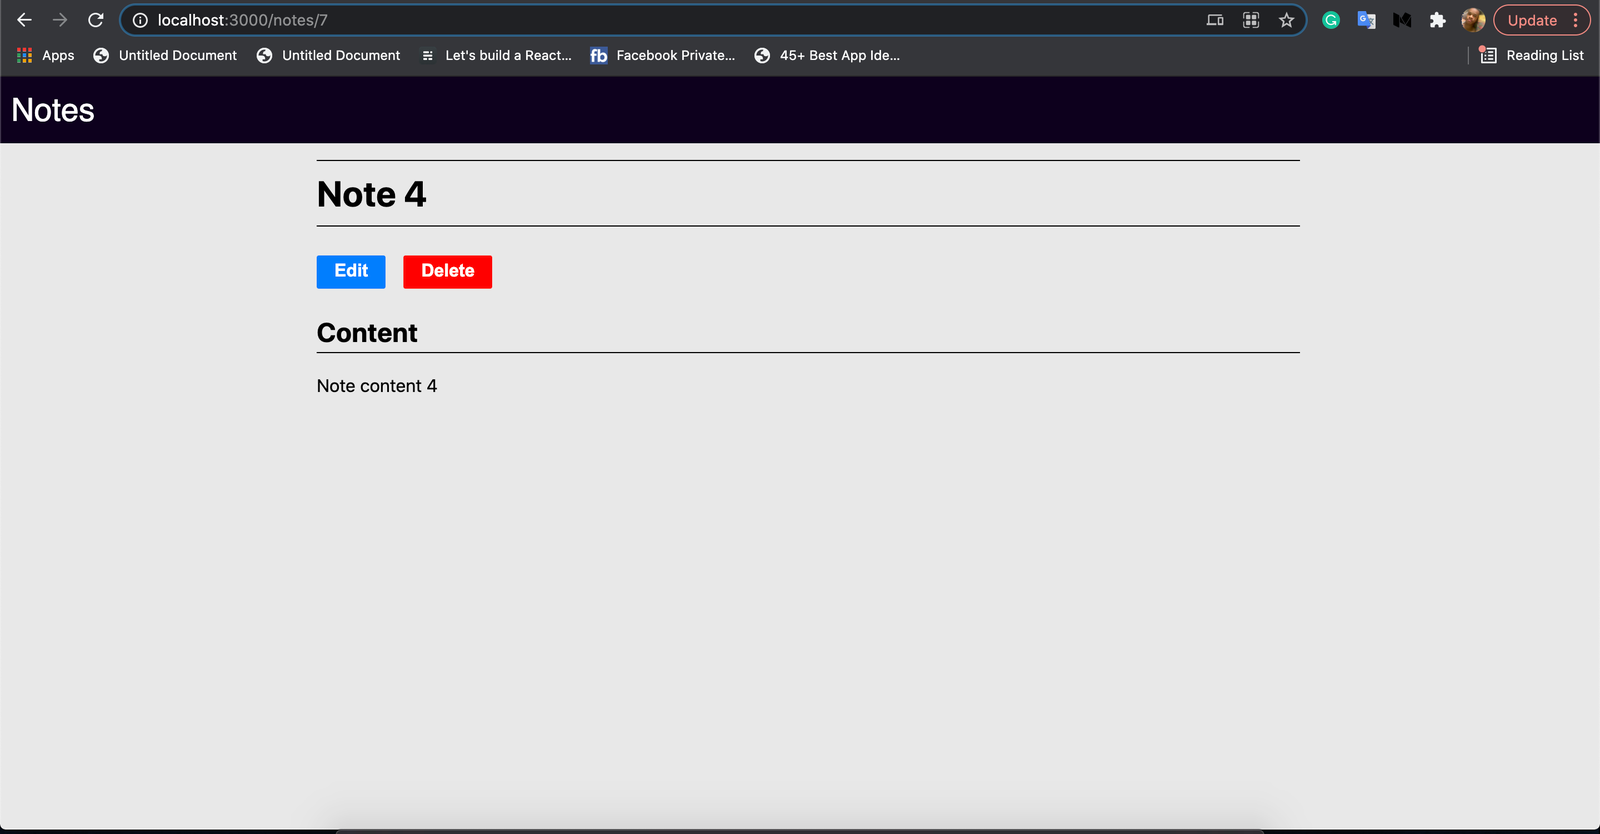
Edit note
Delete note
We can change the database in schema.prisma and run the test again.
Conclusion
We covered a whole lot here. We started by describing Blitzjs and Prisma, next we learned in detail how different databases MySQL, PostgreSQL can be configured for usage in a Blitzjs project. We learned about mutations and queries, and how they are being created via the Blitzjs CLI tool. Last, we built a Notes app to see how the connection is made. See the full source code of the Notes app below:
https://github.com/blitzjs-prj/blitz-prisma