
In this tutorial, you'll learn how to make a Vue component using the bare minimum requirements.
In this tutorial, you'll learn how to make a Vue component using the bare minimum requirements. What we are building is a GitHub user card which has the following content:
- The profile picture.
- GitHub profile name.
- Joining date.
- User bio.
- The number of followers.
All in all, it will look something like this:
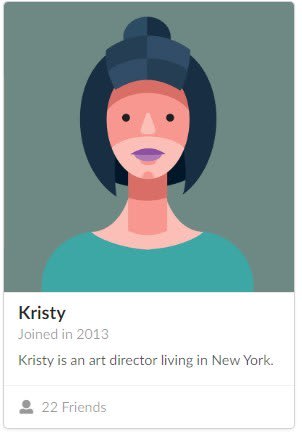
If you're familiar with Semantic UI, this is exactly what it's card component is like.
You'll get to know how to fetch data from the GitHub API endpoint and how to connect it with the Vue instance.
Let's jump straight in!

Is this a jump or a facepalm?
Prerequisites 🙃
Attention to extreme new-comers in web development! This tutorial is for those who have worked on:
- HTML
- CSS
- JavaScript
- Vue.js - basic component creation, knowledge on instances, props etc.
Write the HTML markup 😌
Inside the `index.html` file, you need to have the root `app` element `div` which will help Vue to mount it on the webpage.
Before we move any further, add the following Semantic UI CSS CDN:
`https://cdnjs.cloudflare.com/ajax/libs/semantic-ui/2.4.1/semantic.min.css\`
Next, we copy the card component markup code listed here.
```html
As you can see, under the ui card class, we have an image which holds the default avatar. After this, we have a content block that holds all the details like the header, metadata, the description and finally the extra content which contains number of friends.
Write the Vue! 😎
Just before the closing `` tag, add the Vue.js CDN script:
``
Make a new `main.js` file under the same project folder, link it with your HTML, and then create the Vue instance.
Code the component
Create the new component template at the top of the `body`. This is where the card will render:
``
The next step is to register our component. We use Vue.component method. Let's give it a name `github-card`. We need a single prop, `username` which is of `type: String` and is made `required` by default as we need it to hit the GitHub API endpoint.
Our user details will be stored in the data() property. Next, we need to have a method to call the GitHub API, so we will use the much popular Axios library to fetch the details. Make sure you grab its CDN by including the following script:
`https://unpkg.com/axios/dist/axios.min.js\`
Now, this AJAX call will be done in two places:
- First, once the component is created.
- Second, before it's mounted to the document.
Checkout this lifecycle diagram for better context.
So, inside the created hook, we use the get() method to pass the API URL. i.e. `https://api.github.com/users/${this.username}\`. The response data is set to the `user` property.
Here's the code:
```js
Vue.component('github-card', {
props: {
username: {
type: String,
required: true
}
},
data() {
return {
user: {}
};
},
async created() {
const response = await axios.get(`
https: //api.github.com/users/${this.username}`);
this.user = response.data;
}
});
new Vue({
el: '#app',
});
```
Create the template
We use the X-Template method to put the above HTML syntax. But first, we give it a suitable `id` of `github-card-template` making sure we also update the Vue code by adding the `template` with this `id`. Cut all the Semantic UI HTML and add it under the new X-Template script.
The GitHub API format and all the data which we can get is available on their website in the JSON format.
Let's replace the hardcoded values with the newly accessible `user` object from the API. Here are the replacements:
 ->
-> - "Kristy" -> `{{ user.name }}`
- "Joined in 2013" -> `Joined in {{ user.created_at }}`
- "Kristy is an art director living in New York." -> `{{ user.bio }}`
- "22 Friends" -> `{{ user.followers }} Followers`
Remember that we're using the moustache format for the JavaScript code.
Here's the new code:
```html
```
As you can see, I've added links in between the name and the follower count using the :href argument.
Refresh the browser page and there you have it! You've just created a GitHub component in Vue and styled it with Storybook. How cool!
Here's what @nickytonline's GitHub card looks like: 😉

Where to next? 🤔
- Make these cards for multiple users!
- Use GitHub data to get more info
- Use Semantic UI's other components to display the data.
Thanks for reading, I appreciate it! Have a good day. (✿◕‿◕✿)
Who here can relate? 😓
Documentation is rarely closed as duplicate, just saying... 😉
Find Microsoft Docs this way: https://t.co/eq5hQaVjPn
Image source: https://t.co/gnY04c5qul#DevHumour #Programming #Developer #ICYMI pic.twitter.com/KIrCbhE7Q5
— Microsoft Developer UK (@msdevUK) July 26, 2020