
.png)


Step-by-step instructions to download, install, and configure Cursor IDE, enable AI features, import VS Code settings, and start your first project.
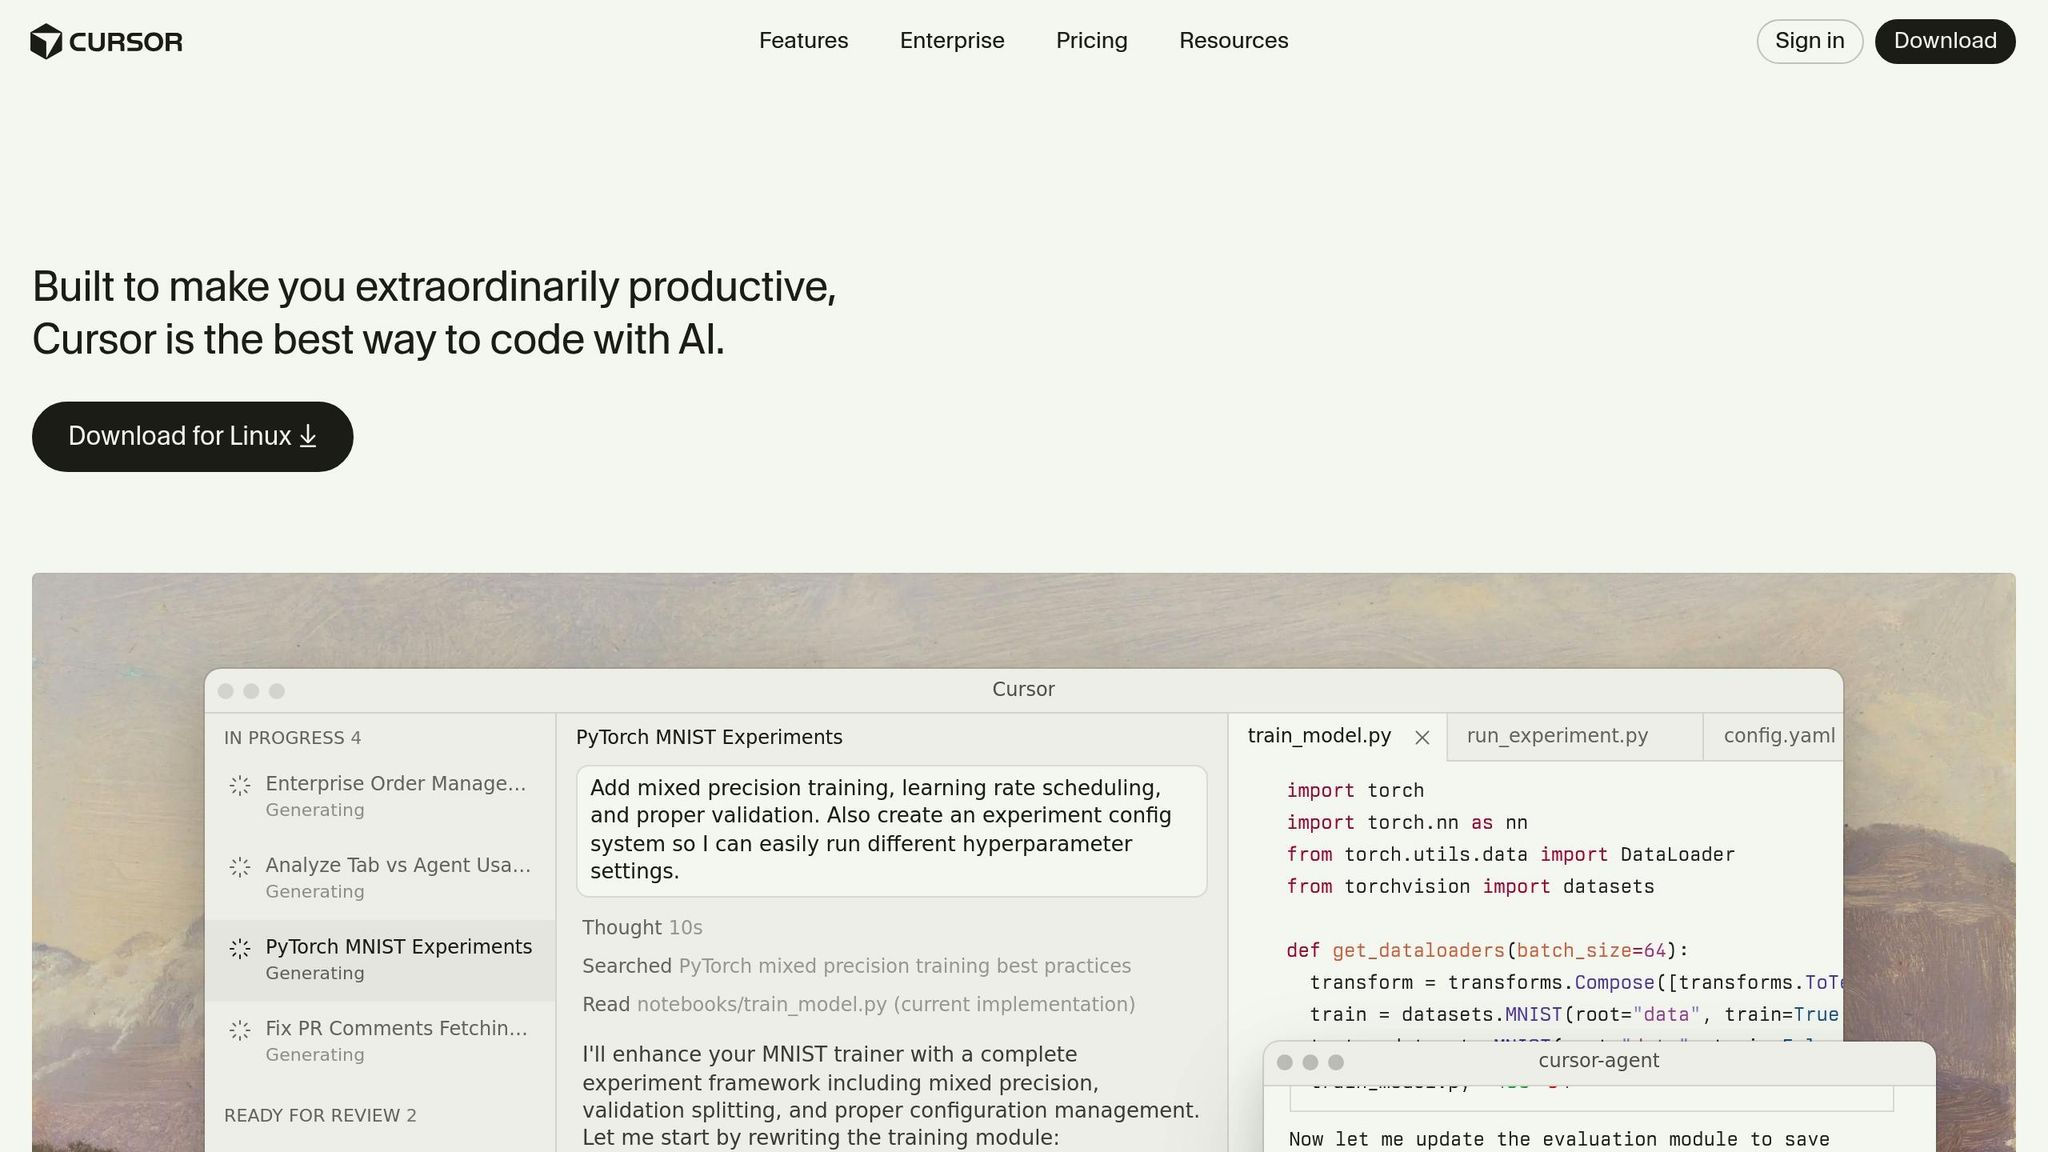
Cursor is an AI-powered code editor based on Visual Studio Code, designed to simplify coding with tools like predictive autocomplete, inline natural language editing, and an AI chat interface. It supports Windows, macOS, and Linux, and integrates seamlessly with existing VS Code extensions, themes, and keybindings.
Key Steps to Get Started:
- Check Requirements: Ensure your system meets the minimum specs (4GB RAM, 2GB disk space, and a stable internet connection).
- Download Cursor: Visit cursor.com/download to download the installer for your OS.
- Install: Follow OS-specific instructions for installation. For Linux, ensure necessary libraries (e.g.,
libfuse2) are installed. - Log In: Create an account to access AI features. A 14-day Pro trial is included.
- Customize: Import VS Code extensions, themes, and keybindings, or tweak settings to suit your workflow.
- Explore AI Features: Use tools like multi-line autocomplete, inline edits, and project-wide AI assistance to speed up coding.
Cursor blends familiar coding tools with advanced AI to reduce repetitive tasks and improve productivity. Whether you're a beginner or an experienced developer, Cursor offers features that help you focus on building your projects efficiently.
TUTORIAL: How to Set Up and Install Cursor: Your Guide to AI-Powered Code Editing
System Requirements and Preparation
Cursor System Requirements: Minimum vs Recommended Specifications
Before you dive into downloading Cursor, it’s wise to ensure your computer is ready for it. The good news is that Cursor runs on most modern setups without demanding high-end hardware. Taking a moment to check your system now can save you from installation issues later. Let’s go over what you’ll need.
Supported Operating Systems
Cursor is compatible with Windows, macOS, and Linux. Here’s a quick breakdown:
- Windows: Requires Windows 10 or 11 (64-bit).
- macOS: Supports macOS 10.15 (Catalina) or newer, with dedicated builds for both Intel and Apple Silicon processors.
- Linux: Works on Ubuntu 20.04+, Debian, Fedora, and RHEL. You can install it using AppImage, .deb, or .rpm packages.
Whether your machine runs on x64 or ARM64 architecture, Cursor has you covered. This flexibility means it works on both older Intel devices and newer ARM-powered systems.
Hardware Requirements
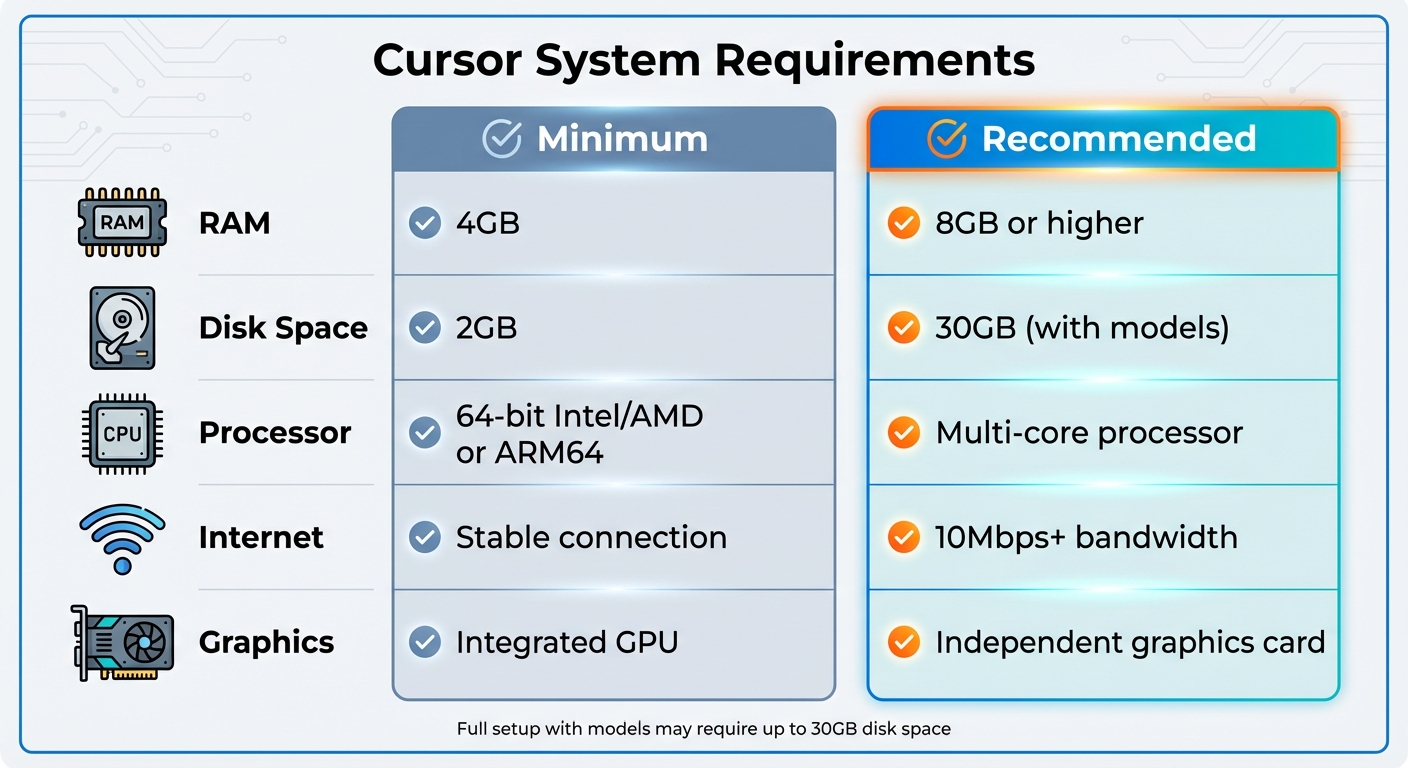
Cursor doesn’t demand much to get started. At minimum, you’ll need 4GB of RAM and 2GB of free disk space. However, for a smoother experience - especially with larger projects - 8GB of RAM or more is recommended. The installation file size varies by operating system, ranging from 180MB to 250MB, but keep in mind that a full setup (including models) may require up to 30GB of disk space.
Here’s a quick look at the hardware specs:
| Spec | Minimum | Recommended |
|---|---|---|
| RAM | 4GB | 8GB or higher |
| Disk Space | 2GB | 30GB (with models) |
| Processor | 64-bit Intel/AMD or ARM64 | Multi-core processor |
| Internet | Stable connection | 10Mbps+ bandwidth |
| Graphics | Integrated GPU | Independent graphics card |
A multi-core processor is suggested for better performance, and while integrated graphics will work, an independent graphics card can significantly enhance the user interface experience. Since Cursor’s AI features rely on cloud services, you’ll also need a stable internet connection with at least 10Mbps bandwidth.
Additional Tools or Prerequisites
To make the most of Cursor, you’ll need a few extra tools:
- Git: Cursor uses Git for version control and repository cloning.
- Node.js: If you’re working with the Model Context Protocol (MCP) for advanced integrations, install Node.js version 18 or higher.
Linux users, take note: before running the AppImage, make sure the necessary FUSE libraries are installed. Here’s what you’ll need based on your distribution:
- Ubuntu/Debian: Install
libfuse2usingsudo apt install libfuse2. - Fedora: Install
fuse. - Arch: Install
fuse2.
For those migrating from VS Code, Cursor makes it easy to bring over your extensions, themes, and keybindings during setup. No need to start fresh - it’s all ready to import!
Downloading and Installing Cursor
To get the latest version of Cursor with all security updates, head to the official website at cursor.com/download. The site will automatically detect your operating system, but macOS users should double-check and select the correct processor type - either Intel (x64) or Apple Silicon (ARM64).
Downloading Cursor
Visit cursor.com and click the download button. File sizes vary slightly based on your operating system:
- Windows: Around 200MB.
- macOS: Between 180MB and 250MB (depending on whether you choose Intel, Apple Silicon, or Universal).
- Linux: Approximately 190MB to 200MB.
Windows users can choose either a standard .exe installer or a portable .zip file. For Linux, you can download an .AppImage for universal use or opt for a .deb package (Debian/Ubuntu) or .rpm package (Fedora/RHEL).
For users who prefer a command-line approach, you can install Cursor via these commands:
macOS (Homebrew):
brew install --cask cursor
Windows (Winget or Chocolatey):
winget install Anysphere.Cursor
choco install cursor
Once downloaded, follow the installation steps for your operating system below.
Installation on Windows

Run the downloaded .exe file and follow the setup wizard. You'll be asked to choose between "System" or "User" installation modes. If you encounter issues, like an antivirus flagging the installer or the setup freezing, try temporarily disabling your antivirus or running the installer as Administrator. The installation process typically takes about 10 minutes.
After installation, Cursor will give you the option to start fresh or import your existing VS Code extensions, themes, and keybindings.
Installation on macOS

Open the .dmg file you downloaded and drag the Cursor icon into your Applications folder. This is the standard installation procedure for macOS. If you see a security warning when launching Cursor for the first time, you can resolve it by navigating to System Settings > Privacy & Security or by running the following command in your terminal:
xattr -cr /Applications/Cursor.app
Make sure you're using the version that matches your Mac's processor. If you have an M1, M2, or M3 chip, download the ARM64 version. For older Intel-based Macs, use the x64 version. The Universal build works on both but comes with a larger file size.
Installation on Linux
Linux installation methods depend on your distribution. To use the .AppImage file, go to your downloads folder, make the file executable with chmod +x cursor-*.AppImage, and then run it using ./cursor-*.AppImage.
For Ubuntu and Debian users, you'll need to install the FUSE library first. Run:
sudo apt install libfuse2
. Alternatively, you can use the .deb or .rpm package for a more straightforward installation.
Once Cursor is installed, open the Command Palette by pressing Ctrl+Shift+P (Windows/Linux) or Cmd+Shift+P (macOS). Select the option to "Install 'cursor' command in PATH." This enables you to open projects directly from the terminal by typing:
cursor .
.
Setting Up Cursor for the First Time
When you first open Cursor, you'll be greeted by a welcome screen asking you to sign up or log in. This step is essential to access the AI features. You can create an account using your email and password, Google, or GitHub. If you plan to use team features, the GitHub option is a great choice.
Creating or Signing Into an Account
As a new user, you'll get a 14-day Pro trial that includes 250 fast premium uses (covering GPT-4, GPT-4o, and Claude 3.5 Sonnet). The best part? No payment details are required upfront. Once the trial ends, your account will automatically move to the free Hobby plan. This plan offers 50 slow premium uses and 2,000 autocompletions each month. If you need more, you can upgrade to the Pro plan for $20/month, which includes 500 fast requests and unlimited slow requests and autocompletions.
After signing in, you can monitor your AI usage by navigating to Cursor Settings > General > Account. If privacy is a concern, enable Privacy Mode under Settings > General > Privacy to ensure your code isn’t used for training purposes.
Customizing the Interface
Once your account is set up, you can tweak Cursor to better fit your needs. For a seamless transition, import your existing extensions, themes, settings, and keybindings from VS Code. Just head to Cursor Settings > General > Account and click "Import from VS Code."
Want to change the look and feel? Go to Settings > Themes to pick from light, dark, or custom color schemes. If you need better code readability, adjust the font size and type under Settings > Editor. By default, Cursor’s activity bar is horizontal to make room for the AI chat panel. If you prefer the vertical layout, you can switch it back in the VS Code settings.
Installing Extensions
After setting up your interface, you can boost Cursor’s functionality with extensions. Cursor supports most VS Code extensions through the Open VSX registry. To explore and install extensions, press Ctrl+Shift+X (Windows/Linux) or Cmd+Shift+X (macOS) to open the Extensions panel. Look for extensions marked as "Verified" for reliability.
You can also install extensions directly using URLs formatted like this: cursor:extension/publisher.extensionname. To manage your installed extensions, simply right-click on any extension in the sidebar to disable or uninstall it. For extension-specific settings, press Ctrl+, (Windows/Linux) or Cmd+, (macOS) and search for the extension name.
With your account set up and interface customized, you're ready to dive in and start your first project!
Understanding the Cursor Interface
Once your setup is ready, getting familiar with Cursor's interface will help you work more efficiently. While many features will look familiar, Cursor's AI-powered tools add an extra layer to streamline your coding experience.
Key Interface Elements
On the left sidebar, you'll find the File Explorer. It integrates with the AI chat panel, making it easier to navigate your project. At the center of your screen is the Editor Window, where you'll write and edit code. It supports syntax highlighting for over 40 programming languages and allows you to work with multiple cursors simultaneously.
What really sets Cursor apart is the AI Chat Panel, located on the right sidebar. You can open it by pressing Ctrl+L (Windows/Linux) or Cmd+L (macOS). This panel lets you ask coding questions, get explanations, or run queries across your entire codebase.
The Activity Bar is positioned horizontally at the top by default, providing extra space for the AI chat. Prefer the traditional vertical layout? Adjust the workbench.activityBar.orientation setting to vertical and restart Cursor to apply the change.
The Command Palette acts as your control hub. From here, you can access all of Cursor's commands and settings using the shortcuts listed below.
| Feature | Shortcut (Mac) | Shortcut (Windows/Linux) | Function |
|---|---|---|---|
| AI Chat | Cmd + L |
Ctrl + L |
Open the general AI chat panel |
| Inline Edit | Cmd + K |
Ctrl + K |
Refactor or generate code directly in place |
| Composer/Agent | Cmd + I |
Ctrl + I |
Perform project-wide tasks or create files |
| Command Palette | Cmd + Shift + P |
Ctrl + Shift + P |
Access all editor commands |
| Quick Open | Cmd + P |
Ctrl + P |
Quickly search and open files |
These tools create a seamless environment for managing and developing your projects.
Creating and Opening Projects
Starting a new project is simple. Open the Command Palette and type "Create New Project", or use the file menu to open an existing folder. If you prefer working in the terminal, navigate to your project folder and type cursor . to launch it directly.
Once your project is open, use the Quick Open shortcut from the table above to quickly find and jump between files. The integrated terminal is located at the bottom of your workspace and can be accessed using Ctrl+** (Windows/Linux) or **Cmd+ (macOS).
Using AI Features
Cursor's AI tools go far beyond basic autocomplete. The Cursor Tab model suggests multi-line code blocks and even predicts where you might want to make edits. In March 2024, an update to this model resulted in 21% fewer suggestions but a 28% higher acceptance rate.
For targeted edits, highlight code and press Cmd+K (or Ctrl+K) to use Inline Edit. Describe your desired changes in plain English, and Cursor will refactor or generate code directly in the editor. For bigger tasks - like creating test files or editing multiple files - use Composer/Agent with the shortcut provided in the table.
When interacting with the AI, you can use the "@" symbol to focus its attention. For example, type @file, @codebase, or @folder to give the AI specific context and avoid generic responses.
As shadcn, creator of shadcn/ui, shared: "The most useful AI tool that I currently pay for, hands down, is Cursor. It's fast, autocompletes when and where you need it to, handles brackets properly, sensible keyboard shortcuts... everything is well put together."
Next, we'll explore how these AI features enhance your project workflow and coding process.
sbb-itb-bfaad5b
Starting Your First Project with Cursor
Get hands-on with Cursor by building your first project and discovering how its AI features can streamline your workflow.
Setting Up a Project Folder
Start by creating a folder on your desktop or any preferred location in your local file system. Give it a descriptive name like "memory-game" or "first-cursor-project." Open Cursor and access the Command Palette by pressing Cmd+Shift+P on macOS or Ctrl+Shift+P on Windows/Linux. Type "Open Folder" and select the directory you just created.
To improve AI accuracy, consider adding a requirements folder inside your project. In this folder, create a file called frontend_instructions.md and include an overview of your project along with details about the tech stack. You can also use the /Generate Cursor Rules command in the chat to define specific guidelines for your project's architecture and conventions.
Once your setup is ready, you can start using Cursor’s AI tools to generate and refine your code.
Using AI to Generate Code
Open the AI Chat panel with Cmd+L (macOS) or Ctrl+L (Windows/Linux) and describe your project. Include details like frameworks, libraries, or specific features. For example, you could say:
"Create a 4x4 memory game using animal emojis with a 3D flip animation."
The AI will generate an initial structure for your HTML, CSS, and JavaScript files based on your description.
For more precise code generation, place your cursor where you need new code and press Cmd+K (macOS) or Ctrl+K (Windows/Linux) to use the Inline Edit feature. You can type requests like, "Generate a basic HTML structure for a calculator," and Cursor will suggest multi-line completions to speed up your work.
To provide the AI with additional context, use the @ symbol. For example:
@fileto reference a specific file@folderfor a directory@Codebaseto focus on the entire project structure
These commands help the AI stay aligned with your project needs, ensuring accurate and relevant suggestions.
Once the AI generates your code, you can test and refine it to match your requirements.
Testing and Improving Your Code
Testing is a crucial step. Run the generated code as soon as it’s written. For example, if the AI creates a function, test it with sample inputs right away to confirm it behaves as expected. Use the integrated terminal by pressing Ctrl+** (Windows/Linux) or **Cmd+ (macOS) to execute your code and check its functionality.
If you encounter errors, paste the error message into the Chat panel and ask for help, like: "How do I fix this?" For more advanced tweaks, highlight a code block and press Cmd+K (macOS) or Ctrl+K (Windows/Linux). You can request changes such as improving animations, refining logic, or adding documentation with JSDoc.
For tasks spanning multiple files, the Agent/Composer feature can be a game-changer. Access it with Cmd+I (macOS) or Ctrl+I (Windows/Linux). You can ask the AI to handle tasks like creating test cases and running them. For example:
"Write unit tests for this function and execute them."
The AI can even review your code - simply ask, "Can you spot any issues?" or "Refactor this for better performance."
As the Codecademy Team describes it: "Cursor is an intelligent code editor built as a fork of Visual Studio Code, designed to transform the coding experience through advanced AI capabilities."
Keep in mind that Cursor’s AI has a context limit of approximately 20,000 tokens. To get the best results, focus on sharing relevant code snippets instead of your entire project. For more complex challenges, enable "MAX Mode" through the Command Palette to unlock enhanced reasoning capabilities.
Keyboard Shortcuts and Productivity Tips
Keyboard shortcuts are a game-changer when it comes to speeding up your workflow. Two of the most important ones to know are Cmd+K (macOS) or Ctrl+K (Windows/Linux), which opens the inline AI tool for code generation or editing, and Cmd+L (macOS) or Ctrl+L (Windows/Linux), which toggles the AI chat panel.
Common Shortcuts
Here's a quick reference table for commonly used shortcuts:
| Shortcut (macOS) | Shortcut (Windows/Linux) | Action |
|---|---|---|
| Cmd+K | Ctrl+K | Open Inline AI for code generation or editing |
| Cmd+L | Ctrl+L | Toggle AI Chat panel |
| Cmd+I | Ctrl+I | Open Composer for multi-file tasks |
| Cmd+Shift+L | Ctrl+Shift+L | Add selected code to Chat context |
| Alt+Enter | Alt+Enter | Ask a quick question without generating code |
| Cmd+/ | Ctrl+/ | Switch between AI models |
For multi-file edits, use Cmd+I (macOS) or Ctrl+I (Windows/Linux) to open the Composer. Want quick access to any feature? Cmd+Shift+P (macOS) or Ctrl+Shift+P (Windows/Linux) opens the Command Palette. When working with AI suggestions, press Tab to accept the entire suggestion, or use Cmd+Arrow Right (macOS) or Ctrl+Arrow Right (Windows/Linux) to accept only the next segment. This lets you fine-tune what you keep.
Now, let’s dive into how context commands can make your AI experience even more effective.
Getting the Most from AI Assistance
Shortcuts are just the beginning. To get the best results, make sure the AI has the right context. Use the @ symbol to reference specific files, folders, or documentation. For example, typing @file followed by a filename ensures the AI focuses on that specific code when generating suggestions. You can also quickly add selected code to your chat context with Cmd+Shift+L (macOS) or Ctrl+Shift+L (Windows/Linux).
Need a quick answer without diving into code? Use Alt+Enter in the Cmd+K prompt bar. For more control, switch between AI models like Claude 3.5 Sonnet or GPT-4o by pressing Cmd+/ (macOS) or Ctrl+/ (Windows/Linux). Tackling a particularly tricky problem? Enable MAX Mode through the Command Palette to give the AI an extra boost in reasoning power, perfect for complex architectural challenges.
YOLO Mode for Advanced Users
If you're an experienced developer looking to take automation to the next level, YOLO mode might be for you. This feature allows the AI to execute terminal commands and modify files automatically, all while maintaining built-in protections to prevent accidental deletions. YOLO mode is ideal for tasks like running test suites or making multiple file changes in one go. You can enable it through Cursor Settings, but it’s best reserved for those who are comfortable with the risks of automated file modifications. It’s a serious time-saver for advanced workflows!
Staying Updated with daily.dev

Getting comfortable with Cursor is just the beginning. The world of AI coding moves fast, and staying in the loop is crucial for sharpening your skills and mastering the tools at your disposal.
Why Developers Should Use daily.dev
daily.dev brings together news, tutorials, and resources into one easy-to-navigate, personalized feed. Its smart recommendation engine tailors the content to your interests, whether you're into AI tools, web frameworks, or DevOps.
With daily.dev, you can uncover new libraries, tools, and techniques that you can put to use right away. Whether it's the release of a cutting-edge AI model or a fresh approach to development, this platform ensures you’re always in the know. Staying informed not only keeps you ahead of the curve but also helps you make better decisions about the technologies you adopt, streamlining your coding process.
Combining daily.dev with Cursor
Cursor supports VS Code extensions, and by adding the daily.dev extension, you can access your personalized feed directly within the editor. This means you can catch up on the latest industry updates during compile times or short breaks without disrupting your workflow.
Found a helpful coding pattern or library on daily.dev? Try it out instantly using Cursor's AI-powered environment. Feed relevant articles or documentation into Cursor’s Ask Mode or Agent Mode by tagging them with the @ symbol, and let the AI incorporate the latest trends and standards into your code. This seamless integration of learning and experimentation speeds up your growth and keeps your skills sharp.
Conclusion
This guide walked you through installing Cursor and using its powerful AI features like Tab, Cmd/Ctrl + K, and Chat/Agent. To truly make the most of Cursor, consistent practice and smart use of @-mentions for context management are essential. Dive into features like Agent To-dos and MAX Mode to tackle even the most intricate tasks with ease.
"Cursor is more than just a tool - it's a new way to code, blending human creativity with AI efficiency to unlock possibilities that were once limited to expert developers." - Apidog
As you incorporate Cursor into your workflow, it’s worth noting how quickly the AI landscape is advancing. Tools like Claude 3.5 Sonnet, GPT-4o, and protocols such as the Model Context Protocol (MCP) are redefining how development is approached. Stay ahead by using resources like daily.dev, which offers the latest updates, libraries, and techniques to refine your Cursor experience. By combining mastery of Cursor with ongoing learning, you can align efficient coding with the ever-evolving world of technology - keeping your skills sharp and relevant.
FAQs
What are the requirements to install Cursor?
To get Cursor up and running, make sure your system meets these basic requirements:
- Operating System: Compatible with Windows 10/11 (64-bit), macOS 10.15 or newer, or a popular Linux distribution like Ubuntu 20.04.
- Hardware: A minimum of 4 GB of RAM and 2 GB of available disk space. For a smoother experience, having a dedicated graphics card is a plus.
- Internet: A stable connection is essential for AI features, with at least 10 Mbps recommended for best results.
Double-check your system setup before downloading Cursor to ensure everything runs smoothly!
How do I transfer my VS Code extensions to Cursor?
Migrating your VS Code extensions to Cursor is straightforward, and you can choose between two methods: automatic import or manual transfer.
For automatic import, start by opening Cursor. Head to Settings by clicking the gear icon or pressing Ctrl/⌘ + Shift + J. Navigate to General > Account, then select Import from VS Code. Make sure the Extensions option is checked, and confirm the action. Once done, restart Cursor, and your extensions will show up in the Extensions panel (Ctrl/⌘ + Shift + X).
If you prefer a manual transfer, you’ll need to locate your VS Code user folder first:
- Windows:
%APPDATA%\Code\User\ - macOS:
~/Library/Application Support/Code/User/ - Linux:
~/.config/Code/User/
Copy everything from this folder and paste it into your Cursor user folder:
- Windows:
%APPDATA%\Cursor\User\ - macOS:
~/Library/Application Support/Cursor/User/ - Linux:
~/.config/Cursor/User/
After copying, restart Cursor and check the Extensions panel to see if your extensions are listed. If any extensions didn’t carry over, you can reinstall them manually. This way, you can keep using your favorite tools seamlessly in Cursor.
What AI features does Cursor provide to boost coding productivity?
Cursor brings a suite of AI-driven tools aimed at making coding quicker and more efficient. The AI chat pane lets you use natural-language prompts to instantly generate code snippets, get explanations, or troubleshoot issues. On top of that, Cursor offers real-time autocomplete, which uses advanced AI to suggest code as you type, cutting down on keystrokes and saving time.
With AI Agents, you can tackle tasks like generating boilerplate code, refactoring files, planning features, or even building data models. These agents can run simultaneously, allowing you to customize commands and set project-wide rules tailored to your workflow. For projects that rely heavily on APIs, Cursor integrates seamlessly with OpenAPI specs. This means the AI can recommend endpoints, parameters, and authentication details while you work.
Other standout features include in-line editing, where you can highlight sections of code and ask the AI to rewrite or optimize them, context-aware suggestions that adapt to your specific project, and image-to-code conversion. Whether you're a coding beginner or a seasoned developer, these tools are designed to help you write, debug, and refine your code with greater ease.


